Stop Calling People Food Snobs (I’m Sick of It)

Guys really,

It’s time. I think we’ve all had enough of it.

afe062f7ddd84ab72e1bd976ac3d4431

What is a food snob? A food snob is a colloquial term for someone who deviates from eating whatever is perceived, by the accuser, as being “normal” food and eats something perceived, by the accuser, as being “different.” For purposes of distinction, we should make note of the fact that a food snob does not necessarily compel anyone else to participate in their particular program – the food they eat may well affect only themselves.

A food snob could be a vegan, a vegetarian, a Paleo advocate, or someone on Whole30. It could be someone who shops at Whole Foods or in the produce section at Walmart or goes to the farmer’s market. It could be someone who doesn’t eat kale salad because they don’t like how it tastes. It could be someone who declines a certain brand or variety of food in favor of another, or – and this seems to be the culmination of cultural blasphemy – brings their own food to an event in order to maintain a certain variety or level of nutritional intake. The term food snob can also apply to persons with allergies, sensitivities, auto-immune diseases, genetic markers and random personal likes or dislikes of foods that are out of their control.

Most often, food snob is the term used for anybody who deviates from the modern, standard American diet, especially someone who chooses to forego many processed foods.

g1426881840475400074

Shame on you for eating something else … Calling someone a food snob is to participate in a rampant shame culture that, among other things, determines that anyone who does anything different than the individual(s) defining the norm is bad and must be forced, through humiliation, exclusion, belittling and rejection, both subtle and blatant, both public and private, to conform to a perceived norm.

I can see you. The astonishing thing about a shame culture, however, is that it opens a page into the private heart of the accuser, to those who know how to read it. In her book Daring Greatly, social researcher Brene Brown tells us, “What’s ironic … is that research tells us that we judge people in areas where we’re vulnerable to shame … If I feel good about my body, I don’t go around making fun of other people’s weight or appearance. We’re hard on each other because we’re using each other as a launching pad out of our own perceived shaming deficiency. It’s hurtful and ineffective…” (1) The more someone belittles another for their food choices, odds are the more guilty and ashamed that person feels about their own food decisions. A person who feels confident, comfortable and secure in their choices has no need to make another feel small for their choices.

Don’t feel self-righteous just yet. This is a knife that can cut both ways – someone who is adhering to a specific food plan can pick relentlessly at those around her or him, becoming an annoying and aggravating source of unwanted information. So to the person accused of being a food snob – don’t be a snob. Snobs are annoying. There is a way to be snobbish and rude and annoying about your food choices, and there is a way to be loving, and kind, and open-hearted and generous about your food choices. You have a story of healing to tell, and that’s why you’re here, making the choices you do! Share your story with authenticity. Don’t play the martyr, or the saint, or the food snob.

What do we do when someone calls us a food snob? Ouch. It is far more appropriate to show love and listen. The person accusing you the loudest of being a food snob is very likely the person hurting the most. Listen to their hurt, and employ shame-resilience strategies for yourself in the face of their criticism:

Acknowledge to yourself the wound of their insult, and respect the hurt it can bring and know that you are not alone in your pain. Feel gratitude that you are able the make the choices you do despite harsh comments opposing you. Stay engaged in the culture that gives you support.

Haters-Gonna-Hate

Then move on from the experience and understand that no matter what you do, somebody out there will disapprove, because somebody out there is uncomfortable with their own choices! Unless they are going to be living in your body, they don’t get a vote. Provide the wonder and awe that inspires you to eat the way you do, and let the shamers continue on their path.

Thanks for listening. I love you guys.

Read more:

1 Daring Greatly: How the Courage to Be Vulnerable Transforms the Way We Live, Love, Parent, and Lead. Brene Brown. Page 99. Penguin Random House, New York. 2012

Turkey Leftovers: Moo Shoo Wraps, Burritos and Delicious

Dear Thanksgivingers,

I actually buy extra turkey in advance, just so I can have more “leftovers” to make this. I was filling deviled eggs and whipping meringue for Thanksgiving dinner, and the wraps I would need for both of these recipes were already sitting on the pantry shelf, waiting for Their Day.

thanksgiving

Thanksgiving is as good a time as any to post heartwarming Norman Rockwell paintings.


Oh, these are good, very, very good. They drip juice, they crunch, they fill you up, and everybody wants more! For the Moo Shoo wraps, you can use cabbage or bok choy, whichever you have – both are available on our farm during this season, so I toss in a miscellaneous mixture of the two.

A big wok is best for making this, but you can also make it in a regular pan if you wish! If you are a vegetarian and you use something other than the usual turkey as your main, I’d be curious to know if you can throw a meatless twist on this! If you do, hook us up with a recipe link in the comments (I’m looking at you, Mysterious Mrs. S!).

Turkey Chase

This turkey is giving ’em a run for their money!


I originally shared this recipe back in 2011 on the old blogstead; I’d already been making it for several years by this time, and we still love it today. Love it so much, in fact, that it gets gobbled up (like that pun?) before I ever get any pictures – I’ll snap some this round, and add them to the post for you photophiles. And for your photo files.

Photo Credit: The Kitchn

Photo Credit: The Kitchn


Note: This is the oil we use and which I recommend to anyone looking for coconut oil – ethically sourced, traditionally prepared, and organic, the expeller-pressed oil has no coconut flavor or aroma and I use it for everything from frying chicken to scrambling eggs to pouring into my smoothies!


Moo Shoo Turkey Wraps

Download the Moo Shoo Turkey Wrap & Turkey Burrito Recipes

Obviously, there is lots of wiggle room in this recipe.  Add some toasted sesame seeds if you like; I love to serve these with homemade (or storebought) sweet plum sauce!  To really go with the Asian theme or to avoid extra gluten you could use rice wraps, like spring roll wrappers, instead of tortillas.  If you like, you could use a bagged shredded coleslaw mix instead of a cabbage.  

1 tablespoon olive oil, coconut oil or rice brain oil
1 additional teaspoon olive oil, or any of the above options
10 – 16 ounces sliced mushrooms
4 green onions, sliced
1 small knob peeled, grated ginger
1/4 teaspoon crushed red pepper flakes
3 cloves garlic, crushed
16 – 20 ounces shredded fresh cabbage or bok choy (one small cabbage, or less than half large cabbage)
1/3 cup water
2 cups shredded leftover cooked turkey (you could use chicken or pork, if you preferred)
3 tablespoons soy sauce
3 tablespoons (plus extra for serving) hoisin sauce (sometimes I use home-canned plum sauce instead)
8 tortillas, warmed

In a skillet or wok, heat one tablespoon oil on medium-high until hot.  Add mushrooms and saute 6 minutes, or until tender and lightly browned.  Remove to a plate.
In the skillet, heat one teaspoon olive oil on medium-high.  Stir in green onions (reserve a small portion if you want to sprinkle some fresh on the wraps), ginger, crushed red pepper, and garlic.  Add shredded cabbage and cook 2 minutes or until cabbage begins to soften, stirring constantly.  Add water and cook 1 to 2 minutes or until water evaporates.  Cabbage should be tender-crisp, not mushy; stir frequently.  Stir in turkey, soy sauce, 3 tablespoons hoisin sauce, and cooked mushrooms; cook an additional 3 minutes or until turkey is hot, stirring constantly.
Spread tortillas with hoisin sauce; top with turkey filling, extra green onions if you like, roll up and enjoy!  These are very juicy.  These are very delicious. These are amazing.

13214015

They aren’t always so agreeable to peeling potatoes, but sometimes you can trick ’em into it


Is it okay if I post two turkey recipes? Because this one is so insanely, crazy good that I can’t leave it out. I know you’ll go nuts for this one, too, because my entire family did! 

Turkey and Bean Burrito 

Download the Moo Shoo Turkey Wrap & Turkey Burrito Recipes

If you so desire, drizzle into your burritos a little Louisiana Hot Sauce, some homemade spicy ketchup, or some enchilada sauce! We crazy love this recipe, and you can sneak a little gravy in there if you like, too …   See the original post from 2011 here.

1 tablespoon olive oil or any of the above options
1 yellow onion, sliced thinly
2 cloves garlic, crushed
1 tablespoon ground cumin
1 teaspoon chile powder
1 pint diced tomatoes or you can purchase a can of tomatoes with diced chiles in it, such as Rotel tomatoes, and ignore the next ingredient
1 – 2 tablespoons chopped chiles or pickled jalapenos
2 tablespoons lime juice or the juice from one small lime
4 cups shredded cooked turkey (or chicken, or pork, or julienned tofu!)
1 pint pinto beans, fresh-cooked or canned, rinsed
6 tortillas, warmed
8 ounces shredded Monterey, pepper Jack, or cheddar cheese
2 cups shredded green cabbage or bok choy (one small cabbage, or less than half large cabbage)

Heat oil in a large skillet over medium heat.  Add onion and saute, stirring, until softened, about 2 minutes.  Stir in garlic, cumin and chile powder and cook for 30 seconds or until the spices release a fragrant scent.  Add tomatoes and lime juice; bring to a boil.  Reduce heat to a simmer and cook until onions are very tender, about 20 minutes.  Stir in turkey and cooked beans and continue cooking until the mixture is heated through, approximately five minutes.  Fill tortillas with the turkey and bean mixture; top with cheese and shredded cabbage, roll, and enjoy!

What do you do with your leftover turkey? Please tell me – I love turkey, I love it all manner of delicious ways!!


Norman-Rockwell-Thanksgiving-Turkey

She loves turkey, too.

Don’t forget to Download the Moo Shoo Turkey Wrap & Turkey Burrito Recipes for your recipe files!

Gobbling,

Mrs H
Our turkeys are on Facebook
Instagram is clearly for the birds!


Sauerkraut: The Great Pickled Vegetable

Riddle me this: What food is gluten-free, vegan, Paleo, GAPS, vegetarian and kid-approved? Read on … 

Dear scientist chefs,

A kraut by any other name would be as sauer! Kimchi, kraut, cortido, sour cabbage, tsukemono, atsara and pickles are just a few of the names you’ll find around the world for the sour, lactic-acid-fermented vegetables that virtually every culture knows and loves. Every combination under the sun – with spices, onions, peppers, mixed vegetables, herbs, wild weeds, boiled eggs (what?!), fruits, chips of bark and probably the occasional unfortunate cricket – can be found as you travel from home to home, country to country. Eastern Europeans favor dried fruit, caraway seeds. Warmer climates tend towards spicier, peppery blends. Studying the trends in different regions, you can find the logic in it; dried fruit is available in Eastern European climates, where it grows fresh throughout the year. Spiced-up krauts are less inclined to mold, and in hot climates ferments lean towards mold very quickly. Isn’t it funny how natural food culture, separated from the supermarket mentality, really suits the region?
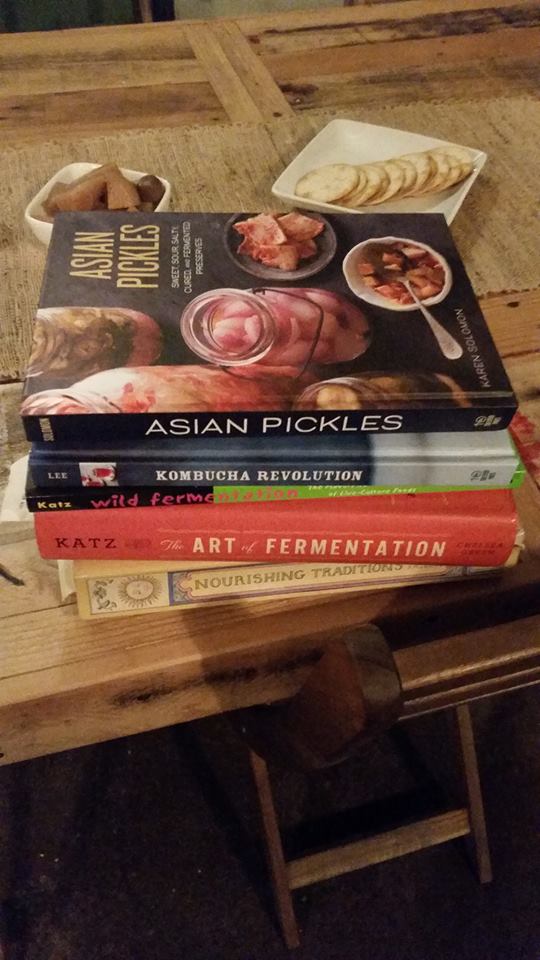
A few of my favorite fermenting books

A few of my favorite fermenting books

In Seattle, Washington, Britt's Pickles can be found in various farmers markets. They ferment their pickles in huge, steam-cleaned oak barrels from local wineries. Their Pickleator and other fermenting tools are available online.

In Seattle, Washington, Britt’s Pickles can be found in various farmers markets. They ferment their pickles in huge, steam-cleaned oak barrels from local wineries. Their Pickleator and other fermenting tools are available online.

Out here on the farm, we make our kraut by pretty much dumping in everything we have on hand at the moment! We held another rollicking kraut and kimchi food lab, where the class chopped up four monstrous boxes of cabbage, as well as black Russian kale and a case of fresh-picked bok choy. We threw the chopped cabbage into tubs and salted it in layers, and pounded it with a wooden rolling pin by turns until the juices leaked and the cabbage was thoroughly bruised on every side.

All the pounded, salted greens went into a huge, ten-gallon crock, and then the students set to work chopping up their unique flavor choices. Everybody was making their own delicious jar of kraut, or kimchi, or whatever you want to call it – by this stage, no true name really applied because we weren’t following any rules! White turnips, black radishes, peeled and shredded gingerroot, red and green apples, yellow onions, habanero and Carmen peppers, lacinato kale, celery, rainbow carrots, red radishes, daikon radishes and garlic were all chopped by students and their selections were mixed by handfuls in their individual kraut bowls. Then, everybody shoveled scoops of the bruised, dripping kraut into their bowls and hand-mixed it with the vegetables they had chosen, before pressing it into quart jars, labeling and capping them.
10463924_10152688883730921_8142857362626408840_n

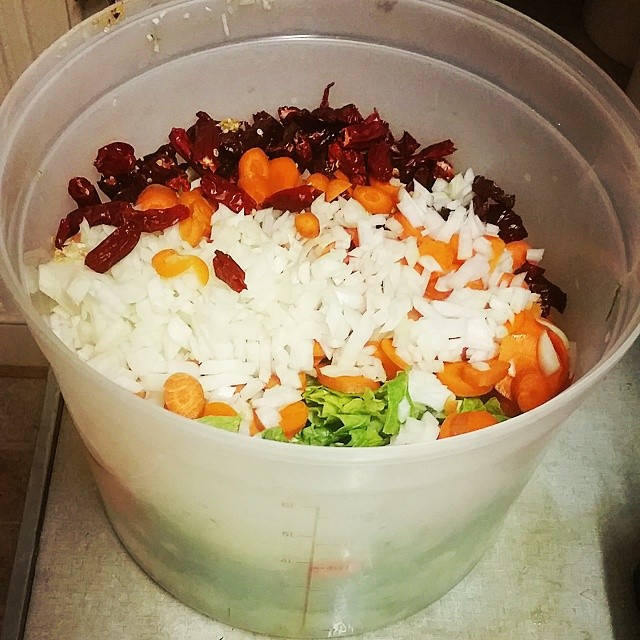
A small batch of kimchi I prepared back in June; we enjoyed eating it on fresh bread, with slabs of cold butter, during class.

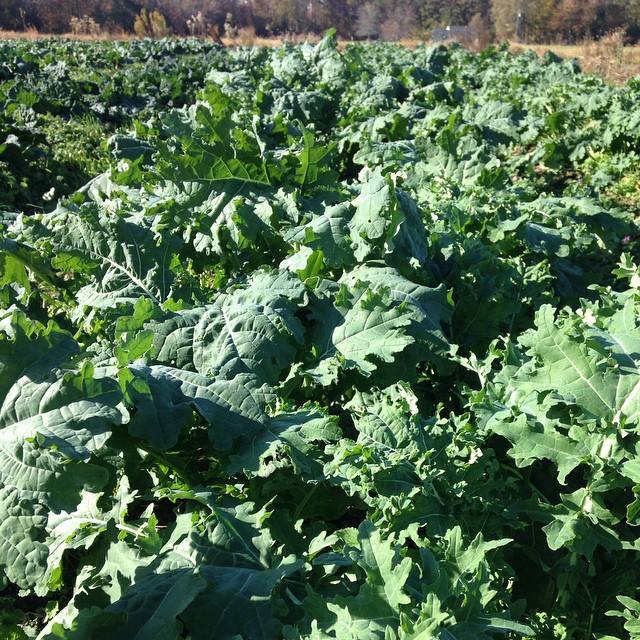
And the kale grows, and grows, and grows ... this is White Russian Kale. Photo credit Kevin Jamison

And the kale grows, and grows, and grows … this is White Russian Kale. Photo credit Kevin Jamison

These stuffed quart jars will sit on the counters in their homes, hopefully in a rimmed baking sheet or something to catch the juice that will surely leak out! Every day, for a few days or even a week, they’ll release the lid, letting out some of the built-up gases escape. Those jars hiss like a bottle of homemade kombucha when you pop the top! After a few days of this, the jars can safely sit – with only the occasional lid check – until the substrate inside is fully soured to the chef’s taste. How do you know if your kraut isn’t done fermenting? It will taste like salty cabbage! How do you know if it’s fermented enough? It tastes as sour or tart as you like it to! Then, the home cook will eat it and/or move that jar to the fridge, where bacterial activity will slow to incredibly low rates. Yes, it will keep fermenting in the fridge – but very slowly! It can take months and months for marked flavor change to develop.

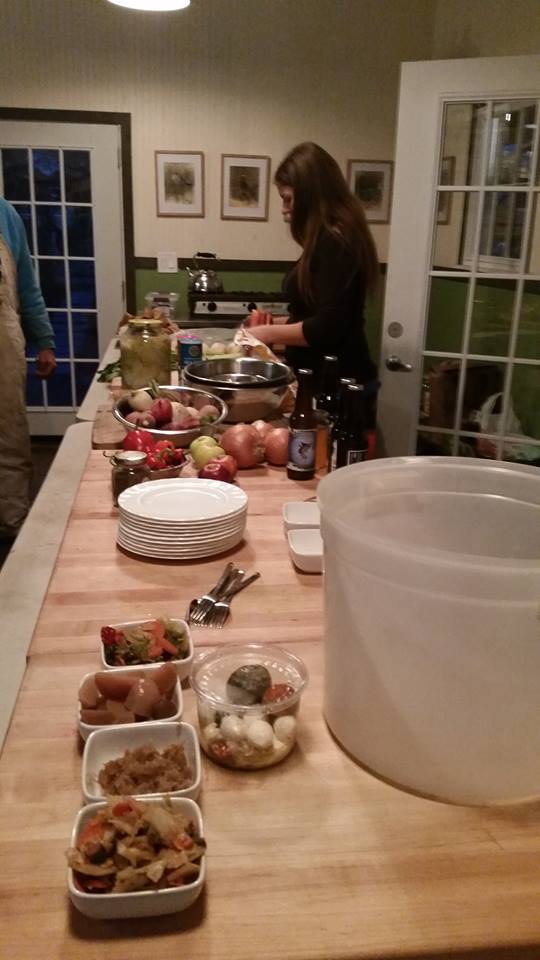
One of the students snapped a few pictures for us before things got muddy – it’s a little hard to take pictures in the building at night, but you can get a general idea of what went on!

Chef Lyndsay preps some fresh bread for snacking during class
Chef Lyndsay preps some fresh bread for snacking during class

Lots of big Boos boards for chopping - they donated six to our Food Lab, very generously!
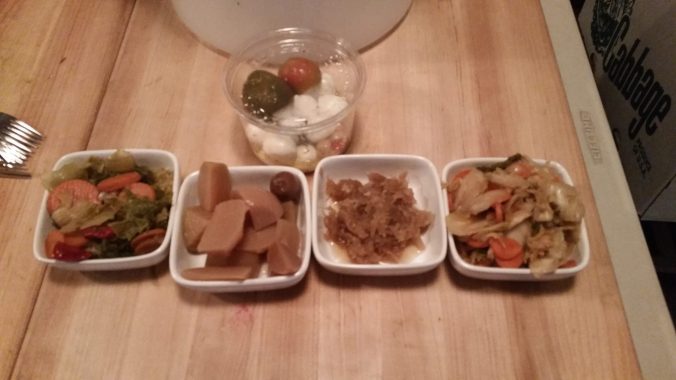
Lots of big Boos boards for chopping – they donated six to our Food Lab, very generously!

A rather blurry picture of some of our fermented vegetables, ranging between six months to two years old.
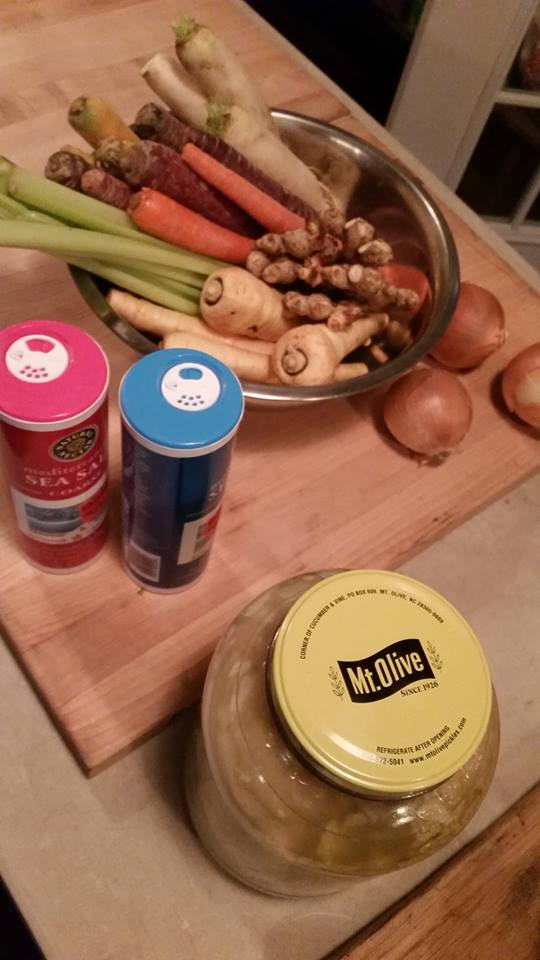
A rather blurry picture of some of our fermented vegetables, ranging between six months to two years old.

That old pickle jar is full of small heads of cabbage drowning in saltwater.

That old pickle jar is full of small heads of cabbage drowning in saltwater.

Sauerkraut FAQs from the Food Lab

Download Kraut FAQs and Recipe

1. How long does it take to ferment my kraut in the jar? 

It depends on how much salt you added. With more salt, and in colder temperatures, it will take a long time. A light hand on salt, and a warm kitchen – 70 – 85F – and the kraut can go faster, maybe becoming sour in as little as a week or two. I like to leave my krauts to ferment for a few weeks or even months, and then move them to the fridge for another few months. Some purists say the real flavor doesn’t even begin to develop until after six months!

2. How do I know if my kraut went bad? 

You’ll know – it will be slimy and moldy, it will stink to high heaven, and nobody could pay you to eat it! If some mold develops on the top of your kraut, don’t be alarmed – gently scoop it off with a spoon, and replace the missing liquid with purified, salted water if necessary (you want your vegetables to stay beneath the brine!). Some of the mold might break off and float away, but just get what you can. The vegetables deep under the brine are still safe for consumption.

3. How much salt do I use? 

I really don’t measure the salt – I sprinkle it in as I layer the chopped vegetables before pounding them, and during the summer I tend towards a heavy hand with salt. The lactic acid that the vegetables create are what inhibits the growth of pathogenic bacterias – but lactic acid takes about three days to kick in when fermenting cabbage! That’s what the salt is for – it does the work of inhibiting the pathogens until the lactic acid can do the dirty work. If you really insist on a measurement to get started, you can use about 1-1/2 tablespoons of kosher sea salt per average head of cabbage. Get used to using that amount, and pretty soon you’ll be able to vary up and down per your own preferences.

4. Why kosher salt, or sea salt, or whatever you had said up there? 

Use salt that does not contain iodine and anti-caking agents such as yellow prussiate. These tend to make the cabbage slimy and gross.

Download Kraut FAQs and Recipe
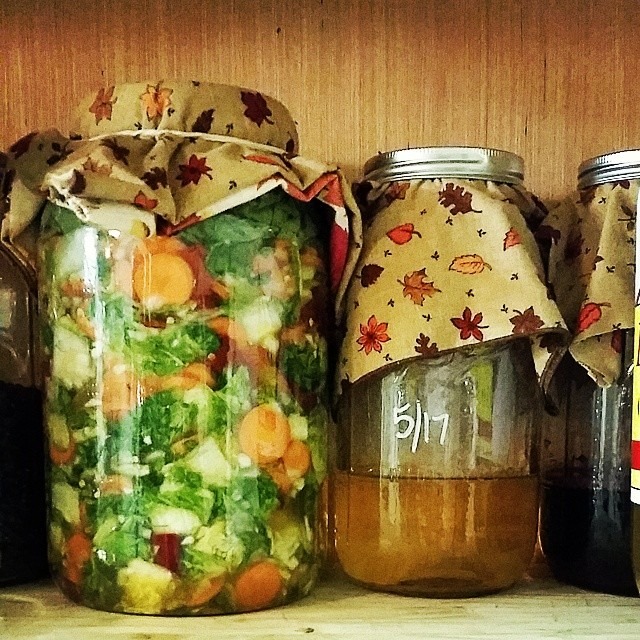
This kimchi is covered with a cloth, and a thick layer of brine and jar weights. Generally, I prefer using lids on jars.

This kimchi is covered with a cloth, and a thick layer of brine and jar weights. Generally, I prefer using lids on jars.

Simple Seasonal Sauerkraut

1 organic head of cabbage (Chinese cabbage, green cabbage, it doesn’t matter)

1 to 1-1/2 tablespoons sea salt, approximately

Optional: caraway seeds, turmeric, peeled and crushed garlic, peeled and shredded ginger, small amount of dried or shredded fruit (about ½ cup or less), other vegetables cut, shredded, julienned, diced or sliced the way you like them

1. Shred or coarsely chop cabbage; place in a metal or plastic bowl that won’t break and sprinkle with salt.

2. Firmly massage with your hands, or pound with a wooden mallet or the end of a rolling pin for about ten minutes, until the cabbage is very juicy and wet. When you start pounding, you may think “I’ll have to add water to this to get enough brine to cover it!” If you’re using nice, fresh cabbage, just keep on pounding till that ten minute mark. You may be surprised how much brine will leak out of that cabbage!

3. Mix in any other spices, herbs, vegetables or fruits that you like. I tend to keep the “other” ingredients at less than 50% of the volume, usually well below that, so my krauts are mostly cabbage.

4. Pack it all into a large jar or multiple jars, pressing the vegetables down so the brine covers them completely. Pieces that poke out or float will probably be thrown away when you open the jar to eat the kraut, so really smash it down firmly!

5. To keep everything beneath the brine, you can add small jar weights (available from Cultures for Health, Britt’s Live Culture Foods and other places), or use the stem end of the cabbage to wedge in to the top of the jar.

6. Place the jar on the counter in a rimmed baking sheet or pan to catch any juices that may leak out; you will need to pop the lid once or even twice a day for a few days. Depending on how warm your house is (70 – 80F is a happy place for fermenting!), you can taste test it as soon as three days; it may take up to a few weeks. If you don’t want it on your counter that long, you can move it to the fridge and let it slow ferment for a lo-o-o-ong time!)

Kraut will last months and even years in a cool place. My favorite ones are at least a year old. Some traditions say the true kraut flavor does not even begin to develop until after six months!

Adding caraway seeds, turmeric or even a few tablespoons of raw, cultured whey will help reduce the risk of your kraut molding.

Download Kraut FAQs and Recipe
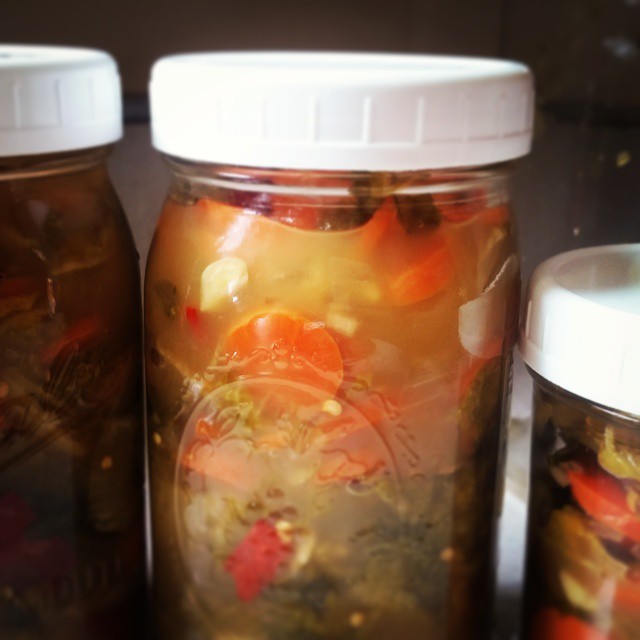
A batch of kimchi, ready to move into the fridge for cold storage and spicy snacking!

A batch of kimchi, ready to move into the fridge for cold storage and spicy snacking!

Bacterially yours,

Mrs H
My phone was stolen so I haven’t grammed you in a while!
Hunt us down on Facebook – we “like” that!

Recommended Reading

I’m always building up my fermenting library (and you will be, too, with all the book giveaways I have coming up!). These are some of my long-standing, time-tested favorites. Just reading them makes me all giggly and happy inside – and of course, the wealth of knowledge that can be gleaned by cross-examining all the books should not be underestimated!

The Art of Fermentation: An In-Depth Exploration of Essential Concepts and Processes from around the World

Wild Fermentation: The Flavor, Nutrition, and Craft of Live-Culture Foods

Asian Pickles: Sweet, Sour, Salty, Cured, and Fermented Preserves from Korea, Japan, China, India, and Beyond

Nourishing Traditions: The Cookbook that Challenges Politically Correct Nutrition and the Diet Dictocrats

Kombucha Revolution: 75 Recipes for Homemade Brews, Fixers, Elixirs, and Mixers

The Nourished Kitchen: Farm-to-Table Recipes for the Traditional Foods Lifestyle Featuring Bone Broths, Fermented Vegetables, Grass-Fed Meats, Wholesome Fats, Raw Dairy, and Kombuchas

Kombucha – From Basic Preparation to Hair Conditioning and Scoby Candies!

Need a scoby to make your homemade hair tonics and face pastes?
Click here! 

Dear soda-sippers and lovers of delicious beverages,

If I didn’t get this post written soon, I think ya’ll were gonna ride me out of town on a rail!

This is the long-awaited and dearly requested kombucha post. Yes, the recipe packet you have been asking for the most! We’ve had several kombucha Food Labs on the farm, a number of satellite classes at various off-campus locations, and we have more scheduled into January 2015.

Photos in this post were shot by Sami Roy Photography, one of the proficient and expert photographers on the farm!

NEF_Kombucha Class_003

NEF_Kombucha Class_017

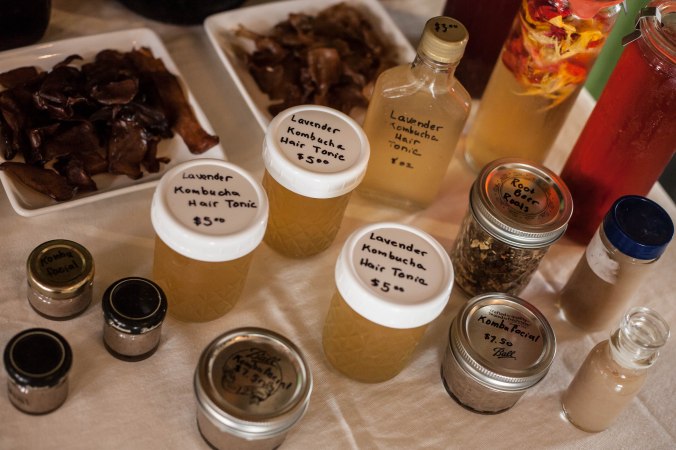
You can do more with kombucha than just drink it as a fizzy, original or variously-flavored drink.  You can also use the scoby to make chewy, gummy candies that are flavored any way you like (or crispy candies, if you prefer!). You can make fruit gelatins, jelly candies, or even move out of the kitchen and make hair tonics and face masks!  And for those who want to know if there is alcohol in kombucha, yes – about the same level as in a loaf of bread or a bottle of Coke.  So, microscopic levels. 

NEF_Kombucha Class_005

NEF_Kombucha Class_009

NEF_Kombucha Class_013

NEF_Kombucha Class_018

NEF_Kombucha Class_027

Basic Kombucha Recipe

Download the Kombucha Class Packet here

This is a very basic kombucha recipe and similar to the hundreds you’ll see replicated across the internet.  Use filtered, purified water; use organic tea and sugar. This is non-negotiable – otherwise your revitalizing, detoxifying probiotic health drink will become a toxic, poisonous potion that was a waste of time to prepare! At least a quarter of your tea leaves should be black – this brew in particular feeds the kombucha scoby, although the bacteria seem to tolerate varying amounts of other tea leaves. Experiment with a variety of leaves and see what works best for you; personally, I’ve settled on the flavor profiles of organic Assam black – mellow, vegetal – and organic China green – fruity, light, notes of citrus.

Heat three quarts filtered water to boiling on the stove; remove and set aside for five minutes.

Add 4 teaspoons black tea and 4 teaspoons green tea or white tea or a mixture of both; stir to combine, let sit for five minutes. Alternately, use 4 black tea bags and 4 green tea bags. (See end of post for my recommended teas)

Measure three quarts cold or room temperature filtered water into a large heat-proof container. Place a mesh sieve over the pan if your tea leaves were loose and not in tea bags.

Pour the hot, steeped tea in to the cold water. Remove the sieve and set aside; to the warm tea, add 2 cups of white sugar and stir thoroughly and steadily with a wooden spoon until sugar is completely dissolved.

Let the tea cool to room temperature, or at least about body temperature (96°). Pour it into a large, clean, glass container. Use only clear glass for brewing kombucha.

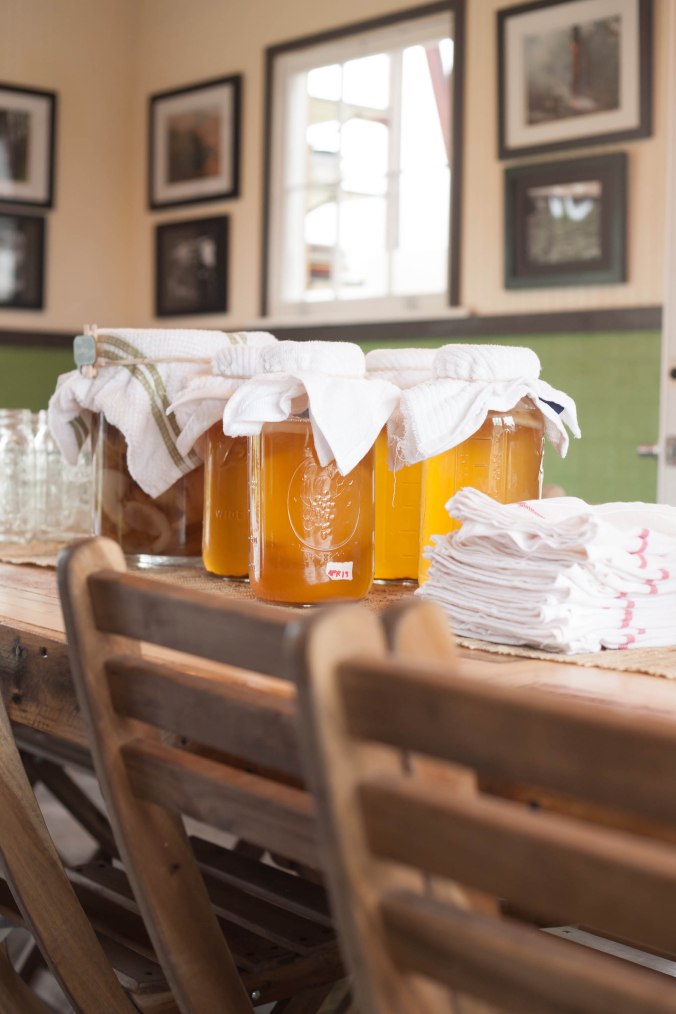
Add 2 cups of kombucha and one scoby.  Cover the lid tightly with a clean, tight-weave towel and secure with a string or rubber band. Fruit flies love kombucha and will try very hard to get inside the container, so be aware!

Set in a cool, undisturbed area (about 70-85° is perfect for these bacteria to multiply) for about two weeks.  You can taste test your fermenting tea at intervals and find your favorite number of days for fermentation. Ambient temperature and other factors may impact the fermentation of your tea, and every various way you try it will be delicious and wonderful!

Download the Kombucha Class Packet
This includes: 
Basic Kombucha
Flavored Kombucha: Seven Food Lab Favorites
Kombucha Fruit Gummies
Probiotic Skin Healing Masque
Hair Conditioning Treatment (Hair Tonic)
Scoby Candy
Kombucha Gelatin

NEF_Kombucha Class_043

NEF_Kombucha Class_047

NEF_Kombucha Class_082

A moment to brag on the delicious Frontier Teas that I recommend for this kombucha…

I’ve done some extensive taste-testing, and I am very particular about my kombucha teas. The final teas I have settled on produce a kombucha so light, so airy and fruity, so delightfully flavored, that it has won best-taste from even the snobbiest of my clientele – and the most devoted kombucha haters!

Fair-Trade Certified, Organic Frontier China Green Tea (light, fruity, vegetal)

Fair-Trader Certified, Organic Assam Tea Tippy Golden (Black) (delicate, mellow, earthy)

For sugar, I use either

Itaja Organic Fine Granulated Sugar

or,

Wholesome Sweeteners Organic Cane Sugar

And as one of my favorite flavorings of all time:
Frontier Whole Elder European Berries

My top fermentation book recommendation, available at all my classes:

The Art of Fermentation: An In-Depth Exploration of Essential Concepts and Processes from around the World

And an explosive new book with recipes for kombucha that will blow your mind! (Book review pending here on the blog!)

Kombucha Revolution: 75 Recipes for Homemade Brews, Fixers, Elixirs, and Mixers

Brewing and sipping,
Mrs H
Face it, you like us
Gram it instantly – #eatorganic #farmandhearth

Salted Rosemary Croccantini: better than expensive gourmet brands, even

Dear crackling, cackling, crackering,

It’s that time of week again when we get to zip back in time and steal a post from the old crumbling blogstead! I originally came up with this recipe back in December 2012, when I wanted some fresh, homemade crackers. When driving from Seattle to Virginia, about seven or eight months pregnant and anxious to see my husband again after he’d been moved by the Navy, I was given a package of sort of boring-looking crackers and a bag of sliced cheese. I didn’t even think the crackers looked very good but once I started eating them, I couldn’t stop! Flakes of salt, the herby aroma of rosemary, and the crackle of crispy … I was hooked. You will be, too.

rosemary1

rosemary2

I love croccantini crackers.  Croccante is the Italian word for crispy or crunchy; –tini is a pluralized diminutive attached to the word, hence our cute little croccantini (if any Italian speakers know more on this, let me know, I have a very limited vocabulary!).

Last year, when I left for my Long Haul to Chicago, my cousin bequeathed upon me a large and full box of flat, salted, rosemary-infused-and-topped, fragrant crackers.  I wasn’t too excited at first (“Oh good, a vehicle for my cheese”) but then I ate one and … well, then I ate the rest.

They were good.  Really good.

I semi-forgot about them for a while, wishing now and again I could find them but not recalling the name of the brand.  “I need to ask her where she got them,” I resolved every time I thought of them.  I didn’t know they were a Thing, popular in Italy with cheese for a snack, and produced by more than one manufacturer, until I stumbled my eyes across them in Trader Joe’s.

Welcome to my cart, little box of crackers.

I took them home and quickly realized that in order to feasibly enjoy them in the quantity and frequency I desired, I would have to find a more fiscally responsible way to get them to my plate.  And following my rule of thumb for food – “If I can buy it, I can make it,” – I headed straight to the kitchen.

rosemary3
I wanted the crackers to be whole wheat, or at least mostly so.  If not for the fact that unbleached flour is fairly pointless as far as nutrition goes, then for the fact that whole wheat has a more robust depth of flavor, somewhat nuttier and more hearty than white.

I strapped the baby to my back and got to work.  And let me tell you, it was worth the twenty to thirty minutes of experiential toil: these crackers are far and away better than the packaged version (why are we not shocked? Why?).  They taste better, have a meatier crunch, the salt and rosemary flavoring is controlled by me (more, more, more!!!), and they look a whole darn lot better, too.

rosemary4

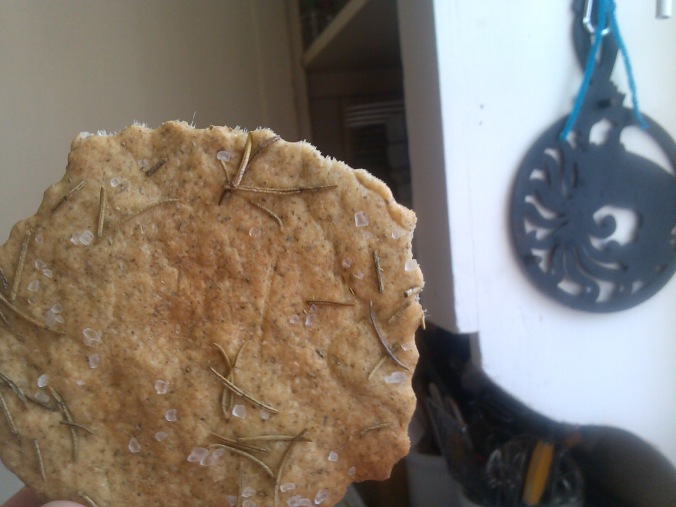
My cracker – hearty, flavorful, well-seasoned

rosemary5

The store cracker – sparsely seasoned, pasty texture when chewing, snaps like a piece of brittle glass and explodes across the room, but still so good it inspired me to make my own. Now, imagine how much deliciousness there must be in the homemade version!!

rosemary6

You can cut them into whatever size or shape you like.  Just don’t re-roll the dough – cook the odd pointy scraps leftover from any fancy cutting you do, and enjoy them in their fun shapes.

 It’s simple: Mix the dry ingredients by hand, in the Vitamix cup with dry blade, or in a food processor …

rosemary7

Add the wet ingredients.

rosemary9

Pulse into a loose ball of dough.

rosemary10

Dump said ball of dough onto a barely dusted work surface.

rosemary11

Mold gently by hand into a ball of firm, soft dough.

rosemary12

Cut the dough into workable sizes.  Halved or quartered will be fine.

rosemary13

Roll the first half or quarter out thin, thin, thin.  This is a quarter of the dough, rolled out.  Brush with olive oil.

rosemary14

Sprinkle with coarse sea salt and dried rosemary; I rolled over it with the rolling pin to ensure the seasonings stuck in, or you can use your hand.

rosemary15

Cut into the desired shape: use a pizza cutter, decorate with a dough roller docker if you wish, use cookie cutters, biscuit cutters, a knife, a glass, a bowl … or bake whole, and break afterwards.

rosemary16

Just ten minutes at 450 F will do it.  Check at the halfway point to make sure you aren’t burning it!  Enjoy with cheese, salami, spread, hummus, baba ghanoush, meats, pico de gallo …

rosemary18

Salted Rosemary Croccantini

Download the Salted Rosemary Croccantini recipe here

These are easy to make.  No particular skills needed, not even very much time – I made them between chores on a busy afternoon, on a whim, with a baby dangling from the carrier on my back.  Now, imagine how much easier it must be without the baby! I weighed my flour, as you will see following, because I wanted to have precise measurements.  Scooping, fluffing, or scraping flour out of the container is just not accurate enough, although it can get you a good approximation.  

1 cup (156 g) whole wheat or white whole wheat
3/4 cup (106.5 g) bread flour (I used King Arthur white bread flour)
1 teaspoon kosher salt
1 teaspoon baking powder
1 generous tablespoon chopped rosemary (see below), more or less depending on your preference
1/2 cup filtered water
1/3 cup olive oil
Extra olive oil for brushing
Sea salt, additional dried rosemary, and other optional herbs for topping

Heat oven to 450.  Adjust rack to the middle; if you have a pizza stone, put it in the oven.  If not, put a large cookie sheet in the oven.
Using a Vitamix or food processor: Add dry ingredients and pulse to mix; pour oil and water into the well and pulse from low to hi, repeatedly, until a scrappy, loose ball of dough forms.  It should only take a few revolutions.
By hand: Using your hands, a pastry or dough cutter or two forks, blend the dough until a scrappy, loose ball of dough forms.
Both methods:  Dump the dough onto a lightly dusted work surface.  Gather and gently work it into a ball of dough.  Using a knife, cut into halves or quarters (quarters are easy to work with).
On unfloured, ungreased parchment paper, roll the dough out until it is thin, thin, as thin as you can make it.  Then, a little thinner.  Brush with olive oil; sprinkle with salt and rosemary.  If you like, add other herbs such as thyme, basil, or flavors such as granulated garlic.
Pick up the parchment paper and place it in the heated oven on your stone or cookie sheet.  Bake for ten minutes in the heated oven, checking at the halfway point and near the end to ensure it isn’t burning.
Remove when it is browning at the edges and looks dry and croccante!

Note: Do not use a Silpat/silicone baking mat.  The heat is too near the maximum temperatures for the silicone (480 is where they top out), especially if you are using a baking stone.  You will end up with a smoking kitchen and crackers that taste oddly like plastic.  How do I know?  I tried.  Thank me later!

Chopped or Powdered Rosemary

Download the Chopped or Powdered Rosemary Recipe here

I used dried rosemary from our garden for this.  The Krups Electric Spice and Coffee Grinder is my preferred weapon of choice: it lasts notoriously long (years, years, decades), is loud but not deafening, is pretty cheaply priced and best of all does the job required of it with speed and efficiency.  

Strip leaves from the woody stems.

rosemary19

Using a coffee or spice grinder, pulse rosemary 4 times for 1 second to chop coarsely.

rosemary20

rosemary21

To grind into a powder, pulse for about four or five seconds several times, until the fineness you desire is achieved.

rosemary22

Our family of rosemary, left to right: Whole, coarsely chopped, powdered.

rosemary23

Download the Salted Rosemary Croccantini recipe here

Download the Chopped or Powdered Rosemary Recipe here

Crisply crunching,

Mrs H
Instantly see more on Instagram
Face it fearlessly on Facebook

African Samosas: Interdependence in Community

Samosas can be vegan, too!  The ones pictured here include meat,
but you don’t need meat to make samosas – just don’t let any Kenyans hear me say that! 

Rafiki, friends,

The traditional African dishes streaming into my home have become such family favorites that it’s hard to imagine planning a week of menus without samosas or a masala stew or some chai. The African mothers have figured out not only the best dishes – ones you can make in advance, make in one pot, make with few ingredients, make with what’s available on the land – but also how to coordinate the community to see to everyone’s needs.

20141009_073411

Across the street from me, Agnes will race over and tell me she made a huge pot of chicken masala, just on the very day I’ve been working frenetically and never got to prepare dinner. “Jambo sana, mwanamke,” she’ll say, using the greeting of ‘woman’ she adopted tongue-in-cheek after hearing my husband address me in that manner, “I have a stew for us. I’m out of rice, can you make rice?”  The next day I’ll be stopping by. “I took a turkey out of the freezer. What should we make?” With this community support, the children are all fed, she gets to go to her college classes and I get to teach yoga classes, knowing that between the two of us, dinner for the families will be handled. When Beryl was staying with me for a few weeks before our husbands got back from deployment, nobody ever thought twice about who would make dinner or who would watch the kids – between the three of us, somebody was always home, a pot was always on the stove, and the kids were always under a watchful eye!

We thrive in the interdependence that comes from supporting and leaning on the community around us. Stark independence is a sign of pride and immaturity, somebody unable to give or receive. The tangled fibers of a family uplifting, supporting and creating is a sign of society truly becoming.

20140911_183659

These African samosas are one of the hallmarks of African cooking! Whenever a friend comes back to the States after visiting Africa, they claim this is the food they miss the most. “I dream about these at night,” a missionary friend confided once. Create the taste of the continent in your own kitchen, using the vegetables and meat that are available to you! Fillings are endless – but we all have our favorites! I love to include cilantro. Some shredded cabbage is always a win; and seasoning the meat with masala spices from Tanzania’s Zanzibar markets is one way to ensure there will be no leftovers.

This is less of a recipe, and more a set of guidelines. If you’re very attached to measurements and quantities, the time to lose that attachment is with international cooking – the recipes are land-based, meaning they use what’s available at the local markets at that time – and the quantities you’ll learn from each individual cook are often derived based on how big her family is, or how large her soup-pot is!

African Samosas with video instruction

Download the recipe PDF here

I did the folding of the wrapper painfully slow, because after watching Beryl and Agnes do it a thousand times and finding videos of them online, I still didn’t have the hang of it because everybody went too fast! 

Alternative Wrapping

Samosas are a special treat and a favorite in our house. Since they are fried, we don’t make them every day or even every week – but when I do make them, the dinner table is buzzing with interest! You can make them ahead of time and freeze without frying, then defrost them in the refrigerator before frying for dinner on a busy weeknight. They are wonderful served with hot, homemade sauce or pili pili, and a mound of fluffy rice or pilau. Put alongside stews, soups and simple pot dinners, and throw them in the toaster oven to reheat the next day!  

Samosa wrappers
Samosa filling
Oil for frying

Wrappers: There are many different brands and varieties. You can even make your own!  They are generally found in the freezer section of international or Indian-Asian stores. If you use the large squares, you can fold them in half as I did in the video, or cut them in half to make twice as many. The long strip varieties are very economical – one package has about fifty wrappers! They make a smaller samosa, of course, so if you use the large wrappers you will have fewer, fatter pieces.

20140912_094901

Filling: Shockingly, it’s a free country and you can fill your samosas with whatever you like. A pound of meat, plus some chopped herbs, vegetables and spices will fill about thirty middle-sized wrappers, but this all depends on the size you use, and the quality of meat you use. You can also opt for a vegetarian filling, and use all chopped vegetables, shredded cabbage, and cooked rice, or potatoes and masala. Here is the filling I like to make: heat a few tablespoons of oil, and add diced onion and garlic. Cook until fragrant, 10 – 30 seconds. Add chopped vegetables, about a cup, and toast a few more seconds. Add one pound of ground meat or about three cups of rice and vegetables and cook until brown or tender; add one bunch chopped cilantro and one cup cooked rice, and stir to combine.  It’s easiest to make samosas if you let the filling cool first, but that is not necessary if you need to finish quickly. You can even make the filling a day in advance and store in the refrigerator!

Oil: Expeller pressed coconut oil, peanut oil, or whatever you generally use, heated hot so a piece of dough shrivels and bubbles when dropped in, or about 350°F.

Filling and Frying Samosas: The Process

Prepare filling; cool if you wish. Heat a pan of oil and prepare a plate with a towel, or a cooling rack over a pan, for the finished samosas (if desired). Make a paste by whisking a little flour and water in a small bowl; set aside. Fill and fold the wrappers according to the shape you are using (you can also roll them like spring rolls). Use a little flour paste to glue the final piece of dough closed. At this point you can remove them to the freezer if you are preparing them in bulk. Place the finished or defrosted samosa in hot oil. Fry until the bottom side is browned, about thirty seconds to one minute, then flip over with tongs, being cautious about splattering oil! Let them fry until the second side is done, between thirty seconds and two minutes. Use your discerning eye to time them – it will vary based on the wrappers you use, the oil you use, how crispy you like them to be, and how hot your stove is.

Serving: Serve with pilau rice, a traditional masala rice. Serve with plain rice, stews or hot sauce. Any way you serve them, they will be enjoyed by all, including the neighbors if they hear what you’re up to. What a treat!

Download the recipe PDF here

20140911_183614

Asante,

Mrs H
Hunt us down on Instagram – but no spears, please!
Our Facebook page has a following, are you there, too?

Chopped Late-Summer Salad: eating has rarely been this good

Dear chopping and slicing summer-savers,

Hooray for Throwback Thursday! This is the day we take a field trip to visit the old blog, and steal one of the best-loved recipes from that sacred time capsule. This is one of my personal, heart-warming favorites, because I remember making it repeatedly when I was hot, tired, bored and hungry in Coronado, California! I started trying lots of variations from our CSA box at that time, and this one for some reason stuck as an outstanding, winning combination. As with all salads (like our prize-winning Overnight Cold Salad, you remember that!), you can vary, change and convert as suits your lifestyle, garden, region, favorite dietary sensitivity … So enjoy this recipe, loaded with sweet and precious memories, and let me know how much you love it, too!

DSCN4627

Dear reader with the Kleenex stuffed miserably up your nose,

I hear reports from my beloved, soggy Pacific Northwest that the traditional damp-weather sicknesses are plaguing and besetting them all.  Half my family contracted the dreaded strep throat in a wave of plague, and had to languish in quarantine separated from the other half which still had day jobs, school, and everyday interactions to be accomplished!

DSCN4650 DSCN4518

I wished I could whack up a big bowl of this refreshing, germ-sizzling salad for them … Not only is it splendidly crunchy and delicious beyond all reason, but it packs a punch to whallop those wintery diseases in the red, chapped nose.  This recipe emerged triumphantly from a smattering of miscellaneous CSA-box produce and farmer’s market leftovers that I had lying indulgently about in my fridge – Mr H enjoyed it with a hot lunch of fry bread with hasty dipping sauce, and the whole meal was speedily assembled by myself only minutes after he requested a mid-afternoon repast.

As a practicality, if you are staggering from the black plague yourself, this salad is deathly simple to prepare.

Chopped Late-Summer Salad 

Download the recipe here

This is a splendid little salad I dreamed up when we had our first CSA membership out in Coronado, California.  I first named it Kick-the-Sickness Salad, because it seemed to be able – every time – to just wallop a burgeoning illness and send it packing!  Pair this with a glass of cold, sparkling kombucha and you have a lunch made in heaven, loaded with enough nutrition to stock you for hours.  As always, mix and match what you have available in your region, at whatever time of year you choose to make it! I like to vary the texture – some firm, some soft, some chewy – and the flavors – some neutral and fatty, some crisp and sharp.  Do you have a winning combination for a chopped salad?

3 medium-small tomatoes

1 thick slice of yellow onion

2 thick slices of cheese

1 ripe avocado

Olive Oil

White or Raw Apple Cider Vinegar

Fresh-ground black pepper

Sea salt or pink Himalayan salt

Fresh ground cumin or taco seasoning

Coarsely chop the first four ingredients and put them in your lunch bowl.  Drizzle with just a bit of olive oil, and then a dash of vinegar.  Grind some pepper over the top (pre-ground won’t have the same effect), and sprinkle with sea salt and ground cumin or taco seasoning.  Stir together.  Eat immediately or let marinate for a few hours or overnight in the fridge.

Variation: Add coarsely chopped or pickled garlic for extra power.  Add minced cilantro (my favorite!).

Download the recipe here

Life is short! Enjoy every … last … morsel!

DSCN4628

I really enjoyed this short sally out onto the memory highway, where recollections and amusing anecdotes come flying at me like speeding cars on the interstate. Let me know if this works for you, or if you have another genius ingredient to add!!

Cheers,

Mrs H
Also cheering you on Facebook, very facely
Snapping the best of the messes on Instagram, grammarly

Laundry and Cloth Diaper Detergent – a success story

This post may contain Amazon affiliate links.
That’s how I earn my blogging income, so thanks for clicking through!  

Dear historic, not to be confused with histrionic,

It’s Throwback Thursday, time to reblog one of your favorite posts from the old blogstead!  This post originally went up June 19th, 2012 – unbeknownst to me, just three days before our son would make his very welcome arrival into our home!  It’s been one of our most popular posts ever since it first launched, so much so that I had to write a follow-up. The following post has been modified from it’s original version; it has been formatted to fit your screen. 

DSCN7696

Dear frugal readers or earth-conscious types,

And those who write to-do lists,

I’m getting to the tail-end of my “to-do before baby” list, which is good since I’m also getting to the tail-end of my “how long it usually takes to build a baby” calendar.

One of the things on my to-do list was to make some cloth diaper detergent.

Why homemade?

Bona-fide bottled store-bought cloth diaper detergent – which can’t contain certain fragrances, whiteners, and other ingredients that adhere to cloth and diminish the absorbency of the diaper – can be expensive, especially if you’re trying to find something that’s not too harsh on the body.  I also feel bad going through lots of plastic bottles, since plastic doesn’t really deteriorate once you throw it out.  Homemade just seemed like a natural choice.

I started my recipe hunt, and stumbled across Elisa’s beautiful blog.  She shared several detergent recipes, including a cloth diaper recipe that was ultra-minimal to avoid causing any rash or problem with her child’s sensitive skin.

DSCN7694

DSCN7695

DSCN7692

This recipe became my choice for our diapers so far.  I like leaving out as many chemicals as possible, but I also like clean diapers.  I am grateful to Elisa for sharing this recipe!

Here, she explains the ins and outs of the recipe – as well as another recipe for your everyday laundry, if you need one!  (She also posted a recipe for dishwasher detergent!) We’ve chosen to use the following simple cloth-diaper-safe detergent for all of our laundry needs; when my husband comes home with fuel or grease soaked uniforms, I throw in some extra detergent, or even beef it up with Borax (I definitely keep the baby clothes separate from his uniforms!).

Elisa’s Three-Ingredient Cloth Diaper Detergent

Download the detergent recipe here

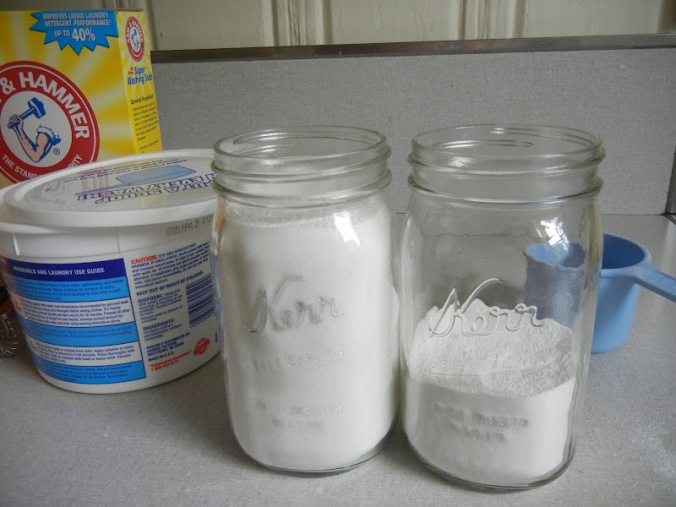
When you’re looking for an oxygen cleaner, if you aren’t sure exactly what it is just check the ingredients on the container – there should only be two.  The oxygen cleaner and washing soda would be in the laundry aisle, and regular baking soda will be in the baking aisle.  You can bring the cost of the detergent down even more if you can find these items in bulk at a big-box store or wholesale supplier!  

DSCN7693

Baking Soda (sodium bicarbonate)
Oxygen Cleaner (sodium percarbonate and sodium carbonate) Try Bio Kleen or Seventh Generation
Washing Soda (sodium carbonate)

Mix equal parts of each ingredient.  Use one tablespoon for a small load, two tablespoons for a medium load, and … you can extrapolate for the large load! For extra stains, throw in additional baking soda.

Download the detergent recipe here

I put the jars on the laundry-room shelf, and posted instructions for mixing more and how to use, in case family members ever volunteered to run a load.  Why only two tablespoons for an average load, you may ask?  Homemade detergents will always be more concentrated than store-bought detergents because we don’t bother to add extra fillers and junk to make it look like we have more than we do.  Using a one-cup scoop for laundry detergent feels pretty pointless now, doesn’t it?

I didn’t add any fragrances to this batch, but you could try adding essential oils if you wanted a little something more.

We’ve been using this laundry detergent for over two years now, and we’ve loved it continuously!  My husband has taken it on deployment, we’ve traveled with it and use it for all our towels, linens, laundry, dish cloths, diapers and the whole nine yards [of fabric].  Our diapers are remarkably stain-free, and our clothes are light and without a filmy residue of chemicals.  I borrowed a pair of jeans from a friend and was shocked that I immediately felt the residue of chemicals and fragrances all over the clothes – it took me a moment to realize what was “wrong” with them!  

Yours in laundry,

Mrs H
We’ll never hang you out to dry, so stay in touch on our Facebook page
There aren’t any fillers in our detergent or on our Instagram feed