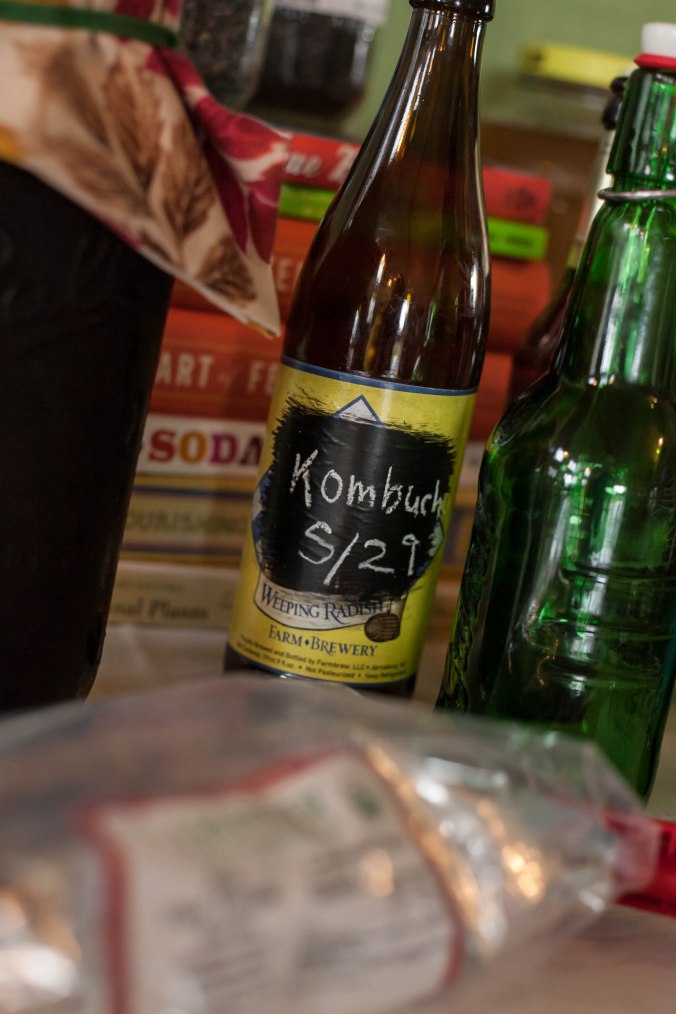
Kombucha – From Basic Preparation to Hair Conditioning and Scoby Candies!

Need a scoby to make your homemade hair tonics and face pastes?
Click here! 

Dear soda-sippers and lovers of delicious beverages,

If I didn’t get this post written soon, I think ya’ll were gonna ride me out of town on a rail!

This is the long-awaited and dearly requested kombucha post. Yes, the recipe packet you have been asking for the most! We’ve had several kombucha Food Labs on the farm, a number of satellite classes at various off-campus locations, and we have more scheduled into January 2015.

Photos in this post were shot by Sami Roy Photography, one of the proficient and expert photographers on the farm!

NEF_Kombucha Class_003

NEF_Kombucha Class_017

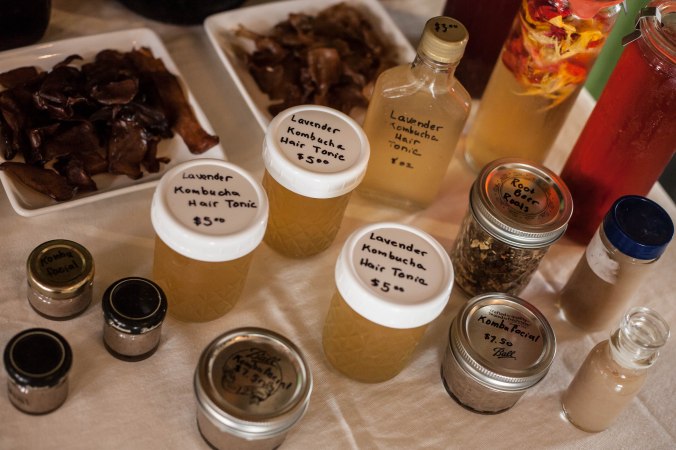
You can do more with kombucha than just drink it as a fizzy, original or variously-flavored drink.  You can also use the scoby to make chewy, gummy candies that are flavored any way you like (or crispy candies, if you prefer!). You can make fruit gelatins, jelly candies, or even move out of the kitchen and make hair tonics and face masks!  And for those who want to know if there is alcohol in kombucha, yes – about the same level as in a loaf of bread or a bottle of Coke.  So, microscopic levels. 

NEF_Kombucha Class_005

NEF_Kombucha Class_009

NEF_Kombucha Class_013

NEF_Kombucha Class_018

NEF_Kombucha Class_027

Basic Kombucha Recipe

Download the Kombucha Class Packet here

This is a very basic kombucha recipe and similar to the hundreds you’ll see replicated across the internet.  Use filtered, purified water; use organic tea and sugar. This is non-negotiable – otherwise your revitalizing, detoxifying probiotic health drink will become a toxic, poisonous potion that was a waste of time to prepare! At least a quarter of your tea leaves should be black – this brew in particular feeds the kombucha scoby, although the bacteria seem to tolerate varying amounts of other tea leaves. Experiment with a variety of leaves and see what works best for you; personally, I’ve settled on the flavor profiles of organic Assam black – mellow, vegetal – and organic China green – fruity, light, notes of citrus.

Heat three quarts filtered water to boiling on the stove; remove and set aside for five minutes.

Add 4 teaspoons black tea and 4 teaspoons green tea or white tea or a mixture of both; stir to combine, let sit for five minutes. Alternately, use 4 black tea bags and 4 green tea bags. (See end of post for my recommended teas)

Measure three quarts cold or room temperature filtered water into a large heat-proof container. Place a mesh sieve over the pan if your tea leaves were loose and not in tea bags.

Pour the hot, steeped tea in to the cold water. Remove the sieve and set aside; to the warm tea, add 2 cups of white sugar and stir thoroughly and steadily with a wooden spoon until sugar is completely dissolved.

Let the tea cool to room temperature, or at least about body temperature (96°). Pour it into a large, clean, glass container. Use only clear glass for brewing kombucha.

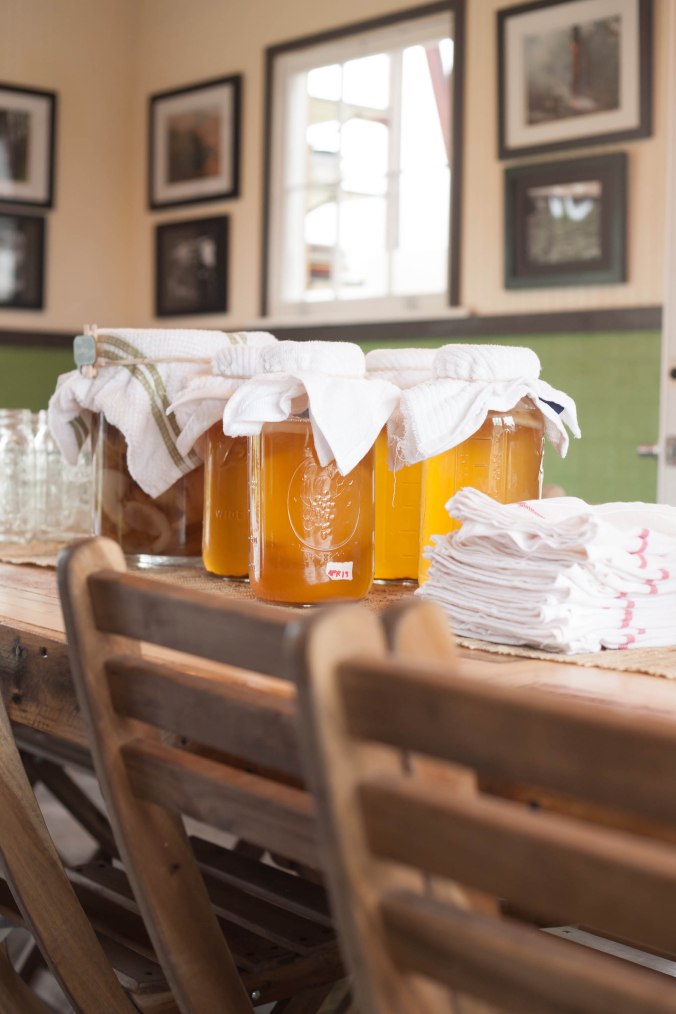
Add 2 cups of kombucha and one scoby.  Cover the lid tightly with a clean, tight-weave towel and secure with a string or rubber band. Fruit flies love kombucha and will try very hard to get inside the container, so be aware!

Set in a cool, undisturbed area (about 70-85° is perfect for these bacteria to multiply) for about two weeks.  You can taste test your fermenting tea at intervals and find your favorite number of days for fermentation. Ambient temperature and other factors may impact the fermentation of your tea, and every various way you try it will be delicious and wonderful!

Download the Kombucha Class Packet
This includes: 
Basic Kombucha
Flavored Kombucha: Seven Food Lab Favorites
Kombucha Fruit Gummies
Probiotic Skin Healing Masque
Hair Conditioning Treatment (Hair Tonic)
Scoby Candy
Kombucha Gelatin

NEF_Kombucha Class_043

NEF_Kombucha Class_047

NEF_Kombucha Class_082

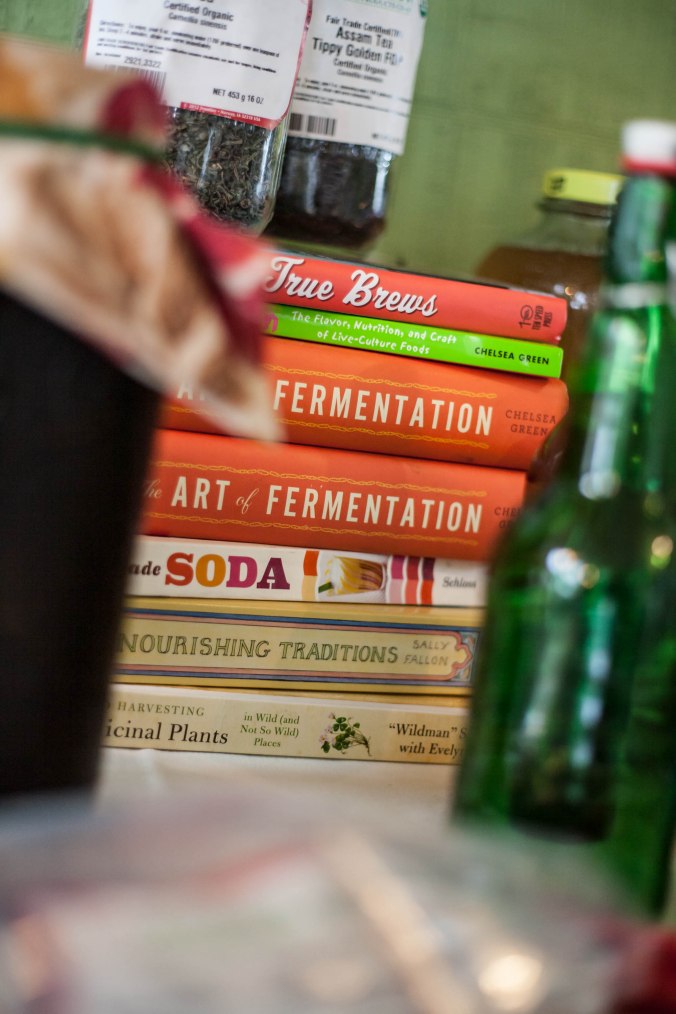
A moment to brag on the delicious Frontier Teas that I recommend for this kombucha…

I’ve done some extensive taste-testing, and I am very particular about my kombucha teas. The final teas I have settled on produce a kombucha so light, so airy and fruity, so delightfully flavored, that it has won best-taste from even the snobbiest of my clientele – and the most devoted kombucha haters!

Fair-Trade Certified, Organic Frontier China Green Tea (light, fruity, vegetal)

Fair-Trader Certified, Organic Assam Tea Tippy Golden (Black) (delicate, mellow, earthy)

For sugar, I use either

Itaja Organic Fine Granulated Sugar

or,

Wholesome Sweeteners Organic Cane Sugar

And as one of my favorite flavorings of all time:
Frontier Whole Elder European Berries

My top fermentation book recommendation, available at all my classes:

The Art of Fermentation: An In-Depth Exploration of Essential Concepts and Processes from around the World

And an explosive new book with recipes for kombucha that will blow your mind! (Book review pending here on the blog!)

Kombucha Revolution: 75 Recipes for Homemade Brews, Fixers, Elixirs, and Mixers

Brewing and sipping,
Mrs H
Face it, you like us
Gram it instantly – #eatorganic #farmandhearth
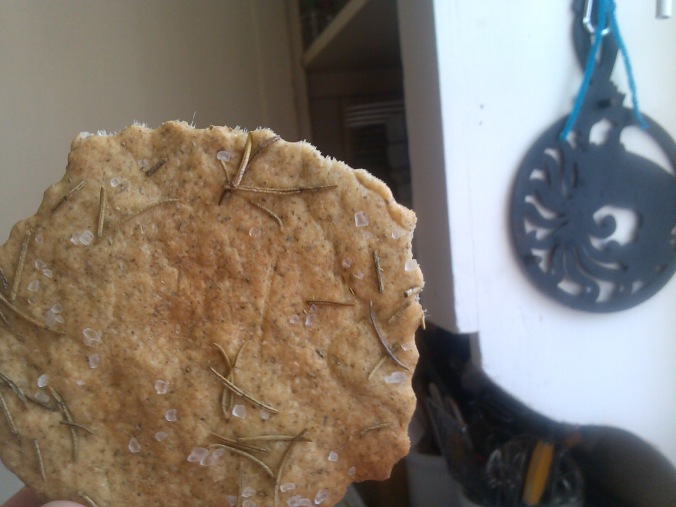
Salted Rosemary Croccantini: better than expensive gourmet brands, even

Dear crackling, cackling, crackering,

It’s that time of week again when we get to zip back in time and steal a post from the old crumbling blogstead! I originally came up with this recipe back in December 2012, when I wanted some fresh, homemade crackers. When driving from Seattle to Virginia, about seven or eight months pregnant and anxious to see my husband again after he’d been moved by the Navy, I was given a package of sort of boring-looking crackers and a bag of sliced cheese. I didn’t even think the crackers looked very good but once I started eating them, I couldn’t stop! Flakes of salt, the herby aroma of rosemary, and the crackle of crispy … I was hooked. You will be, too.

rosemary1

rosemary2

I love croccantini crackers.  Croccante is the Italian word for crispy or crunchy; –tini is a pluralized diminutive attached to the word, hence our cute little croccantini (if any Italian speakers know more on this, let me know, I have a very limited vocabulary!).

Last year, when I left for my Long Haul to Chicago, my cousin bequeathed upon me a large and full box of flat, salted, rosemary-infused-and-topped, fragrant crackers.  I wasn’t too excited at first (“Oh good, a vehicle for my cheese”) but then I ate one and … well, then I ate the rest.

They were good.  Really good.

I semi-forgot about them for a while, wishing now and again I could find them but not recalling the name of the brand.  “I need to ask her where she got them,” I resolved every time I thought of them.  I didn’t know they were a Thing, popular in Italy with cheese for a snack, and produced by more than one manufacturer, until I stumbled my eyes across them in Trader Joe’s.

Welcome to my cart, little box of crackers.

I took them home and quickly realized that in order to feasibly enjoy them in the quantity and frequency I desired, I would have to find a more fiscally responsible way to get them to my plate.  And following my rule of thumb for food – “If I can buy it, I can make it,” – I headed straight to the kitchen.

rosemary3
I wanted the crackers to be whole wheat, or at least mostly so.  If not for the fact that unbleached flour is fairly pointless as far as nutrition goes, then for the fact that whole wheat has a more robust depth of flavor, somewhat nuttier and more hearty than white.

I strapped the baby to my back and got to work.  And let me tell you, it was worth the twenty to thirty minutes of experiential toil: these crackers are far and away better than the packaged version (why are we not shocked? Why?).  They taste better, have a meatier crunch, the salt and rosemary flavoring is controlled by me (more, more, more!!!), and they look a whole darn lot better, too.

rosemary4

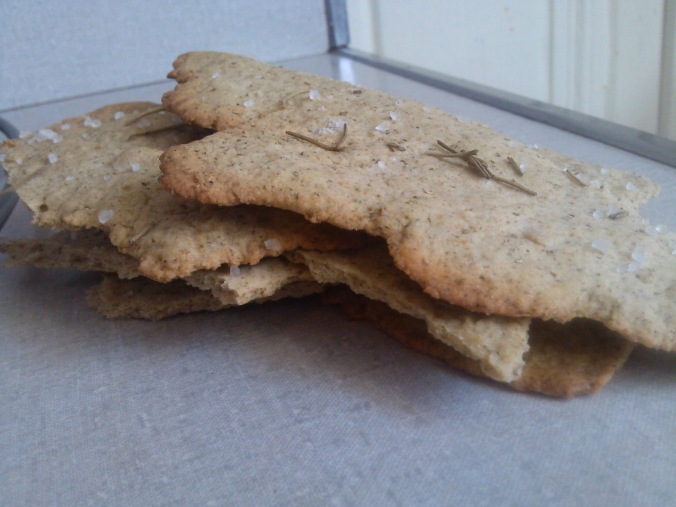
My cracker – hearty, flavorful, well-seasoned

rosemary5

The store cracker – sparsely seasoned, pasty texture when chewing, snaps like a piece of brittle glass and explodes across the room, but still so good it inspired me to make my own. Now, imagine how much deliciousness there must be in the homemade version!!

rosemary6

You can cut them into whatever size or shape you like.  Just don’t re-roll the dough – cook the odd pointy scraps leftover from any fancy cutting you do, and enjoy them in their fun shapes.

 It’s simple: Mix the dry ingredients by hand, in the Vitamix cup with dry blade, or in a food processor …

rosemary7

Add the wet ingredients.

rosemary9

Pulse into a loose ball of dough.

rosemary10

Dump said ball of dough onto a barely dusted work surface.

rosemary11

Mold gently by hand into a ball of firm, soft dough.

rosemary12

Cut the dough into workable sizes.  Halved or quartered will be fine.

rosemary13

Roll the first half or quarter out thin, thin, thin.  This is a quarter of the dough, rolled out.  Brush with olive oil.

rosemary14

Sprinkle with coarse sea salt and dried rosemary; I rolled over it with the rolling pin to ensure the seasonings stuck in, or you can use your hand.

rosemary15

Cut into the desired shape: use a pizza cutter, decorate with a dough roller docker if you wish, use cookie cutters, biscuit cutters, a knife, a glass, a bowl … or bake whole, and break afterwards.

rosemary16

Just ten minutes at 450 F will do it.  Check at the halfway point to make sure you aren’t burning it!  Enjoy with cheese, salami, spread, hummus, baba ghanoush, meats, pico de gallo …

rosemary18

Salted Rosemary Croccantini

Download the Salted Rosemary Croccantini recipe here

These are easy to make.  No particular skills needed, not even very much time – I made them between chores on a busy afternoon, on a whim, with a baby dangling from the carrier on my back.  Now, imagine how much easier it must be without the baby! I weighed my flour, as you will see following, because I wanted to have precise measurements.  Scooping, fluffing, or scraping flour out of the container is just not accurate enough, although it can get you a good approximation.  

1 cup (156 g) whole wheat or white whole wheat
3/4 cup (106.5 g) bread flour (I used King Arthur white bread flour)
1 teaspoon kosher salt
1 teaspoon baking powder
1 generous tablespoon chopped rosemary (see below), more or less depending on your preference
1/2 cup filtered water
1/3 cup olive oil
Extra olive oil for brushing
Sea salt, additional dried rosemary, and other optional herbs for topping

Heat oven to 450.  Adjust rack to the middle; if you have a pizza stone, put it in the oven.  If not, put a large cookie sheet in the oven.
Using a Vitamix or food processor: Add dry ingredients and pulse to mix; pour oil and water into the well and pulse from low to hi, repeatedly, until a scrappy, loose ball of dough forms.  It should only take a few revolutions.
By hand: Using your hands, a pastry or dough cutter or two forks, blend the dough until a scrappy, loose ball of dough forms.
Both methods:  Dump the dough onto a lightly dusted work surface.  Gather and gently work it into a ball of dough.  Using a knife, cut into halves or quarters (quarters are easy to work with).
On unfloured, ungreased parchment paper, roll the dough out until it is thin, thin, as thin as you can make it.  Then, a little thinner.  Brush with olive oil; sprinkle with salt and rosemary.  If you like, add other herbs such as thyme, basil, or flavors such as granulated garlic.
Pick up the parchment paper and place it in the heated oven on your stone or cookie sheet.  Bake for ten minutes in the heated oven, checking at the halfway point and near the end to ensure it isn’t burning.
Remove when it is browning at the edges and looks dry and croccante!

Note: Do not use a Silpat/silicone baking mat.  The heat is too near the maximum temperatures for the silicone (480 is where they top out), especially if you are using a baking stone.  You will end up with a smoking kitchen and crackers that taste oddly like plastic.  How do I know?  I tried.  Thank me later!

Chopped or Powdered Rosemary

Download the Chopped or Powdered Rosemary Recipe here

I used dried rosemary from our garden for this.  The Krups Electric Spice and Coffee Grinder is my preferred weapon of choice: it lasts notoriously long (years, years, decades), is loud but not deafening, is pretty cheaply priced and best of all does the job required of it with speed and efficiency.  

Strip leaves from the woody stems.

rosemary19

Using a coffee or spice grinder, pulse rosemary 4 times for 1 second to chop coarsely.

rosemary20

rosemary21

To grind into a powder, pulse for about four or five seconds several times, until the fineness you desire is achieved.

rosemary22

Our family of rosemary, left to right: Whole, coarsely chopped, powdered.

rosemary23

Download the Salted Rosemary Croccantini recipe here

Download the Chopped or Powdered Rosemary Recipe here

Crisply crunching,

Mrs H
Instantly see more on Instagram
Face it fearlessly on Facebook

Authentic Asian Noodle Recipes – that you won’t find anywhere else!

Dear gourmands and explorers,

Have you ever had ramen?

maruchan

No, no, not those coyly named chicken “flavored” noodles that come in a plastic-wrapped briquette, notably the food of starving college students and high-metabolism bachelors.

I’m talking about authentic Asian street food, from the crowded, foggy streets of Shanghai and Tokyo, and the bustling alleyways and street markets of Canton and Yokohama. Served in a deep, round bowl with savory hot broth and piled with fresh vegetables, pulled pork, soft-poached eggs, chili threads and a hundred other choices, it’s slurped up with Chinese soup spoons and slick chopsticks.

marketstreet

An authentic bowl of ramen is hard to find, outside the countries where it originated and a few port cities where skilled immigrants bring their inherited craft to tiny restaurants and back-door kitchens.  What if you could make your own noodles, the real way, the handcrafted way, at home?  What if you could prepare dashi, katsuobushi salt, mayu and the other necessary condiments, sauces, sprinkles and fats requisite to a steaming bowl of ramen, all in your own home?

IMG_20140628_202129

IMG_20140626_205658

IMG_20140626_193145

In a recent Asian Noodles Food Lab here at New Earth Farm, we experienced the skill of the master first hand!  Chef Kevin Ordonez, owner of the pop-up-turning-restaurant Alkaline VA, treated a full class to a night of ramen making, rice noodles, and Asian noodle legend.  Truly dedicated to his art, he prepares everything for his restaurant from scratch – from the rich chicken bone broth to the infamous scorched mayu, unique in its preparation and notable for the earthy, smoky flavor it brings to a bowl of steaming noodles.
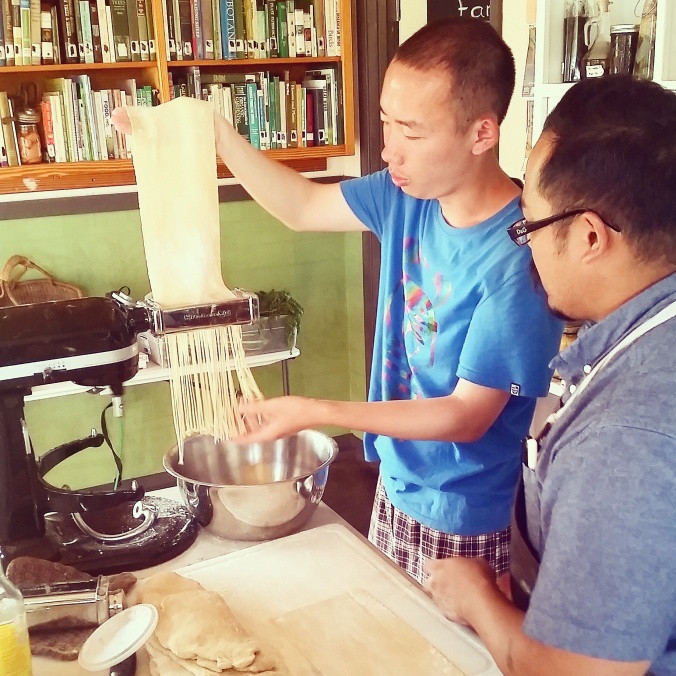
Visiting Chef Kevin’s pop-up – follow his Facebook page to see where he goes next! – is a treat that everybody passing through the Hampton Roads area should indulge in.  It’s a family-friendly setting, with a revolving, ever-changing menu that uses local, seasonal and fresh foods, inspired by Asian street food and a little Comic-con!

20140628_192406

20140628_192849

20140628_120238

Until that glorious day when you get to sit down to a bowl of Chef Kevin’s rich, fragrant ramen replete with umami explosions and sensational flavors, you can enjoy the wonders of Tokyo and Hong Kong in your own home!  [BANG! POW!]  Chef Kevin, in his typically generous fashion, put together a recipe packet for our readers including not only the noodle recipes, but broth, salts and condiments necessary to create a truly authentic ramen experience.  Download the entire recipe packet, or pick and choose – the recipes are simple, straightforward, and true to their Asian roots. Many of these recipes are difficult to find in English or outside of ramen houses, so I am fortunate to be able to share this rich catalog with you!

ordonez_family

Chef Ordonez with his beautiful family, Melissa and young Max, on a visit to New Earth Farm

Alkaline’s Shoyu Ramen

Download the entire recipe packet here – see below for individual files

By Chef Kevin Ordonez of Restaurant Alkaline VA
This plating creates one bowl of Ordonez’ delicious, signature ramen dish. The next time you’re in Virginia Beach, stop by the restaurant and sample a steaming bowl of the authentic, homemade noodles yourself!

Serves one
5 ounces alkaline noodles*
8 ounces chicken stock*
8 ounces dashi*
1 ounce tare*
1 tablespoon cut scallions
1 tablespoon chicken fat*
1 teaspoon katsuobushi salt*
1 teaspoon mayu*

In a small sauce pot, combine the chicken stock, dashi, and tare and bring to a boil. Bring a four quart pot of water to a boil. Meanwhile, drop a few drops of chicken fat and a pinch of katsuobushi salt into the bottom of your guest’s ramen bowl. When the pot of broth comes to a boil, carefully pour it into ramen bowl. Cook ramen noodles in pot of boiling water for 1 minute. Vigorously stir noodles in water with chopsticks or tongs to prevent clumping. Drain noodles well and add to bowl of broth. Add desired toppings. Enjoy!

*See recipes in Asian Noodle Food Lab recipe packet
A note on desired toppings: Regions and chefs create their own unique toppings, but favorites include slices jalapenos and cilantro, thinly sliced seared pork, kimchi, a soft-poached egg, hot house-made sauces and more. Let the natural environment around you create opportunities for invention! Use local and fresh ingredients, and let us know what your favorites are!

Download the entire recipe packet here (all the following recipes, in one document)
Download Alkaline Noodles recipe
Download Chicken Stock recipe
Download Dashi recipe
Download Tare and Chicken Fat recipe
Download Katsuobushi Salt recipe
Download Mayu recipe
Download Alkaline’s Shoyu Ramen recipe
Download Chicken Udon recipe
Download Ginger Soba Noodles recipe
Download Rice Noodles recipe
Download Rice Noodle Stir Fry recipe

20140628_195300

Shopping for noodle tools?  Here are the gadgets Chef Kevin recommends!

He uses a KitchenAid stand mixer and pasta attachment to make noodles by the thousands in his restaurant. It will work in your home kitchen, too!

KitchenAid Professional 5 Plus 5-Quart Stand Mixer

KitchenAid Stand-Mixer Pasta-Roller Attachment

Enjoy your noodles!

Mrs H
Oodles of Instagram, all the time
Our Facebook followers get it first!

African Samosas: Interdependence in Community

Samosas can be vegan, too!  The ones pictured here include meat,
but you don’t need meat to make samosas – just don’t let any Kenyans hear me say that! 

Rafiki, friends,

The traditional African dishes streaming into my home have become such family favorites that it’s hard to imagine planning a week of menus without samosas or a masala stew or some chai. The African mothers have figured out not only the best dishes – ones you can make in advance, make in one pot, make with few ingredients, make with what’s available on the land – but also how to coordinate the community to see to everyone’s needs.

20141009_073411

Across the street from me, Agnes will race over and tell me she made a huge pot of chicken masala, just on the very day I’ve been working frenetically and never got to prepare dinner. “Jambo sana, mwanamke,” she’ll say, using the greeting of ‘woman’ she adopted tongue-in-cheek after hearing my husband address me in that manner, “I have a stew for us. I’m out of rice, can you make rice?”  The next day I’ll be stopping by. “I took a turkey out of the freezer. What should we make?” With this community support, the children are all fed, she gets to go to her college classes and I get to teach yoga classes, knowing that between the two of us, dinner for the families will be handled. When Beryl was staying with me for a few weeks before our husbands got back from deployment, nobody ever thought twice about who would make dinner or who would watch the kids – between the three of us, somebody was always home, a pot was always on the stove, and the kids were always under a watchful eye!

We thrive in the interdependence that comes from supporting and leaning on the community around us. Stark independence is a sign of pride and immaturity, somebody unable to give or receive. The tangled fibers of a family uplifting, supporting and creating is a sign of society truly becoming.

20140911_183659

These African samosas are one of the hallmarks of African cooking! Whenever a friend comes back to the States after visiting Africa, they claim this is the food they miss the most. “I dream about these at night,” a missionary friend confided once. Create the taste of the continent in your own kitchen, using the vegetables and meat that are available to you! Fillings are endless – but we all have our favorites! I love to include cilantro. Some shredded cabbage is always a win; and seasoning the meat with masala spices from Tanzania’s Zanzibar markets is one way to ensure there will be no leftovers.

This is less of a recipe, and more a set of guidelines. If you’re very attached to measurements and quantities, the time to lose that attachment is with international cooking – the recipes are land-based, meaning they use what’s available at the local markets at that time – and the quantities you’ll learn from each individual cook are often derived based on how big her family is, or how large her soup-pot is!

African Samosas with video instruction

Download the recipe PDF here

I did the folding of the wrapper painfully slow, because after watching Beryl and Agnes do it a thousand times and finding videos of them online, I still didn’t have the hang of it because everybody went too fast! 

Alternative Wrapping

Samosas are a special treat and a favorite in our house. Since they are fried, we don’t make them every day or even every week – but when I do make them, the dinner table is buzzing with interest! You can make them ahead of time and freeze without frying, then defrost them in the refrigerator before frying for dinner on a busy weeknight. They are wonderful served with hot, homemade sauce or pili pili, and a mound of fluffy rice or pilau. Put alongside stews, soups and simple pot dinners, and throw them in the toaster oven to reheat the next day!  

Samosa wrappers
Samosa filling
Oil for frying

Wrappers: There are many different brands and varieties. You can even make your own!  They are generally found in the freezer section of international or Indian-Asian stores. If you use the large squares, you can fold them in half as I did in the video, or cut them in half to make twice as many. The long strip varieties are very economical – one package has about fifty wrappers! They make a smaller samosa, of course, so if you use the large wrappers you will have fewer, fatter pieces.

20140912_094901

Filling: Shockingly, it’s a free country and you can fill your samosas with whatever you like. A pound of meat, plus some chopped herbs, vegetables and spices will fill about thirty middle-sized wrappers, but this all depends on the size you use, and the quality of meat you use. You can also opt for a vegetarian filling, and use all chopped vegetables, shredded cabbage, and cooked rice, or potatoes and masala. Here is the filling I like to make: heat a few tablespoons of oil, and add diced onion and garlic. Cook until fragrant, 10 – 30 seconds. Add chopped vegetables, about a cup, and toast a few more seconds. Add one pound of ground meat or about three cups of rice and vegetables and cook until brown or tender; add one bunch chopped cilantro and one cup cooked rice, and stir to combine.  It’s easiest to make samosas if you let the filling cool first, but that is not necessary if you need to finish quickly. You can even make the filling a day in advance and store in the refrigerator!

Oil: Expeller pressed coconut oil, peanut oil, or whatever you generally use, heated hot so a piece of dough shrivels and bubbles when dropped in, or about 350°F.

Filling and Frying Samosas: The Process

Prepare filling; cool if you wish. Heat a pan of oil and prepare a plate with a towel, or a cooling rack over a pan, for the finished samosas (if desired). Make a paste by whisking a little flour and water in a small bowl; set aside. Fill and fold the wrappers according to the shape you are using (you can also roll them like spring rolls). Use a little flour paste to glue the final piece of dough closed. At this point you can remove them to the freezer if you are preparing them in bulk. Place the finished or defrosted samosa in hot oil. Fry until the bottom side is browned, about thirty seconds to one minute, then flip over with tongs, being cautious about splattering oil! Let them fry until the second side is done, between thirty seconds and two minutes. Use your discerning eye to time them – it will vary based on the wrappers you use, the oil you use, how crispy you like them to be, and how hot your stove is.

Serving: Serve with pilau rice, a traditional masala rice. Serve with plain rice, stews or hot sauce. Any way you serve them, they will be enjoyed by all, including the neighbors if they hear what you’re up to. What a treat!

Download the recipe PDF here

20140911_183614

Asante,

Mrs H
Hunt us down on Instagram – but no spears, please!
Our Facebook page has a following, are you there, too?