Sauerkraut: The Great Pickled Vegetable

Riddle me this: What food is gluten-free, vegan, Paleo, GAPS, vegetarian and kid-approved? Read on … 

Dear scientist chefs,

A kraut by any other name would be as sauer! Kimchi, kraut, cortido, sour cabbage, tsukemono, atsara and pickles are just a few of the names you’ll find around the world for the sour, lactic-acid-fermented vegetables that virtually every culture knows and loves. Every combination under the sun – with spices, onions, peppers, mixed vegetables, herbs, wild weeds, boiled eggs (what?!), fruits, chips of bark and probably the occasional unfortunate cricket – can be found as you travel from home to home, country to country. Eastern Europeans favor dried fruit, caraway seeds. Warmer climates tend towards spicier, peppery blends. Studying the trends in different regions, you can find the logic in it; dried fruit is available in Eastern European climates, where it grows fresh throughout the year. Spiced-up krauts are less inclined to mold, and in hot climates ferments lean towards mold very quickly. Isn’t it funny how natural food culture, separated from the supermarket mentality, really suits the region?
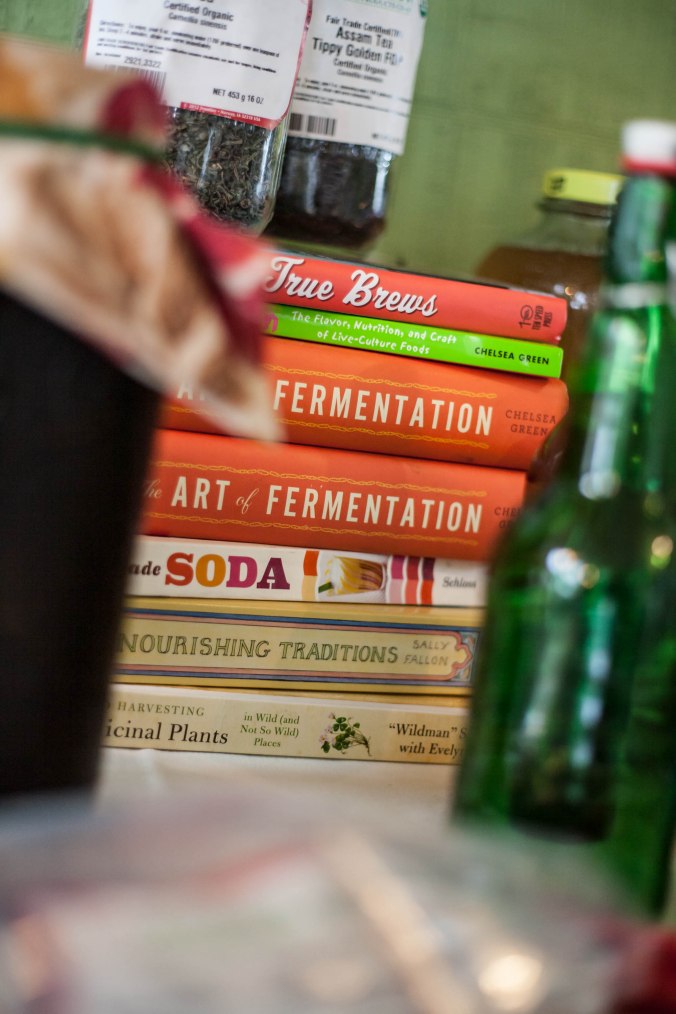
A few of my favorite fermenting books

A few of my favorite fermenting books

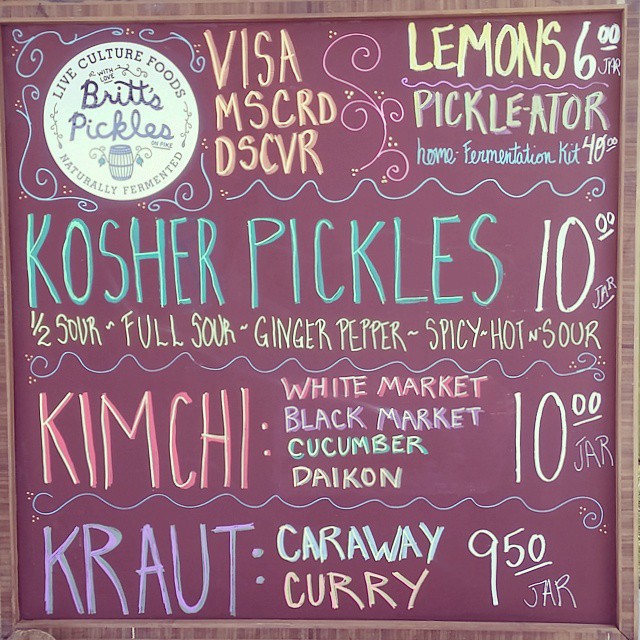
In Seattle, Washington, Britt's Pickles can be found in various farmers markets. They ferment their pickles in huge, steam-cleaned oak barrels from local wineries. Their Pickleator and other fermenting tools are available online.

In Seattle, Washington, Britt’s Pickles can be found in various farmers markets. They ferment their pickles in huge, steam-cleaned oak barrels from local wineries. Their Pickleator and other fermenting tools are available online.

Out here on the farm, we make our kraut by pretty much dumping in everything we have on hand at the moment! We held another rollicking kraut and kimchi food lab, where the class chopped up four monstrous boxes of cabbage, as well as black Russian kale and a case of fresh-picked bok choy. We threw the chopped cabbage into tubs and salted it in layers, and pounded it with a wooden rolling pin by turns until the juices leaked and the cabbage was thoroughly bruised on every side.

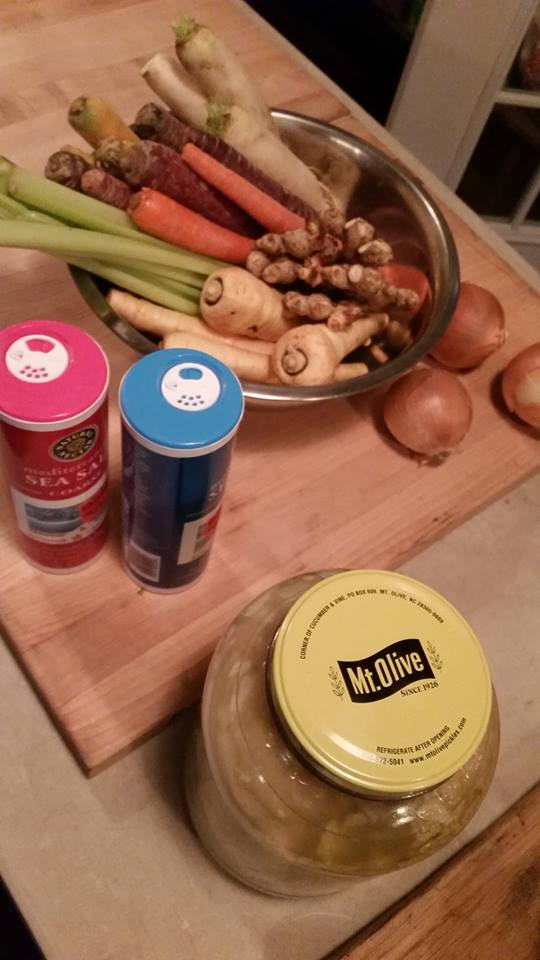
All the pounded, salted greens went into a huge, ten-gallon crock, and then the students set to work chopping up their unique flavor choices. Everybody was making their own delicious jar of kraut, or kimchi, or whatever you want to call it – by this stage, no true name really applied because we weren’t following any rules! White turnips, black radishes, peeled and shredded gingerroot, red and green apples, yellow onions, habanero and Carmen peppers, lacinato kale, celery, rainbow carrots, red radishes, daikon radishes and garlic were all chopped by students and their selections were mixed by handfuls in their individual kraut bowls. Then, everybody shoveled scoops of the bruised, dripping kraut into their bowls and hand-mixed it with the vegetables they had chosen, before pressing it into quart jars, labeling and capping them.
10463924_10152688883730921_8142857362626408840_n

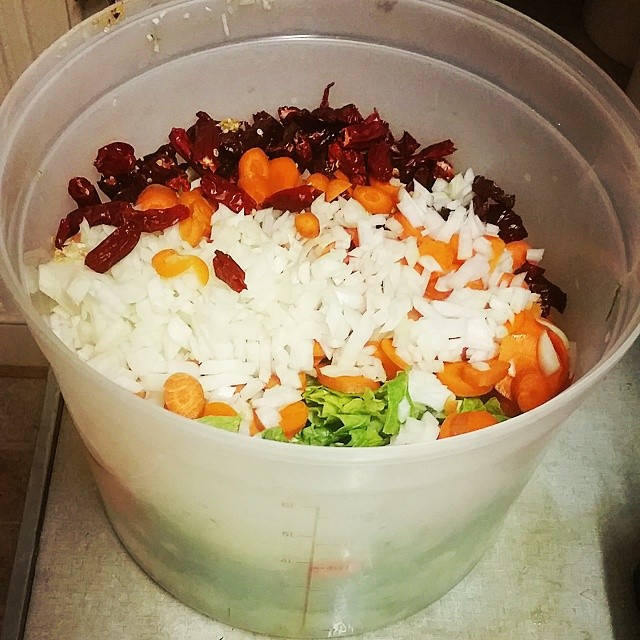
A small batch of kimchi I prepared back in June; we enjoyed eating it on fresh bread, with slabs of cold butter, during class.
And the kale grows, and grows, and grows ... this is White Russian Kale. Photo credit Kevin Jamison

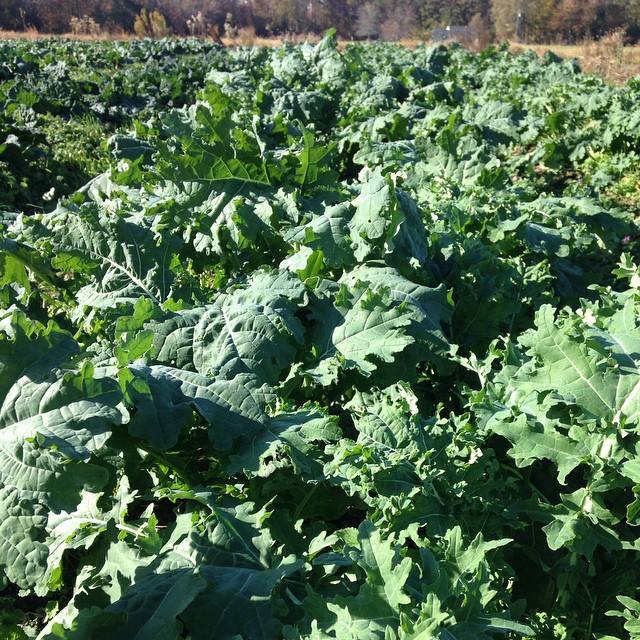
And the kale grows, and grows, and grows … this is White Russian Kale. Photo credit Kevin Jamison

These stuffed quart jars will sit on the counters in their homes, hopefully in a rimmed baking sheet or something to catch the juice that will surely leak out! Every day, for a few days or even a week, they’ll release the lid, letting out some of the built-up gases escape. Those jars hiss like a bottle of homemade kombucha when you pop the top! After a few days of this, the jars can safely sit – with only the occasional lid check – until the substrate inside is fully soured to the chef’s taste. How do you know if your kraut isn’t done fermenting? It will taste like salty cabbage! How do you know if it’s fermented enough? It tastes as sour or tart as you like it to! Then, the home cook will eat it and/or move that jar to the fridge, where bacterial activity will slow to incredibly low rates. Yes, it will keep fermenting in the fridge – but very slowly! It can take months and months for marked flavor change to develop.

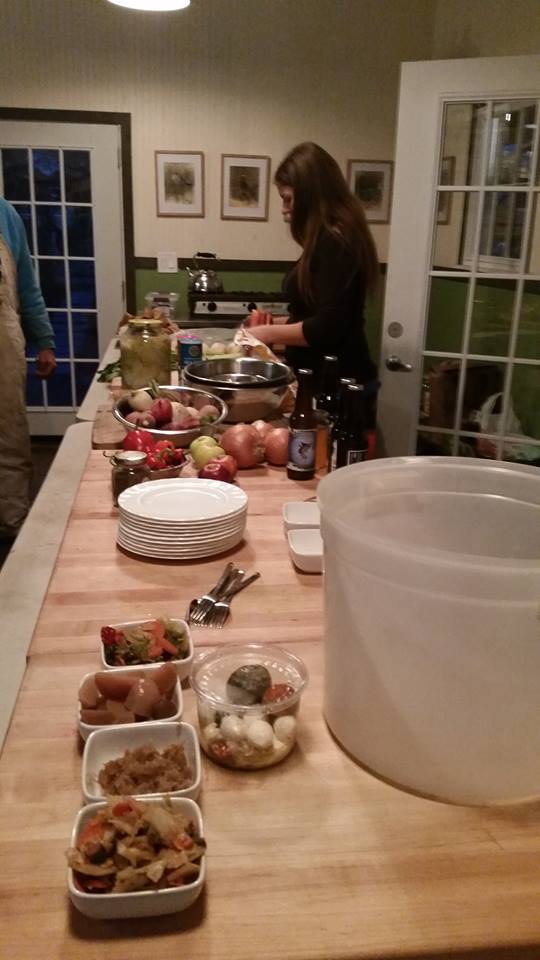
One of the students snapped a few pictures for us before things got muddy – it’s a little hard to take pictures in the building at night, but you can get a general idea of what went on!
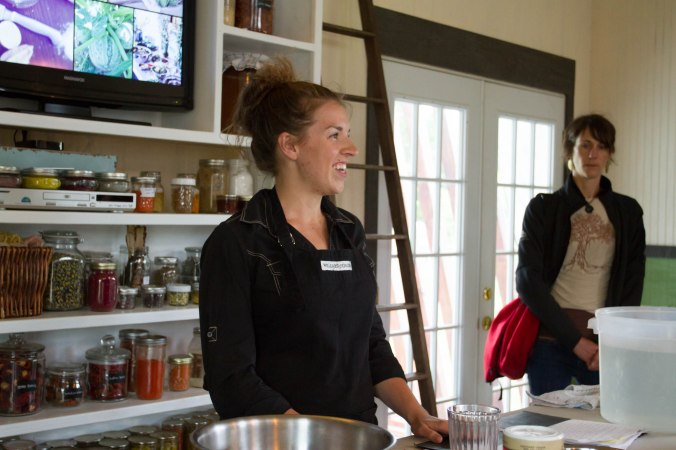
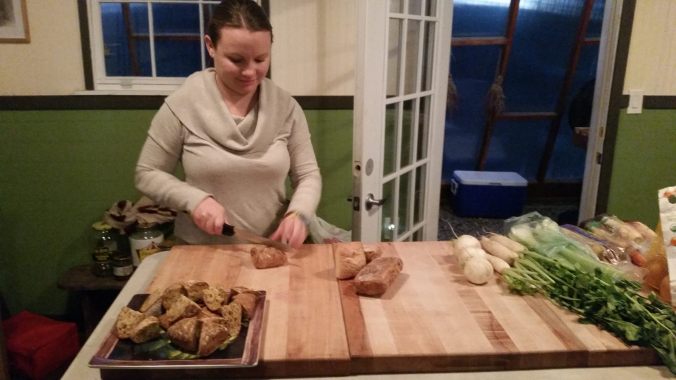
Chef Lyndsay preps some fresh bread for snacking during class

Chef Lyndsay preps some fresh bread for snacking during class

Lots of big Boos boards for chopping - they donated six to our Food Lab, very generously!

Lots of big Boos boards for chopping – they donated six to our Food Lab, very generously!

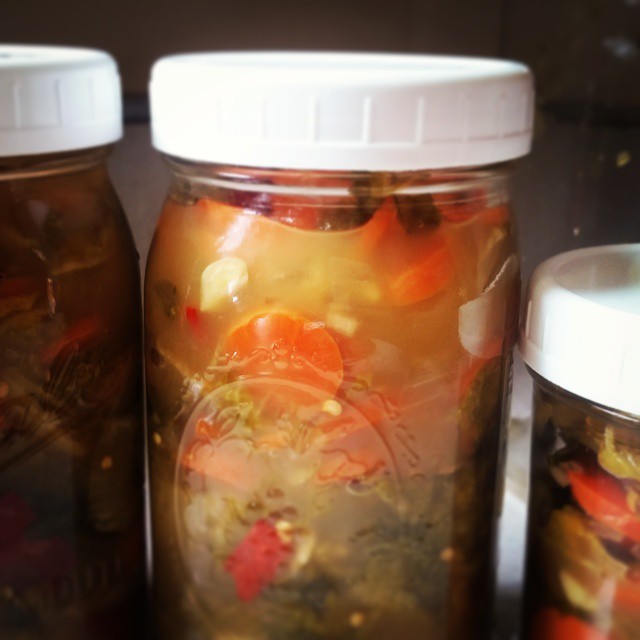
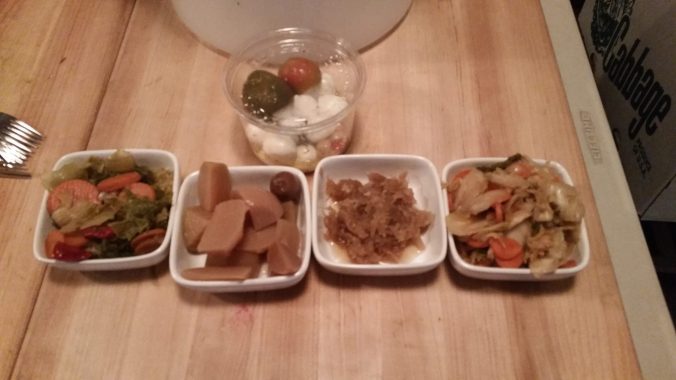
A rather blurry picture of some of our fermented vegetables, ranging between six months to two years old.

A rather blurry picture of some of our fermented vegetables, ranging between six months to two years old.

That old pickle jar is full of small heads of cabbage drowning in saltwater.

That old pickle jar is full of small heads of cabbage drowning in saltwater.

Sauerkraut FAQs from the Food Lab

Download Kraut FAQs and Recipe

1. How long does it take to ferment my kraut in the jar? 

It depends on how much salt you added. With more salt, and in colder temperatures, it will take a long time. A light hand on salt, and a warm kitchen – 70 – 85F – and the kraut can go faster, maybe becoming sour in as little as a week or two. I like to leave my krauts to ferment for a few weeks or even months, and then move them to the fridge for another few months. Some purists say the real flavor doesn’t even begin to develop until after six months!

2. How do I know if my kraut went bad? 

You’ll know – it will be slimy and moldy, it will stink to high heaven, and nobody could pay you to eat it! If some mold develops on the top of your kraut, don’t be alarmed – gently scoop it off with a spoon, and replace the missing liquid with purified, salted water if necessary (you want your vegetables to stay beneath the brine!). Some of the mold might break off and float away, but just get what you can. The vegetables deep under the brine are still safe for consumption.

3. How much salt do I use? 

I really don’t measure the salt – I sprinkle it in as I layer the chopped vegetables before pounding them, and during the summer I tend towards a heavy hand with salt. The lactic acid that the vegetables create are what inhibits the growth of pathogenic bacterias – but lactic acid takes about three days to kick in when fermenting cabbage! That’s what the salt is for – it does the work of inhibiting the pathogens until the lactic acid can do the dirty work. If you really insist on a measurement to get started, you can use about 1-1/2 tablespoons of kosher sea salt per average head of cabbage. Get used to using that amount, and pretty soon you’ll be able to vary up and down per your own preferences.

4. Why kosher salt, or sea salt, or whatever you had said up there? 

Use salt that does not contain iodine and anti-caking agents such as yellow prussiate. These tend to make the cabbage slimy and gross.

Download Kraut FAQs and Recipe
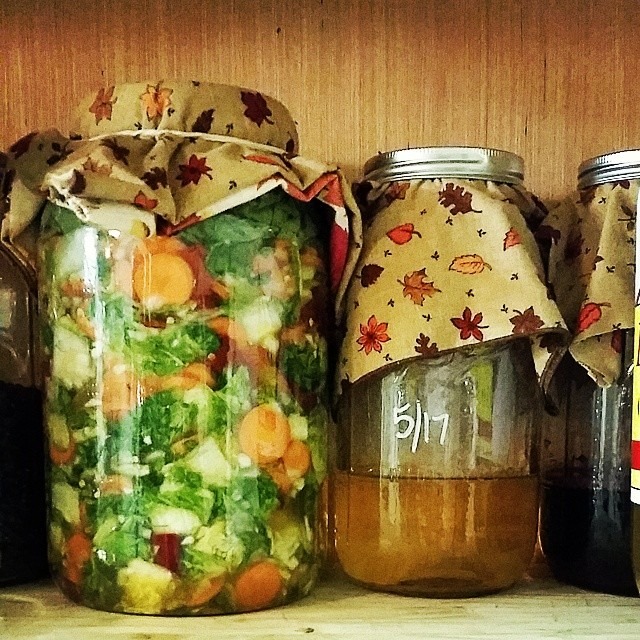
This kimchi is covered with a cloth, and a thick layer of brine and jar weights. Generally, I prefer using lids on jars.

This kimchi is covered with a cloth, and a thick layer of brine and jar weights. Generally, I prefer using lids on jars.

Simple Seasonal Sauerkraut

1 organic head of cabbage (Chinese cabbage, green cabbage, it doesn’t matter)

1 to 1-1/2 tablespoons sea salt, approximately

Optional: caraway seeds, turmeric, peeled and crushed garlic, peeled and shredded ginger, small amount of dried or shredded fruit (about ½ cup or less), other vegetables cut, shredded, julienned, diced or sliced the way you like them

1. Shred or coarsely chop cabbage; place in a metal or plastic bowl that won’t break and sprinkle with salt.

2. Firmly massage with your hands, or pound with a wooden mallet or the end of a rolling pin for about ten minutes, until the cabbage is very juicy and wet. When you start pounding, you may think “I’ll have to add water to this to get enough brine to cover it!” If you’re using nice, fresh cabbage, just keep on pounding till that ten minute mark. You may be surprised how much brine will leak out of that cabbage!

3. Mix in any other spices, herbs, vegetables or fruits that you like. I tend to keep the “other” ingredients at less than 50% of the volume, usually well below that, so my krauts are mostly cabbage.

4. Pack it all into a large jar or multiple jars, pressing the vegetables down so the brine covers them completely. Pieces that poke out or float will probably be thrown away when you open the jar to eat the kraut, so really smash it down firmly!

5. To keep everything beneath the brine, you can add small jar weights (available from Cultures for Health, Britt’s Live Culture Foods and other places), or use the stem end of the cabbage to wedge in to the top of the jar.

6. Place the jar on the counter in a rimmed baking sheet or pan to catch any juices that may leak out; you will need to pop the lid once or even twice a day for a few days. Depending on how warm your house is (70 – 80F is a happy place for fermenting!), you can taste test it as soon as three days; it may take up to a few weeks. If you don’t want it on your counter that long, you can move it to the fridge and let it slow ferment for a lo-o-o-ong time!)

Kraut will last months and even years in a cool place. My favorite ones are at least a year old. Some traditions say the true kraut flavor does not even begin to develop until after six months!

Adding caraway seeds, turmeric or even a few tablespoons of raw, cultured whey will help reduce the risk of your kraut molding.

Download Kraut FAQs and Recipe

A batch of kimchi, ready to move into the fridge for cold storage and spicy snacking!

A batch of kimchi, ready to move into the fridge for cold storage and spicy snacking!

Bacterially yours,

Mrs H
My phone was stolen so I haven’t grammed you in a while!
Hunt us down on Facebook – we “like” that!

Recommended Reading

I’m always building up my fermenting library (and you will be, too, with all the book giveaways I have coming up!). These are some of my long-standing, time-tested favorites. Just reading them makes me all giggly and happy inside – and of course, the wealth of knowledge that can be gleaned by cross-examining all the books should not be underestimated!

The Art of Fermentation: An In-Depth Exploration of Essential Concepts and Processes from around the World

Wild Fermentation: The Flavor, Nutrition, and Craft of Live-Culture Foods

Asian Pickles: Sweet, Sour, Salty, Cured, and Fermented Preserves from Korea, Japan, China, India, and Beyond

Nourishing Traditions: The Cookbook that Challenges Politically Correct Nutrition and the Diet Dictocrats

Kombucha Revolution: 75 Recipes for Homemade Brews, Fixers, Elixirs, and Mixers
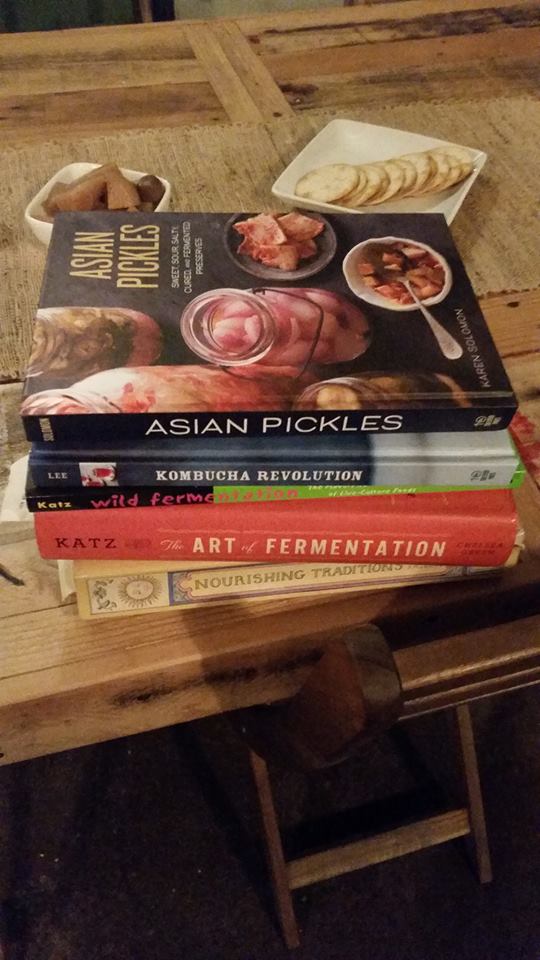
The Nourished Kitchen: Farm-to-Table Recipes for the Traditional Foods Lifestyle Featuring Bone Broths, Fermented Vegetables, Grass-Fed Meats, Wholesome Fats, Raw Dairy, and Kombuchas

Kombucha – From Basic Preparation to Hair Conditioning and Scoby Candies!

Need a scoby to make your homemade hair tonics and face pastes?
Click here! 

Dear soda-sippers and lovers of delicious beverages,

If I didn’t get this post written soon, I think ya’ll were gonna ride me out of town on a rail!

This is the long-awaited and dearly requested kombucha post. Yes, the recipe packet you have been asking for the most! We’ve had several kombucha Food Labs on the farm, a number of satellite classes at various off-campus locations, and we have more scheduled into January 2015.

Photos in this post were shot by Sami Roy Photography, one of the proficient and expert photographers on the farm!

NEF_Kombucha Class_003

NEF_Kombucha Class_017

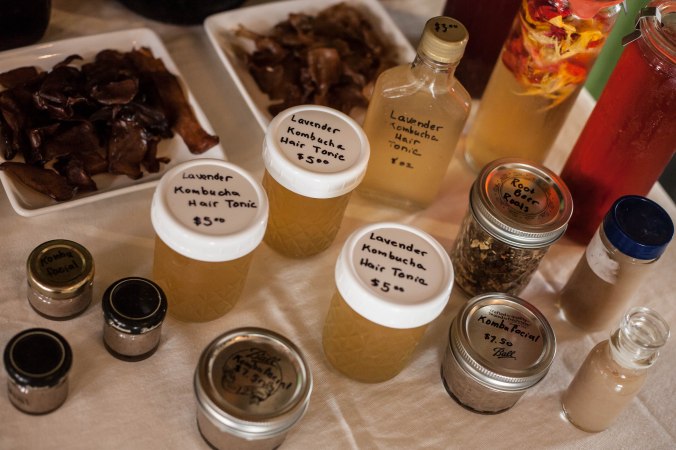
You can do more with kombucha than just drink it as a fizzy, original or variously-flavored drink.  You can also use the scoby to make chewy, gummy candies that are flavored any way you like (or crispy candies, if you prefer!). You can make fruit gelatins, jelly candies, or even move out of the kitchen and make hair tonics and face masks!  And for those who want to know if there is alcohol in kombucha, yes – about the same level as in a loaf of bread or a bottle of Coke.  So, microscopic levels. 

NEF_Kombucha Class_005

NEF_Kombucha Class_009

NEF_Kombucha Class_013

NEF_Kombucha Class_018

NEF_Kombucha Class_027

Basic Kombucha Recipe

Download the Kombucha Class Packet here

This is a very basic kombucha recipe and similar to the hundreds you’ll see replicated across the internet.  Use filtered, purified water; use organic tea and sugar. This is non-negotiable – otherwise your revitalizing, detoxifying probiotic health drink will become a toxic, poisonous potion that was a waste of time to prepare! At least a quarter of your tea leaves should be black – this brew in particular feeds the kombucha scoby, although the bacteria seem to tolerate varying amounts of other tea leaves. Experiment with a variety of leaves and see what works best for you; personally, I’ve settled on the flavor profiles of organic Assam black – mellow, vegetal – and organic China green – fruity, light, notes of citrus.

Heat three quarts filtered water to boiling on the stove; remove and set aside for five minutes.

Add 4 teaspoons black tea and 4 teaspoons green tea or white tea or a mixture of both; stir to combine, let sit for five minutes. Alternately, use 4 black tea bags and 4 green tea bags. (See end of post for my recommended teas)

Measure three quarts cold or room temperature filtered water into a large heat-proof container. Place a mesh sieve over the pan if your tea leaves were loose and not in tea bags.

Pour the hot, steeped tea in to the cold water. Remove the sieve and set aside; to the warm tea, add 2 cups of white sugar and stir thoroughly and steadily with a wooden spoon until sugar is completely dissolved.

Let the tea cool to room temperature, or at least about body temperature (96°). Pour it into a large, clean, glass container. Use only clear glass for brewing kombucha.

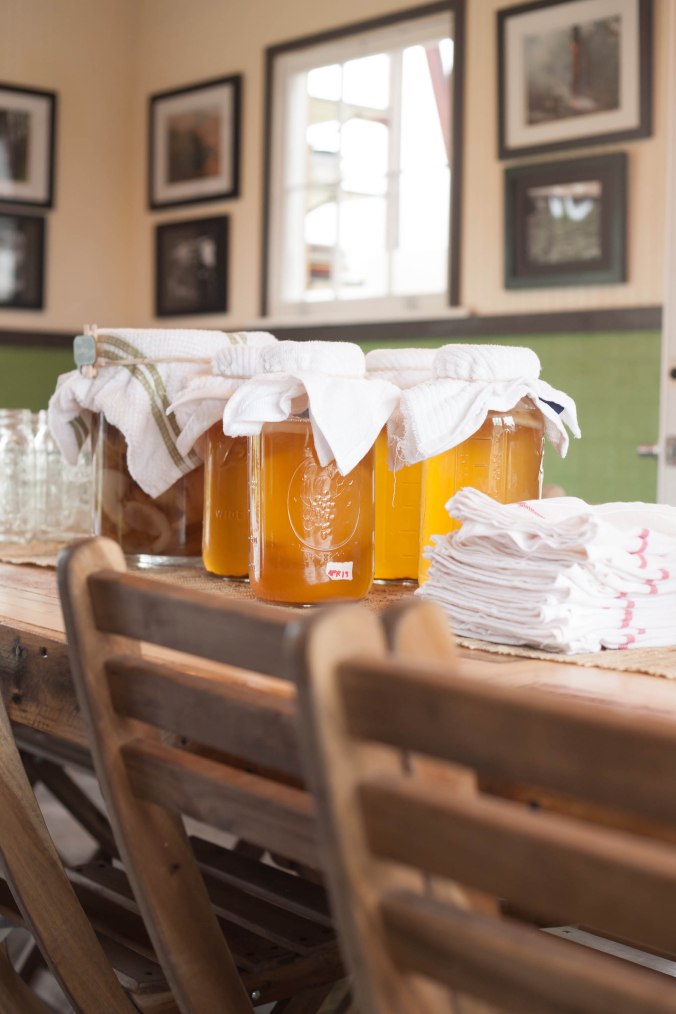
Add 2 cups of kombucha and one scoby.  Cover the lid tightly with a clean, tight-weave towel and secure with a string or rubber band. Fruit flies love kombucha and will try very hard to get inside the container, so be aware!

Set in a cool, undisturbed area (about 70-85° is perfect for these bacteria to multiply) for about two weeks.  You can taste test your fermenting tea at intervals and find your favorite number of days for fermentation. Ambient temperature and other factors may impact the fermentation of your tea, and every various way you try it will be delicious and wonderful!

Download the Kombucha Class Packet
This includes: 
Basic Kombucha
Flavored Kombucha: Seven Food Lab Favorites
Kombucha Fruit Gummies
Probiotic Skin Healing Masque
Hair Conditioning Treatment (Hair Tonic)
Scoby Candy
Kombucha Gelatin

NEF_Kombucha Class_043

NEF_Kombucha Class_047

NEF_Kombucha Class_082

A moment to brag on the delicious Frontier Teas that I recommend for this kombucha…

I’ve done some extensive taste-testing, and I am very particular about my kombucha teas. The final teas I have settled on produce a kombucha so light, so airy and fruity, so delightfully flavored, that it has won best-taste from even the snobbiest of my clientele – and the most devoted kombucha haters!

Fair-Trade Certified, Organic Frontier China Green Tea (light, fruity, vegetal)

Fair-Trader Certified, Organic Assam Tea Tippy Golden (Black) (delicate, mellow, earthy)

For sugar, I use either

Itaja Organic Fine Granulated Sugar

or,

Wholesome Sweeteners Organic Cane Sugar

And as one of my favorite flavorings of all time:
Frontier Whole Elder European Berries

My top fermentation book recommendation, available at all my classes:

The Art of Fermentation: An In-Depth Exploration of Essential Concepts and Processes from around the World

And an explosive new book with recipes for kombucha that will blow your mind! (Book review pending here on the blog!)

Kombucha Revolution: 75 Recipes for Homemade Brews, Fixers, Elixirs, and Mixers
Brewing and sipping,
Mrs H
Face it, you like us
Gram it instantly – #eatorganic #farmandhearth

Authentic Asian Noodle Recipes – that you won’t find anywhere else!

Dear gourmands and explorers,

Have you ever had ramen?

maruchan

No, no, not those coyly named chicken “flavored” noodles that come in a plastic-wrapped briquette, notably the food of starving college students and high-metabolism bachelors.

I’m talking about authentic Asian street food, from the crowded, foggy streets of Shanghai and Tokyo, and the bustling alleyways and street markets of Canton and Yokohama. Served in a deep, round bowl with savory hot broth and piled with fresh vegetables, pulled pork, soft-poached eggs, chili threads and a hundred other choices, it’s slurped up with Chinese soup spoons and slick chopsticks.

marketstreet

An authentic bowl of ramen is hard to find, outside the countries where it originated and a few port cities where skilled immigrants bring their inherited craft to tiny restaurants and back-door kitchens.  What if you could make your own noodles, the real way, the handcrafted way, at home?  What if you could prepare dashi, katsuobushi salt, mayu and the other necessary condiments, sauces, sprinkles and fats requisite to a steaming bowl of ramen, all in your own home?

IMG_20140628_202129

IMG_20140626_205658

IMG_20140626_193145

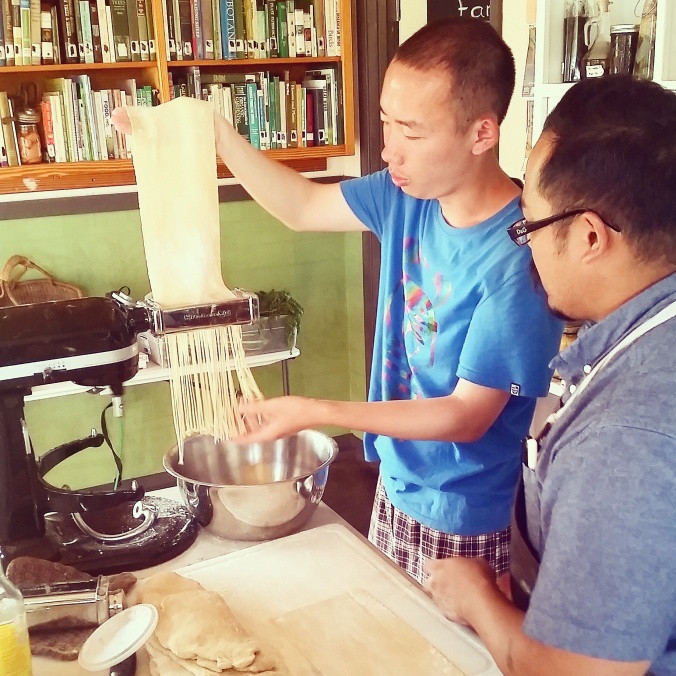
In a recent Asian Noodles Food Lab here at New Earth Farm, we experienced the skill of the master first hand!  Chef Kevin Ordonez, owner of the pop-up-turning-restaurant Alkaline VA, treated a full class to a night of ramen making, rice noodles, and Asian noodle legend.  Truly dedicated to his art, he prepares everything for his restaurant from scratch – from the rich chicken bone broth to the infamous scorched mayu, unique in its preparation and notable for the earthy, smoky flavor it brings to a bowl of steaming noodles.

Visiting Chef Kevin’s pop-up – follow his Facebook page to see where he goes next! – is a treat that everybody passing through the Hampton Roads area should indulge in.  It’s a family-friendly setting, with a revolving, ever-changing menu that uses local, seasonal and fresh foods, inspired by Asian street food and a little Comic-con!

20140628_192406

20140628_192849

20140628_120238

Until that glorious day when you get to sit down to a bowl of Chef Kevin’s rich, fragrant ramen replete with umami explosions and sensational flavors, you can enjoy the wonders of Tokyo and Hong Kong in your own home!  [BANG! POW!]  Chef Kevin, in his typically generous fashion, put together a recipe packet for our readers including not only the noodle recipes, but broth, salts and condiments necessary to create a truly authentic ramen experience.  Download the entire recipe packet, or pick and choose – the recipes are simple, straightforward, and true to their Asian roots. Many of these recipes are difficult to find in English or outside of ramen houses, so I am fortunate to be able to share this rich catalog with you!

ordonez_family

Chef Ordonez with his beautiful family, Melissa and young Max, on a visit to New Earth Farm

Alkaline’s Shoyu Ramen

Download the entire recipe packet here – see below for individual files

By Chef Kevin Ordonez of Restaurant Alkaline VA
This plating creates one bowl of Ordonez’ delicious, signature ramen dish. The next time you’re in Virginia Beach, stop by the restaurant and sample a steaming bowl of the authentic, homemade noodles yourself!

Serves one
5 ounces alkaline noodles*
8 ounces chicken stock*
8 ounces dashi*
1 ounce tare*
1 tablespoon cut scallions
1 tablespoon chicken fat*
1 teaspoon katsuobushi salt*
1 teaspoon mayu*

In a small sauce pot, combine the chicken stock, dashi, and tare and bring to a boil. Bring a four quart pot of water to a boil. Meanwhile, drop a few drops of chicken fat and a pinch of katsuobushi salt into the bottom of your guest’s ramen bowl. When the pot of broth comes to a boil, carefully pour it into ramen bowl. Cook ramen noodles in pot of boiling water for 1 minute. Vigorously stir noodles in water with chopsticks or tongs to prevent clumping. Drain noodles well and add to bowl of broth. Add desired toppings. Enjoy!

*See recipes in Asian Noodle Food Lab recipe packet
A note on desired toppings: Regions and chefs create their own unique toppings, but favorites include slices jalapenos and cilantro, thinly sliced seared pork, kimchi, a soft-poached egg, hot house-made sauces and more. Let the natural environment around you create opportunities for invention! Use local and fresh ingredients, and let us know what your favorites are!

Download the entire recipe packet here (all the following recipes, in one document)
Download Alkaline Noodles recipe
Download Chicken Stock recipe
Download Dashi recipe
Download Tare and Chicken Fat recipe
Download Katsuobushi Salt recipe
Download Mayu recipe
Download Alkaline’s Shoyu Ramen recipe
Download Chicken Udon recipe
Download Ginger Soba Noodles recipe
Download Rice Noodles recipe
Download Rice Noodle Stir Fry recipe

20140628_195300

Shopping for noodle tools?  Here are the gadgets Chef Kevin recommends!

He uses a KitchenAid stand mixer and pasta attachment to make noodles by the thousands in his restaurant. It will work in your home kitchen, too!

KitchenAid Professional 5 Plus 5-Quart Stand Mixer

KitchenAid Stand-Mixer Pasta-Roller Attachment

Enjoy your noodles!

Mrs H
Oodles of Instagram, all the time
Our Facebook followers get it first!

Canning Dill Pickles – recipes, instructions and Food Lab, with hurricane-force winds

This post may contain Amazon affiliate links.
That’s how I earn my blogging income, so thanks for clicking through!

Dear jarred,

I love fermentation, kombucha, dehydrating, the whole bit. But out of all these food preservationy pursuits, my first love is, always has been, and doubtless always will be, canning.  Good, old-fashioned canning!

IMG_20140725_000351

When I was a food-nerdy, homeschooled kid with a lot of time to dream on my hands, I taught myself how to can out of my grandma’s old Farm Journal Cook-Book.  I fantasized about living on a farm, gathering eggs and piling muddy boots by the door, rolling out of bed before dawn and milking cows in a frosty-cold barn in the moonlight. I guess, in a way, these dreams have started to become a reality for me, since now I can gather eggs from 400 layers any time I please (that’s how it works, you know).

Back home in Washington, I spent many months in big groups of women, canning thousands of pounds of produce for our collective families and hauling it off to our respective homes at the end of the day – everybody eats together, the kids play together, and we trash one house – it’s pretty much a win-win.  Miz Carmen usually hosted – you’ll run into her again on this blog.

Our first canning Food Lab of 2014 (we had a few last year, too), was a raging success!  The first one had to be cancelled because of a tornado and a waterspout – I know, really?  Of all things.  The farm lost power, got flooded, and none of the students could drive out of their streets. So, we rescheduled, and many of the students were able to get in on the new date!

20140724_164021

20140724_164103

20140724_175648

Class was focusing on the water-bath canning technique, used for high-acid products like fruits, jams, jellies, pickles and the like.  I decided to make a classic dill pickle for our class; the original recipe came from my long-time mentor and dearly beloved friend Miz Carmen, who was gifted the recipe from another friend, who got it goodness knows where.  I have many favorite pickle recipes, but this one definitely tops the list of classic dills!

Everybody worked hard in class, and they each made a very individual pint of pickles based on the recipe – some added okra, others peppers, still others threw in zucchini; spices and heat varied, ranging from mild crushed red pepper to blazing guns ghost pepper!  Some cut their cucumbers into spears – others left them whole, still others diced them or sliced them.

20140724_163850

20140724_175701

20140724_180916

20140724_182302

20140724_182306

Fresh-Pack Dill Pickles or, Seattle Pickles at New Earth Farm

Download Dill Pickle recipe here

32 lb. pickling cukes, blossom ends trimmed

10 onions (1/3 per qt.)

4 garlic bulbs (2 cloves per qt.)

2-3 bunches dill (1-2 blossoms per qt.)

1⁄2 t. crushed red pepper per qt.

1⁄2 t. alum per qt. (optional)

1 t. pickling spice per qt.

Put all ingredients except cukes in jar. Cut onions, then pack cukes. Begin heating water bath, then prepare brine.

Brine:

3 qt. water

1 qt. apple cider vinegar

1 c. pickling salt

(Takes about four batches)

Cover to 1/2” with boiling brine. Wipe lids, screw on rings. Process 5-10 minutes.

Remove and store 6-8 weeks, to allow flavors to penetrate Pickling spice quantity is variable; brine is not.

Download Dill Pickle recipe here

More from the Food Lab: High Acid Canning Class

To read step-by-step instructions for water-bath canning and enjoy a few more pickling recipes such as my very favorite piccalilli or an award-winning pickled radish, download the entire canning class packet here

Recommended Reading

For those that want to can more, I have a few favorite books to suggest!

The Ball Blue Book is the industry standard on home preservation – canning, drying, and freezing.  Keep this book close at hand all year long – my copy is wrinkled, warped and scribbled on, but I have made good use of it!

Food in Jars, as seen on the popular blog www.foodinjars.com is a gorgeous, well-appointed book full of lush pictures and reasonable, human-sized, small-batch recipes that make a few manageable pints each.

Ball Complete Book of Home Preserving is everything we love about Ball, plus loads more. Lots of recipes to choose from, princples to learn from, and step-by-step instructions. 

But more importantly, some hungry baby robins delighted us by hatching, their nest located just outside the front door of the Learning Center.

IMG_20140725_001525

20140725_164303

It began to rain gently, and class broke up; a few students stayed to help Chef Lyndsay and I can the rest of the vegetables we had prepped (waste not!!).  The light rain turned into a torrential downpour with violent wind, thunder and lightening, and the remaining students eventually had to make a dash for it and escape through the storm! Lyndsay and I canned and cleaned until around 11:00 at night, when we called it a day, locked up, and went home.

I had such a contented, satisfied feeling from canning that day; and the beautiful building just added to my joy (despite the blurry, storm-sogged pictures you can still see how cozy it was!).

20140724_210144

20140724_223255

Canning merrily into the night,

Mrs H
Yes we can on Facebook
You can heart our jars on Instagram

Home-Cured Bacon, Merguez Sausage, Cured Egg Yolks: Charcuterie and more

This post may contain Amazon affiliate links.
That’s how I earn my blogging income, so thanks for clicking through!

Dear cured but never ailing,

In our Food Lab Charcuterie Level One class, we got to play with a lot of really delicious, really wonderful pastured pork from Autumn Olive Farms. Their heritage pork is pastured, well-nourished and consciously raised. Read all the way down to find recipes for bacon, sausage, cured egg yolks and a special pork-belly dish!

Photo by Autumn Olive Farms; Berkshires in a cornfield.

Photo by Autumn Olive Farms; Berkshires in a cornfield.

The talented chef de cuisine Kevin Dubel, from Terrapin Virginia Beach, led an engrossed class through the steps of curing bacon, egg yolks, and grinding sausage at home. (Locals recognized the name of Terrapin instantly, but for our distant readers – it is the most elite and organic, sustainable and delicious fine-dining restaurant in all of Virginia Beach!) Students each prepared their own unique slab of bacon to take home and salt-cure in their fridge, and the self-selected flavors I saw flying across the table ranged from such traditional seasonings as black peppercorns and sage to more exotic choices like dried ghost pepper powder or kombucha. Everybody enjoyed a fresh charcuterie board, finished out with fresh cheese from Sullivan’s Pond Farm, and decanters of our famous farmhouse kombucha flowed!

20140717_183031

20140717_182955

Students loved the chance to dig in and grind meat, add seasonings and experiement. We were blessed to have the expertise of Chef in our Food Lab; the pork for Terrapin is custom-raised, delivered from Waynesboro, VA, and chef breaks it down in his kitchen.  The salumi and charcuterie in the restaurant is house-cured and delectable – flavors are intense, fresh and undeniably delicious!  We loved the chance to meet with our readers and farm supporters, culinary enthusiasts and professionals as well as city-dwellers interested in eating better and living closer to their food.

20140717_185302

20140717_185309

20140717_185322

Home-Cured Bacon

Download home-cured bacon recipe here

10 pounds pork belly

450g salt, kosher (no iodine or anti-caking agents)

225 g sugar

50 g pink salt #1*

Optional: herbs, seasonings, peppers or other flavorings

1. In a shallow, wide bowl or pan, combine salt, sugar and pink salt, and add any additional flavors desired.

2. Use salt box method: roll pork belly in the salt and seasonings to thoroughly coat, and shake off excess.

3. Place in non-reactive bag or pan and set in a refrigerator. If in a bag, massage daily for seven days. If in a pan, flip every other day for seven days.

4. After seven days, remove and pat the pork belly dry. Smoke to an internal temperature of 150°F.  Alternately to smoking, place in 200°F oven until internal temperature reads 150°F.

5. Slice and enjoy!

*Manufacturers started adding pink color to their curing salts so chefs would not mistake it for regular salt. It is also called TCM (Tinted Cure Mix).  Pink Salt #1 or TCM is made up of salt and sodium nitrite; it is used for curing bacon, sausage, hams and other cured products that will be cooked. It is different from Pink Salt #2 which is salt, sodium nitrite and sodium nitrate, which is used for long dry cures such as salami or prosciutto. If you are concerned about sodium nitrites and nitrates used for preserving, remember there are more nitrites in a bowl of spinach than are used to cure an entire salame, and any cured meat that claims to be “nitrate and nitrite free” simply used a celery juice or other vegetable base, loaded with nitrites, to avoid using the sodium nitrite label. There is no nitrite-free cured meat.

Download home-cure bacon recipe here

More downloadable recipes from Food Lab Charcuterie: Level One

Charcuterie Level One Syllabus

Home-Cured Bacon

Merguez Unstuffed Sausage

Cured Egg Yolks

Download all of Level One in a single document!

For those interested in going further, the books recommended by chef are from Michael Ruhlman, the US authority on charcuterie and salumi and Chef Dubel’s mentor and teacher in the trade.

Charcuterie: The Craft of Salting, Smoking, and Curing (Revised and Updated) | Considered by chef to be the “bible” of the home curing world, this book has everything you need to carry off a successful venture in curing, smoking and salting your own foods at home. It’s a less intimidating world than you might think, once you delve in!

Salumi: The Craft of Italian Dry Curing | The techniques discussed in this book will be covered in our more advanced Food Lab charcuterie classes, but you can start researching now!

20140718_105116

Don’t strap your spurs on yet, there’s more!! The leftover slab of pork belly made a delicious staff lunch the next day, braised and slow-cooked in kombucha. Ready to try it out?

Staff Lunch Pork Belly

Download Pork Belly recipe here

One slab pork belly

Handful banana, carmen and green peppers, sliced into rounds

A few whole shishito peppers for good measure

A few whole beets, well-scrubbed

Kombucha

Salt, whole tellicherry peppers

Honey or maple syrup

Fresh herbs on the stem: oregano, thyme, sage and rosemary

1. Set a heavy Dutch-oven style pot over high heat. Gently sear the fatty side of pork belly.

2. While fatty side is searing, sprinkle meaty side with a two-finger pinch of salt, a scattering of tellicherry peppers, and a drizzle of honey or maple syrup.

3. Flip pork over, with fatty side on top. Turn heat down to medium. Again sprinkle with salt, tellicherry peppers, and a drizzle of honey or maple syrup. Pile with herbs, then heap in vegetables – peppers, beets, and potatoes if you wish.

4. Pour over pork one to two cups of kombucha, original or the flavoring of your choice. Cover pot and let cook slowly for one to two hours depending on size, or until tender and internal temperature reads 145F. Check occasionally and add more water or kombucha as necessary.

5. Let rest three to five minutes before slicing or shredding, and serve immediately to happy farm hands.

Download Pork Belly recipe here

Thanks for journeying through our Food Lab class with us!  What flavors do you think you’ll use for your bacon?  Any suggestions for our future classes?

Mrs H
Everything on our Facebook is fresh as a new-laid egg, but less poopy
Our Instagram pictures show that farming isn’t just a job, it’s a lifestyle


This post was shared on The Homestead Barn Hop