Four Infused Chocolate Sweets for Your Sweetheart [but mostly for you, let’s be real]

Dear sweethearts,

Sometimes you just need some chocolate, ya know? You can make these under the guise of crafting sweet treats for your Valentine, but make sure you put a secret stash in the freezer for, like, emergencies or whatever. Chocolate emergencies are a thing.

img_20170211_185644_663

I dreamed up these recipes by having a stack of chocolate in my kitchen, a row of Vitality oils begging to become something delicious, and an insatiable crave for the fruit of the cacao bean in my heart. I ended up creating these based on what I had on hand, and a desire make Valentine’s treats that are gluten-free.

These are basically assembly instructions since these recipes are so ridiculously easy, you pretty much just melt a bunch of stuff and then let it get solid again. Enjoy. 

img_20170211_185535_760

img_20170211_190351_391img_20170210_145456_140

Ingredients

Sugar and Chocolate: Use organic. Use high-quality chocolate. Use Ghirardelli’s or better. Whatever you choose, know that it matters. Cheap chocolate cannot be dressed up enough to taste like quality chocolate. Quality chocolate needs no dressing up to taste amazing.

Essential Oils for Infusing: I use Young Living’s line of Vitality oils for flavoring and spicing up dishes in the kitchen! Vitality oils are approved by the FDA for ingestion, are labelled for supplement use and are delicious, fresh and 100% chemical-free. They are distilled without the use of solvents and grown in pesticide-free soil without any chemical sprays – not even organic ones! You might already have essential oils for flavoring, or you can go here and click “Member” to purchase a 50% off bundle of oils, including five Vitality oils. (Read more about essential oil stuffs here)

download all the recipes in one handy PDF 

img_20170211_185958_044

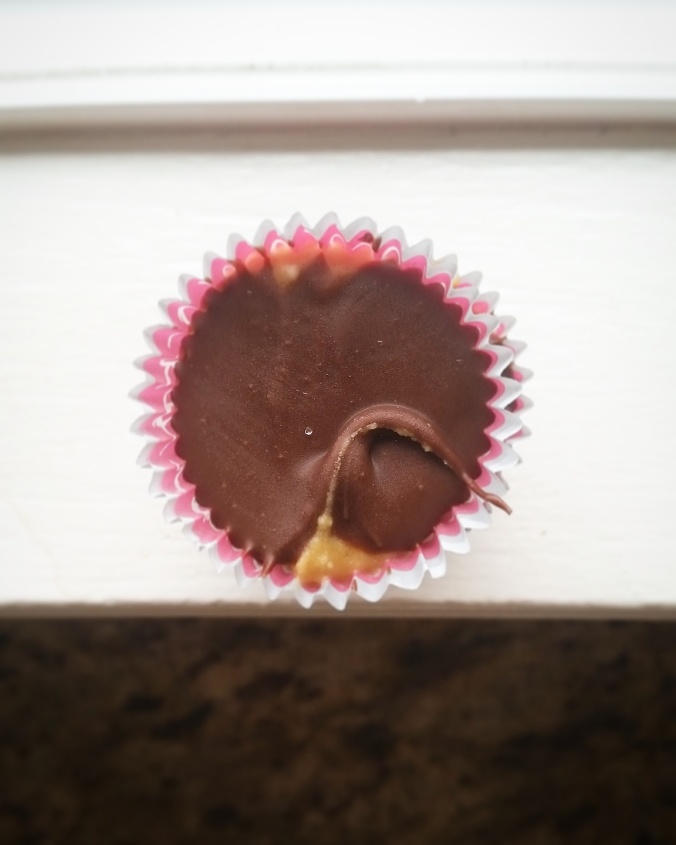
Frankly My Dear Peanut Butter Cups

Rhett Butler might bring the swoon to the silver screen, but these peanut butter cups will have your lover falling all over you with adoration. I don’t even know what I just said but I was really trying to work that Frankly phrase into the name of these delicious, freaking amazing cups of delight. 

printable PDF

1 cup organic, creamy peanut butter, well-churned to mix in the oil **CHECK the label – even “natural” and “organic” peanut butters may include additional sugar, palm oils and hydrogenated soybean oil**
1 Tablespoon Kerrygold or raw butter, melted
1/2 cup organic powdered sugar
1/2 teaspoon Himalayan salt
12 ounces Ghirardelli’s semisweet chocolate chips
6 ounces Ghiradelli’s milk chocolate chips
2 drops Frankincense Vitality essential oil
Paper mini-muffin cup liners, about 30 – 35

  1. Whisk 1/2 cup peanut butter, butter, powdered sugar and salt together with a fork. Set aside.
  2. In a glass microwave-safe bowl, melt the chocolate chips and peanut butter together, stirring every 30 seconds until melted and smooth. When fully silky-smooth, stir in 2 drops of Frankincense Vitality oil and stir vigorously.
  3. Place about one teaspoon of chocolate in each mini muffin cup.
  4. Spoon a teaspoon of peanut butter filling onto each chocolate blob.
  5. Spoon a final teaspoon of chocolate on top of each peanut butter blob, smoothing out the chocolate. Remove to the refrigerator or freezer to chill until firm; store in an airtight container in the fridge or freezer and ENJOY! into the center of each muffin cup.

img_20170209_200220_404

img_20170211_190031_509img_20170211_185904_575

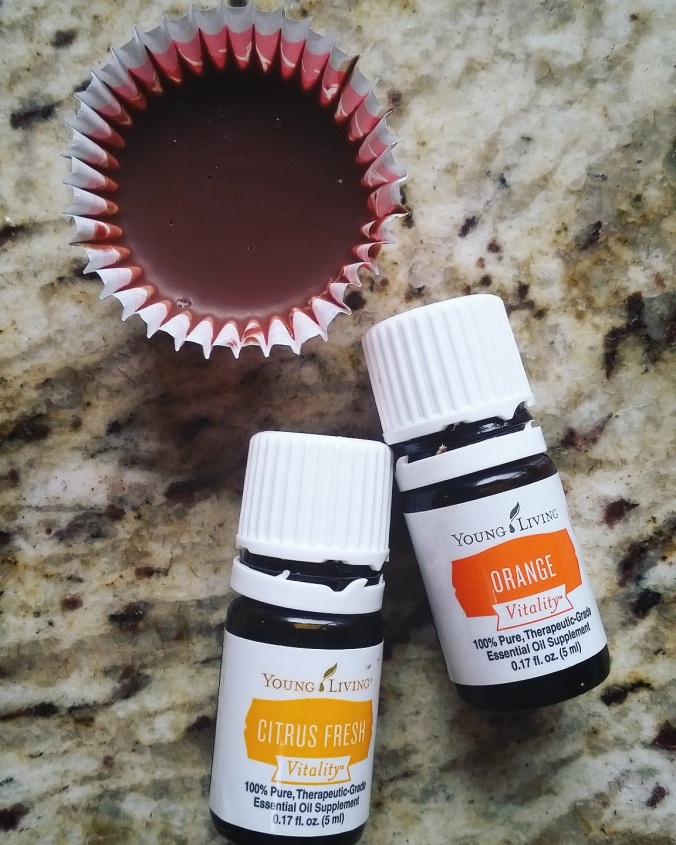
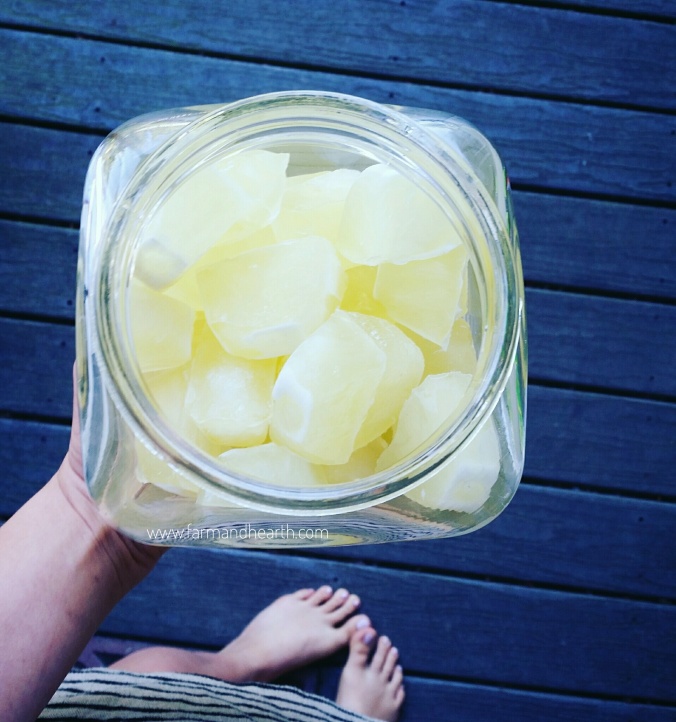
Citrus Dream Meltaways

My friend Holly taught me how to make meltaways back in Virginia Beach. I couldn’t remember exactly how we did it so let’s be real, I just had to make measurements up to recreate our chocolate experience – but follow these measurements approximately and you’ll have delightful melt-in-your-mouth chocolate treats. You can use any flavorings you like – citrus is a particular favorite of mine – and the more chocolate to coconut oil ratio you have, the less melty they will be. 

printable PDF

img_20170211_185435_456

1 cup organic expeller-pressed coconut oil or virgin coconut oil if you like the coconut flavor
12 ounces Ghirardelli’s semisweet chocolate chips
5 drops Citrus Fresh Vitality essential oil blend
4 drops Orange Vitality essential oil

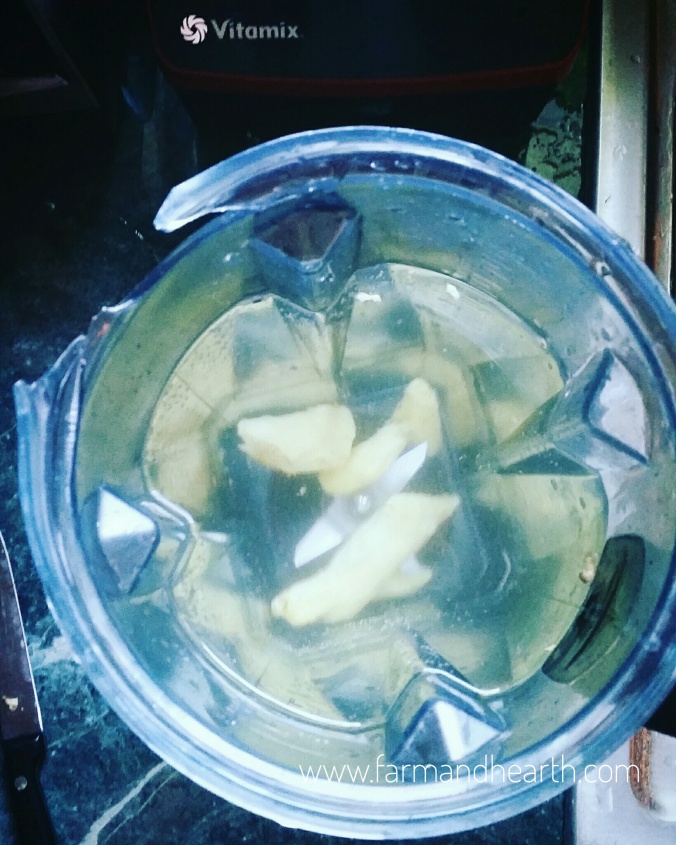
  1. In a glass microwave-safe bowl or a double-boiler, melt the chocolate and coconut oil together. For microwave: heat for 60 seconds, stir, then heat for 30 second intervals, stirring in between, until melted and smooth.
  2. Remove from heat/microwave and add Vitality oils (other flavors I love: Peppermint Vitality for a peppermint patty flavor, Lavender Vitality for a tea party, Ginger, Clove and Nutmeg Vitality at Christmas time, Cinnamon Bark Vitality for a spicy burst …).
  3. Pour or spoon into small silicone molds or paper mini-muffin cups. Freeze until solid; store in an airtight container in the freezer. Melt in your mouth GOODNESS!!

img_20170211_185250_653

img_20170211_185322_534img_20170211_185218_583

Bergamot Berry Fudge

This is an easy, easy fudge. It’s stupid easy. You can make it on the stove in a heavy pan, in a double boiler or in the microwave – whatever floats your chocolate fountain boat. 

printable PDF

img_20170211_190507_528

12 ounces Ghirardelli’s semisweet chocolate chips
9 ounces butterscotch chips
1 14-ounce can organic sweetened condensed milk
1 teaspoon vanilla extract or caramel extract
1/2 cup Ningxia wolfberries, separated so they aren’t in one sticky ball **
5 drops Bergamot Vitality oil

  1. In a heavy pot, a double-boiler or in a microwave-safe bowl, melt the chocolate chips, butterscotch chips and condensed milk together. For microwave: heat for 60 seconds, remove and stir, then heat for 30 second intervals, stirring in between, until fully melted and smooth.
  2. Remove from the heat/microwave and stir in extract, wolfberries and Bergamot Vitality oil.
  3. Pour into a 9×9 pan and let cool (it will firm up very quickly!!) Cut into cubes of divine goodness and float away on a blissful cloud of all your happiest dreams come true. I mean literally. Also share some with people you really really like.

**I buy the Ningxia wolfberries from Young Living in one-lb bags. Absolutely delicious, and bursting with antioxidants. Just what we need to make our fudge a lil less, um, guilty.

img_20170210_115152_796img_20170211_190612_709img_20170211_190351_391img_20170211_190301_800

Infused Brownies Virtually From Heaven

Use your favorite brownie recipe or mix to infuse the Brownies Of Your Dreams.  Serve with lavender-vanilla ice cream, oh creative one! 

printable PDF

1 Ghirardelli’s triple-fudge brownie mix, another brownie mix you love like this awesome gluten free one for an 8×8 pan of brownies, or a single-pan recipe of these seriously amazing Paleo brownies

Lavender-Lemon Brownies 
5 drops Lemon Vitality essential oil
2 drops Lavender Vitality essential oil

Peppermint-Orange Brownies 
8 drops Orange Vitality essential oil
4 drops Peppermint Vitality essential oil

Frankincense-Bergamot Brownies 
3 drops Frankincense Vitality essential oil
8 drops Bergamot Vitality essential oil

  1. Stir together liquids for the brownies and drop in the Vitality oils of your choice. Add dry ingredients and continue with recipe as directed.
  2. Serve to an adoring, grateful crowd of brownie lovers, or, don’t share. You choose.

img_20170210_141611_864img_20170210_141739_881img_20170211_190213_196img_20170210_141655_967

If you have brilliant ways to use the Vitality oils, I am ALWAYS keen to hear them!!!!! Shout out your fabulous ways in the comments below and I will try them out in my own kitchen!!!!!

LOVE to all you beautiful WONDERFUL readers!!!!

Happy Valentine’s Day!!!!!!!

Mrs H
follow the Insta for food
follow the Insta for oils

Ginger Ice Cubes & Good Girl Moonshine Hack

Dear summer,

Visiting the Domestic Endeavors farm is always an exploration in creativity and analysis. Miz Carmen is one of the most creative and innovative minds I know and it is pure pleasure to visit her, any time of year. At our last canning soiree, it was a pleasantly baking 90ish degrees (anything is pleasant after the saturating humidity and soul-sucking heat of 110 in Virginia Beach, right?), and she kept us all hydrated with a variety of homemade drinks, including her custom tweak of a Trim Healthy Mama favorite, the Good Girl Moonshine.

20160818093332

trim healthy mama

One of the greatest features in this icy drink is the ginger ice cubes, which can be used in any of a hundred thousand of your own beverages – adding zip and raw goodness to lemonade, apple cider tonics, Ningxia Red, sparkling water or whatever else your dehydrated body yearns for.

Ginger Ice Cubes

Printable Recipe
How potent should they be? That’s up to you. Miz Carmen states that she uses five ounces of peeled root per Vitamix-load of water. Stronger ice cube flavor means saving more room in your freezer, because you can use just one, instead of two – so mess with the numbers and find your happy place! (Comment below if you have a dream measurement
!)

Organic ginger root, peeled with a spoon
Filtered or clean water
Nut milk bag (I like this one) or linen cloth
Ice cube trays
Vitamix or blender

Throw ginger in a Vitamix or blender and fill to manufacturer’s recommended volume (so, do not OVER fill) with filtered water. Blend and increase speed to HIGH for about a minute, to hyper-rupture the cells of the ginger for maximum flavor and nutrient release.

Strain through a linen cloth or mesh nut-milk bag, squeezing the root to get all that goodness.

Pour liquid into ice cube trays and freeze until solid; store in the freezer, obviously. Use in the following recipe.

20160818093504

20160818093929

Peeling ginger with a spoon is a handy trick I learned in the restaurant kitchens of Virginia Beach!

20160818093855

How much water you use – it is entirely up to you.

20160818093815

Blend on HIGH. The Vitamix has the capability to hyper-rupture plant cells, like the advanced cold-press systems used for making juice today. Read more about ways to use the Vitamix on my popular blog post, 70 Awesome Things to do With Your Vitamix!

20160818093741201608180937042016081809362920160818093542

And enjoy!!!!!!!!!!!

20160818093421

Domestic Endeavors Makes Good Girl Moonshine

Printable Recipe
The original recipe comes from the Trim Healthy Mama cookbook – you can read more about their food philosophy in the Trim Healthy Mama Plan.  They call this an all-day sipper – a metabolism booster that doesn’t spike insulin or provide significant fuel that could throw your fuel/burn plan. 

1/2 Tablespoon THM Gentle Sweet or Super Sweet (depending on your sweet tooth)
1/8 cup (2 Tablespoons) to 1/4 cup raw apple cider vinegar or make your own
2 teaspoons caramel extract (Miz Carmen used this one, so I got some on Amazon)
1 – 2 ginger ice cubes (see recipe above)
Handful of regular ice cubes
12 ounces filtered water or sparkling water (or one can of La Croix)

Load a quart jar with ice cubes and the ginger cubes. Add other ingredients and stir briskly to combine. Sip all day!

cozy

Salute to staying cool and hydrated even on the hottest days!!! You are my sunshine!!!!!!


A Fall Menu: Silky Squash Soup and other delicious stuff you’ll want to eat

All of my recipes come packaged in a downloadable
PDF that you can save to your computer.
Read on for the recipe packet from our fall menu!

Dear Pompkin,

I just like the way early Americans spelled pumpkin. Pompkin.

Pumpkins, squash, and all manner of root vegetables feature strongly in the fall. This is some of my favorite cuisine! Filling, rich and hearty, it qualifies for comfort food any day of the week. Buttery baked dishes, creamy soups and silky puddings dazzle me all through the long winter months! (Although to be honest, the winter in Virginia Beach is starting out a little weak – it was in the 70s last week, and this is October we’re looking at.)

And of course, I love everything about Thanksgiving. Candles, corn cobs, turkey and all that festive business sucks me in every time. I have so many deep and wonderful memories of family life associated with Thanksgiving – the turkey placemats my grandma made, the battered yellow tablecloth she used every year, the chaotic and sometimes argumentative and always loving gathering around that all-important Thursday.

IMG_20151023_111611

IMG_20151023_111657

Fall is just full of delight for me. I taught Cooking with Fall Veggies at Norfolk Botanical Gardens this week, and the class was a slam-dunk. I brought leftovers to my husband on base, and he and the guys there devoured it and pronounced it good. I made the baked root vegetables dish for an Oil Tribe class the following evening, and everybody was asking for the recipe!

Solid, simple food is the best. It wins our hearts every time! Our menu featured rustic, seasonal dishes.

IMG_20151023_111508

The soup was a perfectly silken puree, topped with pepitas. For a vegan alternative, swap out the bone broth for a full-bodied vegetable broth made with dried shishito mushrooms for lots of meaty umami flavor, and trade the butter for expeller-pressed coconut oil or fruity olive oil.  Filled with butternut squash and pumpkin, this dish is nourishing to body and soul.

IMG_20151023_111941

IMG_20151023_111957

IMG_20151023_110945

The Maple-Glazed Baked Root Vegetables were a slam dunk. We chose to coarsely chop beets, carrots, celery root, butternut squash, sweet potatoes, fingerling potatoes, parsnips and onions for our selection of roots and squash; any combination of these or other root vegetables is perfect.

IMG_20151023_111829

IMG_20151023_233644

A family favorite, Spicy Sweet Potato Fries make a special treat any time. I love to dip fries, so we created a special dipping sauce of mayonnaise (any homemade or high-quality store-bought, or aioli), blended with a lacto-fermented homemade sriracha sauce.

IMG_20151023_111739

IMG_20151025_163611

IMG_20151025_163410

IMG_20151025_163329

IMG_20151025_163246

We also made a delicious Maple Cornbread, using coarse, colorful cornmeal from Indian corn. Colorful corn contains a little more nutrition than regular sweet corn – no surprises there!

IMG_20151024_143241

IMG_20151024_143317

And because she rolls that way, Lady Camille was in the carrier on my back while we set the room up for class. Once class began, our friend Mary snuggled baby during the whole thing.

IMG_20151023_111310

Silky Squash Soup with Bone Broth

I created this dish while I was in Washington and wanted to serve a warm, filling meal to my family during the Seahawks game (we lost. It sucked. We needed comfort food). It’s simple, straightforward and truly not all that unique. There are millions of variations you could create from this basic dish, and the measurements I provide here are basic guidelines – you can do whatever you want, really.

4 cups bone broth or an alternative broth
2 cups pumpkin, raw and cubed, or cooked and pureed
2 cups butternut squash, raw and cubed, or cooked and pureed
3 large carrots, coarsely chopped
3 shallots or 1 medium onion
1 15-ounce can coconut cream
3 – 6 cloves garlic
1/2 cup butter or an alternative fat
Pepitas, dried pumpkin seeds, for garnishing
Salt and pepper

In a skillet, heat the butter. Add cubed pumpkin, butternut squash, carrots and onion; or add what is cubed, and reserve pureed mixtures. The goal is to cook the squashes down until they are soft. While mixture is cooking, crush garlic and set aside.
Once mixture is soft, use broth to help blend it until smooth; add garlic while blending, and then pour into a pot. Alternatively, you can use an immersion blender for this step. If you are using pureed pumpkin or butternut squash, add it now, and any more broth, and begin to heat mixture. Whisk in coconut milk. Add salt and pepper to taste.
Ladle into bowls and serve hot; sprinkle with pepitas before eating.

If you use ghee, bacon fat, coconut oil, olive oil or avocado oil instead of butter, this dish qualifies as a Whole30 and Paleo soup.

Download the recipe PDF for silky squash soup, baked root vegetables, spicy sweet potato fries, fermented dipping sauce, maple cornbread and a printable menu

IMG_20150921_073317[1]

IMG_20150928_095615[1]

I know you’ll feel just as indulgent and spoiled as I do when you get to enjoy these delicious foods … and let me know what your favorite tweaks are so I can try your versions, too!

Andrea

Download the recipe PDF for silky squash soup, baked root vegetables, spicy sweet potato fries, fermented dipping sauce, maple cornbread and a printable menu

Beauty Care: Face Wash, Sleepy Rollers, and Tummy Tuck!

(Tummy tuck? What? Go on, please!)

Dear adorable,

The husband and I came home to Seattle for a brief visit, and I kicked off the #seattleoiltribe happenings with a huge beauty make & take! We made four different items, using the Base lotion in some of them, and we did a lot of Zyto scans. And mostly, we visited, we laughed hysterically until we snorted (true story!) and we loved being with friends we hadn’t seen for months and years!!!

image 7

I flew out to Seattle with the two babies, and Gary followed a few days later. I met many wonderful friends on the flight from Virginia to Washington state, and they made my trip a peaceful and painless experience.

image 2

IMG6

imaGE 6

When I was planning my trip, I ordered essential oils, containers and ingredients for the make & take items from Virginia, and had them shipped straight to my mom’s house in Seattle. This was perfect! The first event in Seattle was on a Saturday.

image 4

We opened the doors early for Zyto scans and assessments. Using galvanic skin response, the same technology as a polygraph test, the hand scan takes about three minutes and measures 74 biomarkers in your body, seeing what is out of range. This tool does not diagnose or treat disease. Neither do I!

image 8

Before class began, we made a huge batch of the Base lotion. I mean, it was a bathtub-size bowl that my mom uses to make chocolate chip cookies at Christmastime. I used over seven pounds of shea butter in one sitting – and we blew through virtually the entire monstrous bowl of lotion over the course of the class. It was INSANE! I loved every minute of it!!

imGG`

IMG2

IMG8

I live-streamed the event on Periscope (find me there, Andrea Huehnerhoff. You can watch my classes live, too!).

IMG4

We made individual Zyto rollers for everyone, based on their Zyto scans – this is one of my favorite things to do. Immediate solutions!!

IMG3

We made Sleepy Time Rollers for rolling on your feet just before bed; Silky Foaming Face Wash for refreshing your skin.

IMG_20150927_223647

And the insanely popular Tummy Tuck Lotion for those areas of skin that yearn to be tight again. We ran out of THIS before class even ended, and I’m making more already!

And there are so many other things we can make!

IMG5

So many oils! I went a little crazy hehehaha

Download all five recipes here
(Sleepy Roller, The Base, Tummy Tuck)

Tummy Tuck Lotion
I use this as a part of my post-partum tummy tightening protocol! 

2 ounces base lotion
5 drops Geranium
5 drops Lavender
5 drops Grapefruit
5 drops Elemi
Where to buy containers, ingredients, and effective essential oils

Place base lotion in a 2-ounce container.
Add essential oils and gently combine using a chopstick or another small implement.
Keep tightly sealed in a cool place out of direct sunlight.

Download all five recipes here

I look forward to seeing you at one of our events … online, or in person – in Seattle, or in Virginia – or anywhere else in the world!!!!!

Blessings,

Andrea

IMG7

Clean-Eating Paleo Baking Powder: no sodium aluminum sulfate required

Dear leavened,

I was happily stirring up a triple batch of banana bread a few days ago when I was dismayed to realize we were out of baking powder! Fortunately, I had the ingredients on hand to whisk together a batch of homemade baking powder. It’s an easy recipe to remember, and it took me just a few extra moments to stir up enough to fill my baking powder container.

Of course, the banana bread came out perfectly; and if you’ve already downloaded the recipe for yourself, you know how good it is!

I was baking cookies with a friend once when she revealed she had no baking powder. “Isn’t baking soda basically the same thing?” she asked, surprised that I wasn’t accepting the brightly colored box of Arm & Hammer.

In a sense, yes; baking soda and powder are both chemical leavening agents that build puffy, gassy bubbles in dough much faster than fast-acting yeast or sour starters do.  Hence, things like banana bread, Irish soda bread and baking powder biscuits usually fall under the category of ‘Quick Breads’.

20150430_134127

Terms and Conditions 

Baking Soda (sodium bicarbonate, or alkali), is used in recipes with acidic ingredients it can interact with, like vinegar, lemon juice, buttermilk, non-Dutch processed cocoa, molasses, honey, and so on.  Baking soda is instant-acting and batters made with this leavener should always be baked immediately after mixing, with minimum stirring involved.

Baking Powder is a mixture of baking soda, an acid salt, and usually a starch to absorb moisture so that the soda doesn’t react with the dry ingredients until the wet components are added.  The acid salt can be cream of tartar. This acid salt takes the place of adding lemon juice, buttermilk or another acidic liquid to your batter; magically, the acid can be wetted by whatever liquids you add to your batter, and activate the baking soda! The cookies my friend and I were making in the story above would not have been sufficiently leavened without baking powder, because there was no acid in the cookie ingredients to activate the bubbling of the baking soda. The third ingredient, a starch, which is technically optional, can be organic cornstarch – or arrowroot powder, if you are minimizing grain ingredients in your diet. If you leave the starch out entirely, you will have to use your baking powder right away, or within a few days or weeks! This is one way Paleo baking powder is different from regular baking powder!

Double-Acting Baking Powder is what you would buy in the grocery store, as packaged single-acting baking powder is generally only sold for commercial baking.  As the name indicates, double-acting baking powder leavens twice (hence the double-acting).  When the batter is initially mixed, there is an immediate acidic reaction from the cream of tartar, with the wet ingredients of the batter and the baking soda, and carbon dioxide gas is produced.  The second reaction comes from a second acid that doesn’t activate until the temperatures are elevated (that is to say, the batter goes into the oven), and the gas cells expand and cause the batter to rise. The second acid is usually calcium acid phosphate or sodium aluminum sulfate, two ingredients that many health-conscious consumers are now choosing to avoid due to possible neurological issues associated with aluminum.

11178274_10153391697815921_7062278023106730774_n

10978568_10153223781880921_375650625884420965_n
Homemade Baking Powder is not double-acting – if you use homemade baking powder in a recipe I would recommend baking the batter right away and not delaying (so make sure you preheat the oven when you start mixing your ingredients!). Homemade baking powder is used in the same ratio as store-bought. If your recipe is for a batter that sits in the fridge overnight or which specifically calls for double-acting baking powder, know that the homemade one will probably not produce the desired effect; that second, heat-activating acid would need to be present.

How long do these last in my cupboard?  
Baking Soda can sit in the cupboard, sealed, for an indefinite length of time.  If you are worried that it is too old and you want to test the effectiveness before mixing it into your ingredients, mix 1/4 teaspoon of soda with 2 teaspoons of vinegar.  It should bubble up immediately just like in science class.

Baking Powder should only sit in the cupboard for about six months; the components to homemade baking powder, however (soda, cream of tartar, arrowroot/cornstarch), can sit separately in the cupboard indefinitely so you can keep those handy and simply mix up small batches at a time. To test if baking powder is still active, mix 1 teaspoon powder with 1/2 cup hot water; it should bubble up with carbon dioxide immediately.

3cef5b62eb0d__1296760493000

How much baking powder do I use in a recipe? 
If you are creating your own recipe, a good rule of thumb is 1 to 2 teaspoons baking powder to 1 cup of flour.  Too much baking powder, and the gas bubbles will expand too quickly and cause the batter to collapse in baking.  Too little baking powder, and there won’t be enough gas bubbles and the batter will be dense and tough.

Download Baking Powder Recipe

[Paleo] Aluminum-Free Single-Acting Baking Powder for Storage

If you bought this at the grocery store, it would cost twice as much as regular baking powder. Crazy, huh? Use this baking powder teaspoon for teaspoon to replace store-bought baking powder. The ratio is one part baking soda, two parts cream of tartar and one part starch. 

Sodium bicarbonate: 1/4 cup baking soda
Acid Salt: 1/2 cup cream of tartar
Starch: 1/4 cup arrowroot powder or 1/4 cup organic cornstarch

Whisk ingredients together, pressing through a mesh sieve if baking soda has clumps. Store in an airtight container for less than six months.

Immediate-Use Starch-Free Baking Powder

The ratio for baking powder is two parts cream of tartar to one part baking soda. This baking powder is meant to be used immediately – do not store it! Since there is no starch, you only need 3/4 teaspoon total to replace 1 teaspoon in a recipe calling for standard baking powder. 

To replace 1 teaspoon of baking powder in a recipe, without any additional starches:
1/2 teaspoon cream of tartar
1/4 teaspoon baking soda

Remember, your baked goods must go in the oven immediately after you mix them, as the carbon dioxide bubbling will have begun the second liquids contacted the acid!

Download Baking Powder Recipe

11174914_10153409453325921_8631737741642784364_n

Happy Baking!

Mrs H

Mom’s Internationally-Acclaimed Banana Bread: more famous than any other

Dear hungries,

This morning I had a mountain of black bananas, which the husband has been eyeing hopefully while whispering banana bread under his breath, hoping it sinks into my subconscious. I pulled out my splattered and ragged banana bread recipe, passed down from my mom, given to her by a college friend’s mom and used until well-worn before any of us precious little angels were born.

20150430_134127

This banana bread is simple, and classic.

It has everything a purist loaf of banana bread needs – sweet, overripe bananas, no additional mix-ins. A moist and tender crumb, and a sweet, slightly sticky top that cracks and splits right down the middle, in tender perfection. Cut a slice and melt on some butter – the world stops turning as you drift into a heavenly banana dream. And naturally, when stirring up the batter you can add all the walnuts and chocolate chips you like – a little banana bread blasphemy is always wickedly fun.

This recipe has been emailed, copied, and written down so many times by so many people, my mom spends half her time on the computer sending it out. It’s about time it was posted online for all of you to enjoy!!

20150430_150921

20150430_150933

Download the Best Banana Bread recipe here

Best Banana Bread

You can add chocolate chips, walnuts, dried fruit or even coconut flakes to mix up the flavors and textures!  I tend to go the purist route and not mix in anything – I always plan to do it next time! 

Heat oven to 325 degrees.

Combine in bowl:
2-3 ripe bananas, mashed
1 cup sugar
1 egg

Blend in:
2 cups flour
½ tsp salt
½ tsp soda
1 ½ tsp baking powder

Add:
½ cup Canola oil

Mix well, pour into greased pan.  Bake 45-60 minutes. Serve hot, with butter!

Banana Muffins: spray paper liners in a muffin tin. Scoop in ¼ to 1/3 cup batter in each cup; makes 12.
Mini Loaf Pans: spray mini loaf pans before using; makes three.
Hawaiian French Toast: use slices of banana loaf instead of regular bread when preparing French toast.
Elvis Style Hawaiian French Toast: spread two slices of banana bread with peanut butter; spread one slice with jam, and make a sandwich. Dip into egg and milk for French toast, and cook as French toast.

Alternative Ingredients
Replace 1 cup sugar with ½ cup honey
Replace Canola oil with melted coconut oil

Download the Best Banana Bread recipe here

 Enjoy your banana bread, and please share with me your ideas for mix-ins!

Mrs H

UnGranola Porridge: grain-free, dairy-free, Whole30 kind of

Dear -free advocates and hungry breakfasters,

While I like to think we eat a clean, real-food diet, doing the Whole30 challenge has revealed to me where I am lacking in that area – highlighting bad habits I’ve developed, areas I’ve gotten lazy. And while I love everything on the Whole30, sometimes I just want to eat a breakfast that isn’t made out of eggs!

Well hello, UnGranola.

19719_10153354894830921_6341393825634410924_n

Whole30, in short, means no dairy, no grains, no pseudo-grains like quinoa seeds or buckwheat, no sugars including maple syrup or honey or stevia except for fruit sugars, no legumes (peanuts, beans, soy), and no psychologically-enhanced grain-free Paleo baked indulgences like coconut flour pancakes and muffins. What I do eat are a lot of eggs, mountains of green vegetables, free-range and grass-fed meat from local farmers, fruits, nuts … potatoes, root vegetables, seaweed, seafood, coffee, Choffy, tea and lots of other good stuff. It takes creativity and energy to put together meals without dropping back into habits that are long-established, and there is basically Nothing At All in the grocery store that is pre-made that fulfills the Whole30 requirements, so if one is tired and doesn’t feel like cooking but is also hungry, one is out of luck. (You’d be surprised how much stuff has pea protein in it, am I right?)

Benefits for this pregnant lady on Whole30 (under midwife supervision) include: on Day 23 today, this is the longest stretch I’ve gone without throwing up since I got pregnant. I love me some good food, but I hate seeing it twice! As of about Day 5, my life-interruptingly uncomfortable hiccups and overwhelming chest-pressure ceased entirely, enabling me to do things like breathe during the day, and sleep laying down, instead of propped up over four hundred pillows. And my legs – it’s like the excess baby weight is already trimming itself down despite the fact that I am consuming more calories now than I ever did before, because my clothes fit more easily (but the belly still grows!).

So back to eating a breakfast with no eggs. We eat a lot of fried, scrambled, poached, and boiled eggs in general, because we like them. Yet sometimes I just want something else in the morning, like a hot bowl of porridge with fruit on top. I don’t know if this strays in to “non-Whole30 approved psychological destruction” of the program, but at any rate it keeps me happy on the program and I still feel refreshed, nutritionally fulfilled, and experience none of the negative side effects that my previous (carbohydrate-enhanced) meals were apparently giving me.

I also wanted something Relatively Fast – I don’t always feel like/want to spend forty hours in the kitchen making a meal, so I wanted to make a mixture that could be chucked on the stove, oatmeal-style, and cooked up in just a few minutes. I wanted something the little kids would eat. I wanted something with nutrition, variety, flavor and spices. I wanted something that goes in a bowl and I eat, earthy peasant-style, with a too-large spoon. This satisfies all the requirements, and still meets the standard of no grain, dairy, legumes blah blah.

Enter UnGranola.

26

Peaches ‘n cream, anyone?

new

This porridge fulfills the desire for texture, warmth, a little sweetness if you desire (sometimes I do, sometimes I don’t). And while I like the popular Paleo nut-butter porridges and make those from time to time, they ultimately are something I can only have few and far between because the very nutty smoothness of them gets underwhelming after a while. Download the recipe PDF for UnGranola Porridge at the bottom of this post!

1

2

4

6

The ingredients can vary widely based on your taste, or what you have available in your pantry. Spices can be mixed up to suit your personal preference, too – I love using cinnamon, cloves, fresh nutmeg and a little vanilla powder – because on Whole30 you can’t use vanilla extract, there are too many illegal ingredients! Plus, using powder keeps my mixture nice and dry.  I order it from Beanilla and use it for all sorts of things in the kitchen!

7

Everything goes in the blender or food processor to mix – you have to be careful that you don’t churn it into a paste-like nut butter, though! I think a food processor is the best option, but I don’t have one so the Vitamix is my go-to. The new, wide-based Vitamix would be perfect for this! Sometimes I use the dry cup, but it doesn’t make much difference really.

9

10

Once everything is ground together, as coarse or as fine as you prefer, you have a handy mix to keep in the fridge! I keep it refrigerated because I don’t want the nut oils to go rancid – our house gets pretty warm in the spring and summer. A dark, cool pantry might be just fine, but the fridge is a nice, safe bet.

11

12

To prepare your delicious morning bowl of UnGranola, you take a scoop of the mixture and add a liquid to it. This can be whatever you like! Coconut cream and water, coconut milk, fresh almond milk, goat milk or cow’s milk if you drink dairy.

13

14

The almond milk, if you’re on Whole30, will probably be homemade, because there will be carageenan and other 30-illegal ingredients in most packaged almond milk.

15

16

17

18

Then, you have the option of adding a sweetener if you choose! For a banana-blend UnGranola, mash in a sliced fresh banana, or slice in a frozen one and let it cook down while you stir and mash. The little kids seem to particularly like this version, and it makes a very pleasingly thick, gently-sweet porridge.

19

20

For Blueberries ‘n Cream, you can add blueberries or use them instead of bananas. Add them fresh or frozen close to the end of cooking, and gently stir in! It’s a good thing summer is coming because I’m almost out of frozen blueberries – we pick at least a hundred pounds a year and wash, freeze on pans and then store in gallon bags. After serving the bowls, I like to add a little extra spice to the top – some cinnamon and fresh nutmeg will enhance these berries!

21

22

For Peaches ‘n Cream, I popped open a jar of peaches from our summer harvest. You could use fresh or frozen peaches, too! I mashed them in with a fork while the mixture was cooking.

23

24

Serve the granola with more fruit, spices and milk if you like. A swirl of jam or jelly, some dried fruit, or a rich dollop of butter, ghee or coconut cream. The sky is the limit!

Download the recipe PDF here! 

UnGranola Porridge

Measurements will vary; these are all approximate! You can increase one ingredient in favor of another, if you prefer. A nut-free version is distinctly smaller but still possible. 

UnGranola Mix
Makes approximately 3 – 4 cups of mix, or 6 – 8 servings (1/2 cup dry mix per serving)
1 cup raw walnuts
1 cup raw, dried pumpkin seeds (or other gourd)
1 cup flaked or shredded unsweetened coconut
3/4 cup raw pecans
3/4 cup shelled, raw sunflower seeds
1/4 – 1/2 cup coconut flour
1/4 – 1/2 cup almond flour
1/4 – 1/2 cup hempseed
1/4 – 1/2 cup chia seed
1/4 cup raw cashews
1/4 cup ground flaxseed
Vanilla powder to taste (optional)
Ground cinnamon and cloves to taste
Freshly grated nutmeg
Ground pink Himlayan salt

Liquids:
Coconut cream and water, coconut milk, almond milk or another nut milk, a dairy milk if you prefer

Sweeteners (optional): 
1 banana or another fruit, or maple syrup, honey, stevia or another sweetener of your choice

Making the mix
Pour all of the UnGranola Mix ingredients into a blender or food processor. If using the Vitamix, turn to speed 8 and stop every 30 seconds to scrape container with spatula; press down gently with the tamper while mixing, being careful not to over-blend into a paste.

Scrape mix into a glass container for storage; cap and store in the refrigerator.

To serve UnGranola Porridge: 
Scoop 1/2 cup of mix and place in a small saucepan. Add up to 3/4 cup of the liquid of your choice, more if you like your porridge thinner. Stir briskly with a fork over medium heat, whisking in a banana if you choose and mashing it fully or choosing another variation or sweetener. Heat for about ten minutes, stirring frequently, or until mixture is hot and thick to your liking. Serve with additional fruit, spices or milk if desired.

Tips: If there are any coarse pieces of pumpkin seed or coconut, longer cooking will soften them. If you made your porridge too thin, whisk in a little coconut flour to bulk it up.

Variations: 
Blueberries ‘n Cream: Stir in fresh or frozen blueberries towards the end of cooking. Grate fresh nutmeg on top before serving.

Peaches ‘n Cream: Stir in fresh, canned or frozen peaches, dicing or mashing in to your preference. Sprinkle with cinnamon and pour in cream to serve.

Pumpkin Spice: Add allspice to the spice mixture, and increase the amounts.

Gingerbread Wonderland: Add ground ginger and additional nutmeg to the pumpkin spice version; serve with hot applesauce.

PB&J: Swirl in a dollop of peanut butter, almond butter or another nut butter, and add a spoonful of jam or jelly just before serving.

Hot Butter: Top with a slab of butter or ghee, and a sprinkle of salt.

Download the recipe PDF here!

25

I hope you’ll keep me posted on any fun variations you and your family come up with – I am also always on the lookout for new and interesting ingredients to throw in the mix, so let me know what you find!!

Blessings,

Mrs H

See it first on Instagram
Face to face on the book

Summer Body Lotion: detoxing and flushing hibernation fat!

I’m not a doctor or medical professional. This product and any statements made herein are not intended to be used to diagnose or treat any medical illness or symptom. The information is for educational purposes and as a guideline for personal use; it should not replace medical counseling with a health professional.

Dear emerging, blinking hibernators,

Miraculously, spring has arrived. It’s still snowing here in parts of Virginia, but we’ve had a few tantalizingly balmy days to assure us that summer is soon to follow!

I’ve become fascinated by essential oils, after using them to heal a cavity, obtain a week of full nights’ deep sleep for the first time in 7-1/2 months of pregnancy, soothe the husband’s aching muscles after a 50k, detoxify our little boy from free-radicals (as much as one can) after an emergency CT scan, and just using the darn things to make my house smell good! To tell you the truth, I was kind of sick of hearing about essential oils from everybody on my Facebook feed – but when these issues cropped up for me, and a wise aromatherapist friend stepped in with essential oils, I sighed begrudgingly and took the plunge.

summer body lotion 2

Now there is no going back for me! I’m wholeheartedly sold, in love. That’s the power of experiencing my own healing at the hands of plants, in my own life. It’s how I got hooked on eating organic and local, for instance! And on that note, let’s not ignore the other aspects of a healthy lifestyle – spending time away from the screens, outside, in the fresh air, eating well, living as purely as possible … and essential oils help bridge necessary gaps in our nutrition, healing and detoxifying regimens!!

So, about those bonus layers of fat we want to release. A friend of mine, after working hard to gain a trim body after three children, was frustrated by a layer of belly fat that persisted. Nothing wrong with that, it’s a sign of loving, hard work dedicating her body to bearing beautiful babies – but she just wanted to get rid of it. She started massaging coconut oil and grapefruit essential oil into her belly, and do I need to say the rest? She finally achieved her goal.

Knowing that in a few months I’ll be flushing out loads of extra baby fat from this pregnancy, I created what I call the Summer Body lotion! You can make your own Summer Body lotion with essential oils and coconut oil, or make it into a massage oil with another carrier oil if you’re allergic to palm oils. Following, I’ve provided the recipe for you to download.

20150323_141457

20150324_151827It looks a lot like frosting, but be ye not deceived!

Download recipe and fact sheet for Summer Body Lotion

Summer Body Lotion

Solid Organic Coconut Oil, expeller-pressed or virgin*
Grapefruit Essential Oil
Tangerine Essential Oil
Lemon Essential Oil
Gentle Baby Young Living Essential Oil Blend
Peppermint Essential Oil**

Scoop the solid coconut oil into a bowl or the bowl of a stand mixer. Do not melt the coconut oil. Add essential oils, approximately one drop per ounce of carrier oil; it’s up to you if you want to go stronger! Beat with an electric mixer or the whisk attachment of the stand mixer until oil is fluffy and whipped, and essential oils are thoroughly homogenized into the oil. If using a liquid oil to replace coconut oil, or using fractionated coconut oil, whisk or blend thoroughly before transferring to container. Scoop into jars and cap; store in a cool, dark place. Slather on belly, or any other troublesome areas, daily or twice daily. Avoid applying to areas that will be exposed to sun or UV light in the next 24 hours.

*Expeller-pressed coconut oil will have no coconut scent. Use virgin if you want that extra coconutty aroma! If you are allergic to palm oils, use a liquid oil instead, in the same ratio. Olive oil, avocado oil, grapeseed oil, tamanu oil or a combination would be excellent.

**I leave peppermint out of mine, since these days I am always either pregnant (peppermint, as a digestive aid, can induce labor), or breastfeeding (peppermint, as an agent to dry mucus membranes, can potentially dry up milk supply). It’s optional to add!

Download recipe and fact sheet for Summer Body Lotion

Most importantly, remember to take before and after pictures – I know, taking before pictures is not very fun, but it’s really awesome to compare them with the after pictures!! Some people start seeing changes as quickly as three days of dedicated use in, so be prepared for exciting results!! Be sure to let me know how this lotion worked for YOU!!!!

Blessings,

Mrs H
Instagram that stuff! #farmandhearth

“I don’t have these essential oils yet!” 

Don’t worry!! If you don’t have your own stash of essential oils yet, or you’re building that collection up gradually like I was, I can help you buy a [heavily discounted] kit loaded with 11 of the most commonly used (and some of the most expensive!!!!) essential oils, along with other goodies like a [normally quite expensive] diffuser and some cool samples. Save some bucks and get some pure, organic oils! Leave a comment, contact me at andrea (.) globetrotter (@) gmail (.) com or click through this link!

Homemade Refried Beans (and pressure canning them!)

Dear refritos,

It must have been at least five years ago when my friend, foodmaster and chicken boss Miz Carmen and I spent a rainy, wind-lashed day cooking a monster batch of beans a la charra, a recipe gleaned from a now-out-of-print cookbook she owns from a now-out-of-business Mexican restaurant. She photocopied the page for me, because those beans became an instant hit at our house! She froze most of hers, and I pressure-canned mine. A freshly opened jar of these delicious beans has saved many a dinner for me, between multiple moves (military and otherwise!), and the arrival of our first child!

20150320_084410

20150320_162943

I’m anticipating baby #2, so it seems like a good time to stock up on canned soups and beans in the home pantry – aka fast, real food. Canning beans at home is not only a great way to save money – dried beans cost significantly less than canned ones, even when they’re on sale! – but it saves on waste, too. The jars are reusable (and the lids, if you use these), so you can refill them with beans again and again. You don’t have to agitate about excessive BPA or BPS in metal cans, or try to navigate the harrowing lists of nasty ingredients most canned recipes have.

20150320_065750

Leave the bacon out if you’re opting for a vegetarian version!

20150320_084424

20150320_090158

If you’ve never canned beans, Jill over at The Prairie Homestead has a gorgeous beginning tutorial, as well as a guide for pressure canning! You cannot, ever, ever can beans in a water-bath canner, ever, ever, no matter what you heard from your neighbor or read on Snopes. You can read this fact in any of the Ball canning books, any pressure-canning books, or take my word for it – I’m an internationally certified acidified foods processor, and took a beastly course on microorganisms in the jar to get there. Beans are very low-acid, and in order to kill the microorganisms that can live in a low-acid environment the contents must be heated to far beyond the boiling point, and only a pressure canner can do that.

I did not create this recipe – I’ve just loved it for many years! The cookbook is no longer in print sadly, and the restaurant that inspired it is no longer operational. In our home, we’ve created a number of variations, as is irresistible to do with beans as delicious and simple as these! Be sure to use fresh, high-quality spices for a truly outstanding experience – I obtain mine from MarketSpice or Penzeys, and grind the cumin seeds fresh. The quality of your ingredients will make a difference in the finished product!

Download recipe PDF (and bonus Frijoles Refritos recipe!)

Beans a la Charra

The original recipe comes from a cookbook published by a now-defunct Mexican restaurant in the Seattle area. I can’t find any copies of the book now, and all I have left are photocopies provided kindly by my friend at Domestic Endeavors! Also called “cowboy beans” for their rough-n-tender campfire feel, these beans make the perfect addition to any meal. Pour a jar over a pan of organic, salted chips, and scatter with shredded cheese before popping in the oven to warm. Serve in burritos, enchiladas, alongside rice, or add to a pan of cooked, sliced potatoes to make “cowboy potatoes”, one of my favorites growing up. Puree the entire mixture to serve as soup (do not puree before canning)! All pressure canning is incurred at your own risk. Be sure to follow safety procedures carefully.

3 cups dried pinto beans
3 quarts water
6 slices (about 8 ounces) uncooked bacon, coarsely chopped
½ cup diced onion
1 tablespoon chopped garlic
½ jalapeno, stemmed, seeded, chopped (some like it hot: keep the seeds, or add more jalapeno!)
1 tablespoon chile powder or 2 tablespoons fresh taco seasoning
2 teaspoons ground cumin
1 tablespoon salt

In a stockpot, soak the beans overnight in the water (to cover), optionally adding a tablespoon or two of whey, lemon juice or vinegar to aid in later digestion of the beans. The next day, cook the bacon in a skillet over medium-high heat until crisp, about 6 to 8 minutes. Add the onion, garlic, and jalapeno and cook for 5 minutes. Stir in the chile powder and cumin and cook for 1 minute more. Add 1 cup of the soaking water from the beans while stirring and scraping the bottom of the skillet to loosen all the brown bits adhered to the pan. Add the beans and remaining water, and bring to a rapid boil. Skim foam; decrease the heat to medium-low, and simmer for 1-1/2 hour to 2 hours, or until the beans are soft. If you are planning to can them, you can undercook the beans until they are still a little crunchy; they’ll cook the rest of the way in the pressure canner. If you cook them fully, some the beans will disintegrate somewhat which is delicious and perfectly heavenly in its own right. When the beans are cooked through, add the salt, and cook 1 to 2 more minutes.

Pressure canning: For sea level, process pints at 10 pounds pressure, for 75 minutes. Adjust pressure for altitude. Remove finished jars and let cool, undisturbed. DO NOT press on lids yet. 12 – 24 hours after canning, remove rings and check seals. If any lids pop or shift, remove to refrigeration and use within 2 days. Wash all jars in warm, soapy water to remove residue from the canner.

If serving: Keep warm until ready to serve, or cool, cover, and refrigerate for up to 3 days.

Download recipe PDF (and bonus recipe!)

20150320_162930

The jars will have residue from the beans on them – be sure to let them sit, undisturbed, overnight or for 24 hours before checking seals! Wash all jars and rings thoroughly in warm, soapy water, and leave the rings off. Rings breed potential mold if any moisture or food particles linger, and we don’t want that! Plus, if you enter a jar in the county fair, it will be automatically disqualified if there is still a ring on it, and where would your blue ribbon be then?

20150320_121937

20150320_122014

Pressure-canning tip

Waiting for the pressure to dissipate and the pressure-valve to drop can be a long, boring wait, especially when you’re anxious to re-load the canner with a new batch of jars!

When the canner is about to finish the designated time for canning … Fill a large container or sink with cold water (ice is not necessary). After shutting off the heat and letting the pressure drop to about five pounds (this takes just a few minutes), carefully remove the canner and set in the cold-water bath. It’ll try to float, so keep a hand on it! In a very few minutes, the pressure will drop completely and the pressure-valve will pop down. You can then remove the lid and extract your jars, setting them aside to cool overnight. I learned this handy trick from somebody who saw it on America’s Test Kitchen – if you know the original episode, let me know!

Recommended Tools

23-Quart Pressure Canner
This is the pressure canner I recommend – Presto makes a wonderful, fail-safe product! No mistakes, mishaps or misfires with this canner. I own three of them, and with their heavy, reinforced bottom I use them without the lid for everything from cooking down huge batches of ketchup and applesauce to water-bath canning. You can double-stack pints for canning and pressure canning, they are that deep! Replacement parts can be ordered on Amazon and from Presto’s website. Their customer service has always been friendly and prompt! Note that a small pressure cooker WILL NOT work for pressure canning, EVEN if it comes with a small canning rack!! A pressure cooker is NOT made for canning, and is too small to maintain even heat throughout the substrate (contents of the jar), thus proving UNSAFE for home pressure canning. USE ONLY A DESIGNATED PRESSURE CANNER! 

Oakton EcoTestr pH 2 Waterproof pH Tester, 0.0 to 14.0 pH Range
This is not necessary for pressure canning – but it’s great if you’re food-nerdy, or if you want to can tomatoes which may or may not be acidic enough for waterbath. If you want to test the acidity of, say, a batch of tomatoes, pH test strips are not recommended – there is too much margin for error! This bench tester was recommended to me by a lab technician as one of the best handheld options, unless you want to jump up to the $500 versions! When testing the acidity of something chunky, like tomato sauce or a finished jar of pickles, note that you must blend the contents thoroughly and test a sample of the blended contents. So, if you are planning to process whole tomatoes and you want to check the acidity first, you must blend a representative sample of the tomatoes for testing. Follow the instructions on the tester carefully, and plan ahead – calibrating base for your first use can take time!

General Hydroponics Ph 7.0 Calibration Solution – 8 Ounces, 1 bottle
You’ll also need some standard reference solution. This one will do the trick!

Update – IMPORTANT!!!!

Chevys Fresh Mex Cookbook
Miz Carmen has found The Cookbook on Amazon!! It’s only twelve buckeroos and full of deliciousness. I need MY OWN COPY now!!!!!!!

See more of my recommended products in my Amazon aStorewe could talk cookbooks ALL DAY!!!!

Happily canning and eating,

Mrs H

The Ten-Pound Cleanse: Scrub out your insides and start fresh

I am not a doctor, nutritionist or dietitian. This post and these recipes have not been reviewed by any medical professionals at any point in time; never begin a cleanse without talking to your medical professional or nutritionist first. By reading this article, you take on all responsibility for your own well-being.
This cleanse is not for everyone. Proceed with caution. 

Dear skeptical reader,

I hope the title of this post was intriguing enough to pique your interest!

Since Why I Do Yoga, with dramatic before and after pictures, just about blew up my blog the day I posted it (instantly shooting to the top-viewed post of all time and quadrupling traffic!), I figured I’d better follow it up with a word on nutrition, too.

I call this the ten pound cleanse because everybody who follows it seems to lose around ten pounds, if not more. The reasons are many; but to start, sludging through the average Western digestive system are several pounds of what some nutritionists call “phantom” weight, pounds of crap and mucous that are settling and processing (or not processing) for way too long. There’s always lots of junk to offload, and then for anybody with extra pounds of fat that they aren’t using any more, some of that seems to go, too.

This is a cleanse I designed about two years ago after doing various versions of cleanses and finding what worked for me, and I use regularly for myself. So many of my friends have asked me for copies of it, and used it to their own success, that I guess I just got bored emailing it out over and over and answering the same questions again and again, and decided to post it here, online, for anybody to see and use. But, it’s just my own cleanse – not created or approved by any doctor. I hope I made myself fairly clear here, and now, let’s move on to the interesting stuff.

Keep reading, and then download the cleanse at the end of the post.

snoothie2

What is a cleanse? “Cleanse” is a fairly relative term. For somebody eating a Standard American Diet, a pretty revolutionary cleanse would be just to cut out anything processed or packaged. For somebody eating a fairly clean diet of real food (nothing packaged, processed, but fresh, organic and whole ingredients), a cleanse like this one is just a gentle recalibration of the digestive system; some easy-to-process foods, a rest from eating solids, grains and meats, a purified regimen.

Who can do a cleanse? Again, it’s all pretty relative. Only you and your doctor, nutritionist, therapist, dietitian, holistic care practitioner, cat or whoever you get your advice from, can decide if your body is ready for a cleanse. I personally feel like pretty much everybody can use a cleanse at some point in time; I like a weekend cleanse every month, and a week long cleanse every year. I used them during my weight-loss journey to jump-start my weight loss, and then to regularly get past plateaus and see some increased progress. It perhaps goes without saying that breastfeeding moms and pregnant moms need to exercise extreme caution; losing weight during breastfeeding, for instance, or detoxing heavily, can send all kinds of toxins through your breastmilk. I will say that I do modified versions of cleanses even during pregnancy and breastfeeding – but again, it’s all relative – I am still enjoying lots of full-fat milk, yogurt and fruits whenever I want them, even having meat if that’s what I’m craving, but overall, it’s not that far removed from my everyday diet which is pretty clean – just put in a blender (not the meat, though. Ick)!

Will I be hungry? The biggest complaint I get from people is that they can’t finish all the food assigned in one day. That’s fine, obviously! One of the best things that is happening here is the stomach shrinks – I can’t prove that scientifically, but let’s just say that you eat less and less to get full, and after you start eating normal food again, you are still eating less. (It also works the other way – you can stretch your stomach out to eat more and more if you eat out at restaurants a lot, or generally take large portions! Beware!) Normally I can get through about two smoothies a day on the cleanse, even though three and a snack are allowed. Don’t push yourself to eat more if you aren’t hungry.

OMG I just looked at the recipes and there is fat in them!!!!!! Yeah, you betcha there is. A picture is worth a thousand preachy blog posts, so here’s me eating a standard low-fat, low-sugar, lean meat, high veggie and high-carb American diet designed for weight loss. Size 10 generally, or size 8 on a good day.  Pre-pregnancy, too.

worst ever

Kinda sick of seeing that picture of me so let’s fast-forward to modern times. Here’s me eating full-fat raw milk, fatty pastured bacon, free-range scrambled farm eggs, grass-fed and farm-raised meats, lots of lush organic vegetables and fruits, nuts, seeds, and a low amount of carbohydrates from grains. Please note that I shoehorned myself into a tight pair of size 1 [stretchy] jeans. Post-pregnancy. I could have cried! Maybe I did – you’ll never know … 

jakob

bonfire

I feel like there’s a difference! I attribute all this change in large part to hot yoga – again, you can read Why I Do Yoga to find out how it impacted my life and the way I look at myself – and then eventually, the way I look.

So … get back to the cleanse, lady… What I’m saying is I definitely had to start supplementing that hot yoga with a powerful change in diet, even though (surprisingly) that didn’t actually fully happen until a year and 25 pounds of weight loss in to my story (I started the change earlier, but slowly). Now, I find that with my current, more nutritious diet I can even maintain my weight fairly steadily, where before it was madly fluctuating and skyrocketing every time I ate a cheeseburger.

So the cleanse helped you to … ? It helped me to jumpstart more intense weight loss when I plateaued, and it made me feel clearer, better and even inspired. Any time I got off track, a day or seven of cleansing would bring my intestines back into order, and I wouldn’t lose ground.

smoothie10

You want to try it, too??? Onward to the Cleanse!!!!!!!!!!! 

Detailz detailz. The cleanse can be done up to seven days (or longer, I guess, although I have never truly gone past about seven days). There is a Day 0 that involves eating no food at all (hungry does happen on this day, trust me). This day is really not for everyone (and it is definitely never for breastfeeding or pregnant moms, among other people!). I have a miraculous body that can store fat during the worst of morning sickness when I’m vomiting up all my food and barely eat a thing, and this body is made for survival in the harshest of times! I can go for a day (or up to five days, as I did during a spiritual fast once) with no food or hardly any food, and not be negatively affected. Hungry, yes, but not faint, nauseated, or suffering from headaches. This has not been the experience of all my friends. If you are heavily loaded with toxins, you will probably be feeling sick during Day 0 and beyond as your body goes through a more intense detoxifying process. If you are already at your ideal weight, a Day 0 may be too difficult as you might not have enough fat stores to fall back on! Personally, I feel like starting the cleanse with this Day 0 doubles the impact, and is a powerful attention-getter for me (yes, I still go to yoga on that day!).

I definitely don’t want to gain the weight back. You only need to do three days if this is your first time doing a cleanse, or if your diet is pretty heavily processed and you are graduating yourself into it. One of my friends lost ten pounds in the first three days, and then went back to eating processed foods and gained it all back by the weekend. You have to start cleaning up your entire diet – boxed, processed, packaged junk, and much of the white pasta and breads that are normal for us to eat, as well as sugary and sweet things need to find their way out the door while you’re in the learning and changing process. That’s all detail work that we aren’t getting in to here – there are books, doctors and websites to help with that – so let’s just focus on the cleanse.

What if I can’t buy all that stuff …? Swapping things out is more or less fine, as far as I am concerned. If you have certain allergies, you may have to swap some things for others. I chose every ingredient for a reason – based on it’s liver-cleansing, mucus-cleansing, probiotic or protein properties or a hundred other factors; some things may not be available to you where you live, and you’ll have to modify. Do so mindfully, and read up on your replacement first if you aren’t sure.

A note on ingredients: Using processed, packaged or pre-made food is probably going to ruin your cleanse effect. Honestly, if you use coconut or almond milk, you should either make your own (the cheapest version), or buy it fresh and raw. This isn’t always feasible, but it’s something we can work towards!

If you don’t have all the expensive ingredients, like maca powder, chia seeds or hempseed, you can still do a version of the cleanse using only the basic (large) ingredients in every recipe. Those are added as protein, enzyme and other boosters, and are highly beneficial and strongly recommended – but don’t let a cash shortage keep you from working on your better body, now. You can accumulate items as you go – one bag of maca powder can last for several years, and a ziplock of chia seeds from the store can last for months!  Buying them all at once would definitely be cost-prohibitive for me, but I wouldn’t let it stop me from starting the cleanse.

Best of luck to you in achieving all your goals! Please leave me a comment and tell me how you are doing!

Preview and Download the Seven Day “Ten Pound” Cleanse (yes, it’s free, duh)

smoothie

Happy cleansing!

Mrs H
Clean it up on Facebook
We post smoothies on Instagram

P.S. From time to time somebody points out a typo in a recipe or instructions –
I think I’ve caught most of them, but if you find any let me know and I’ll update the PDF!