Rustic Bone Broth, Bouillon and Powdered Broth

Novemberites and lovers of fall and food,

Bone broth has to be one of the cheapest, most nutrient-dense sources of food out there. One of the oldest and most revered foods, it has long been the way matriarchs prepared nourishing food with meager expenditure. Cooked until the bone is crumbling and breaking, bone broth is rich in gelatin, collagen, protein, glycine and minerals. It creates foundational building blocks for our gut health, skin, hair, bones, teeth, and it can be a wonderfully soothing source of nutrition for the ill, or for anyone suffering from morning sickness.

12115645_10153851756245921_8079637497941597019_n

Not only can you make it cheaply, but you can easily store bone broth by cooking it down and making bouillon cubes, or dehydrating and powdering it.

10734139_10152950609615921_5860906272330866187_n

Bone broth can be expensive to buy, but preparing it from scratch costs almost nothing – even when you use the finest, grass-fed, organic bones and vegetables.

12049583_10153820387080921_2124711480553387518_n

I use leftover bones from our meals (even the drumstick you picked clean at dinner – that makes great bone broth. Squeamish about cooties? Remember, it’ll be cooking for over 24 hours – even if there WERE any cooties on that bone, they’ll be gone by the time you strain your broth!).  Wilful waste makes woeful want! Waste not, want not.  I use fish-heads and bones from local fishermen, and carcasses from cutting up whole chicken or turkey for dinner. The bones from ham, beef and any other meat we eat go straight into a pot, along with any vegetable scraps from preparing dinner.

I'm not above prominent product placement. Gary made this mahogany salt cellar; click the picture to see more.

I’m not above a little prominent product placement!  Gary made this mahogany salt cellar; click the picture to see more.

Print recipe for bone broth, bouillon and powdered broth

Rustic Bone Broth

2 pounds bones – leftover roasted poultry bones or piece bones, ham bone or pork chop bones, oxtail bones, fish heads or spines, or boiled and rinsed pig’s feet
Butt from 1 – 2 bunches of celery
Butts and/or skins from 4 – 10 carrots
Butts, skins and any pieces from 1 – 3 onions
Potato skins
Any other vegetable scraps, skins, tops, butts
2 – 4 tablespoons fat (coconut oil, olive oil, avocado oil, bacon drippings, duck fat), optional
2 – 4 tablespoons raw apple cider vinegar (optional), to help draw minerals from the bones
Sprigs thyme, sage and a few bay leaves, salt and pepper
Filtered water

Prep the bones  |  If bones are not already cooked, heat oil in a large skillet. Add bones and herbs and sear them for a few moments on the stove. Note: Cover and let sit for 45 minute if you are using beef bones; or let them roast, uncovered, at 375F for 45 minutes.  Beef bones should always be roasted for 45 minutes or more prior to use.  Fish bones can skip this step entirely – do not pre-roast or sear them (if they are pre-cooked, that is fine).

Stovetop |  Place all scraps, seared or roasted bones, herbs, any leftover oil and cider vinegar (if using) in a large stockpot.  Add water to cover, or up to 2 gallons.  Cover with a lid and bring up to a strong simmer. Turn down heat and let simmer for 24 – 48 hours.

Crockpot  |  Place all scraps, seared or roasted bones, herbs, any leftover oil and cider vinegar (if using) in a large crockpot. Add water to cover. Top with lid and bring to LOW temp; cook for 24 – 48 hours.

Continuous broth  |  Follow directions for crockpot. Every 24 hours for 5 -7 days, remove 1 – 2 quarts of bone broth and replace with fresh water. Use a large spoon to continuously break and distress the bones each time you remove broth.

Usage  |  Bone broth should be consumed daily; use it to cook rice, quinoa, millet or other grains. Drink a mug of it, well-seasoned, as a nourishing and comforting beverage. Bring a thermos to work or school. Use to cook pieces of meat and vegetables for delicious and nutritious soups!

Print recipe for bone broth, bouillon and powdered broth

12195911_10153844938110921_7301865412123420209_n

We should visit more soon; have you checked my events page to see if I’ll be in your area? Maybe we can chat over a glass of kombucha, or a mug of steaming bone broth!

Until then,

Andrea

But I can never give up rice! You can’t make me!

I’m not a doctor. I’m not anything.
I just love preparing good food, and studying food science.
And eating.

Dear rice lover,

Calm down there. Nobody is going to make you give up anything you don’t want to.

After giving up all grains for sixty days (doing Whole30 twice, back to back), I’ve found that rice is one of the culprits that gives me heartburn and discomfort. I’m not too tempted to eat it.

But what if you’re okay with rice? What if it’s an integral part of your life? How to make it more nutritionally acceptable for a Real Food lifestyle? How to avoid the glucose spike that follows from eating a food that is, effectively, pure sugar?

IMG_20151025_211007

Health advocate Ashley Grosch, leader of national health education group The Oil Tribe, suggests adding a tablespoon of coconut oil to every one cup of rice you cook. This converts digestible starches into indigestible (resistant) starches, so the rice doesn’t metabolize as glucose (unused glucose is what builds fat in our bodies!). Resistant starches are also prebiotic and complimentary to probiotic foods, as they feed the beneficial bacteria that inhabit healthy guts. Pair a bowl of prebiotic rice with some probiotic kimchi, and suddenly you realize why traditional meal plans have made sense for generations of humanity.

Keep your blood glucose from spiking after a starchy meal – rice, white potato – simply by adding fat – coconut oil, ghee, butter – to the starch!  Who wants to eat a potato without butter, anyway? Not me.

Add even more nutrients to your rice (or quinoa, or millet, or whatever else you’re cooking) by cooking it in nutrient dense bone broth, or vegetable broth if you don’t eat meat.

Read more sciencey facts here at Perfect Health Diet, and do some of your own research! Or just take my word for it, and use the following recipe when you prepare rice (which, for the record, shouldn’t be at EVERY meal. I mean, our pancreas can only take so much).

IMG_20151025_211105

Print Rice Preparation instructions

Real Food Rice Preparation

This is a recipe for white jasmine rice. For brown rice, increase liquid to 2 cups, and cooking time to 30 – 40 minutes at a low temperature. For maximum benefit, serve this prebiotic, resistant starch with a probiotic food such as kimchi or kraut.

1-1/2 cups bone broth or vegetable broth
1 cup dry white jasmine rice
1 tablespoon coconut oil, ghee or butter

Rinse rice briefly and add to a cooking pot. Add broth and coconut oil. Cover pot, bring to a boil and shut off heat. Let rice sit for 15 – 20 minutes; remove lid and fluff rice deliciously to serve.

Print Rice Preparation instructions

Do you plan to keep eating rice? Does this make you feel more confident about including it in your meals? Leave a comment and let me know!

Andrea

A Fall Menu: Silky Squash Soup and other delicious stuff you’ll want to eat

All of my recipes come packaged in a downloadable
PDF that you can save to your computer.
Read on for the recipe packet from our fall menu!

Dear Pompkin,

I just like the way early Americans spelled pumpkin. Pompkin.

Pumpkins, squash, and all manner of root vegetables feature strongly in the fall. This is some of my favorite cuisine! Filling, rich and hearty, it qualifies for comfort food any day of the week. Buttery baked dishes, creamy soups and silky puddings dazzle me all through the long winter months! (Although to be honest, the winter in Virginia Beach is starting out a little weak – it was in the 70s last week, and this is October we’re looking at.)

And of course, I love everything about Thanksgiving. Candles, corn cobs, turkey and all that festive business sucks me in every time. I have so many deep and wonderful memories of family life associated with Thanksgiving – the turkey placemats my grandma made, the battered yellow tablecloth she used every year, the chaotic and sometimes argumentative and always loving gathering around that all-important Thursday.

IMG_20151023_111611

IMG_20151023_111657

Fall is just full of delight for me. I taught Cooking with Fall Veggies at Norfolk Botanical Gardens this week, and the class was a slam-dunk. I brought leftovers to my husband on base, and he and the guys there devoured it and pronounced it good. I made the baked root vegetables dish for an Oil Tribe class the following evening, and everybody was asking for the recipe!

Solid, simple food is the best. It wins our hearts every time! Our menu featured rustic, seasonal dishes.

IMG_20151023_111508

The soup was a perfectly silken puree, topped with pepitas. For a vegan alternative, swap out the bone broth for a full-bodied vegetable broth made with dried shishito mushrooms for lots of meaty umami flavor, and trade the butter for expeller-pressed coconut oil or fruity olive oil.  Filled with butternut squash and pumpkin, this dish is nourishing to body and soul.

IMG_20151023_111941

IMG_20151023_111957

IMG_20151023_110945

The Maple-Glazed Baked Root Vegetables were a slam dunk. We chose to coarsely chop beets, carrots, celery root, butternut squash, sweet potatoes, fingerling potatoes, parsnips and onions for our selection of roots and squash; any combination of these or other root vegetables is perfect.

IMG_20151023_111829

IMG_20151023_233644

A family favorite, Spicy Sweet Potato Fries make a special treat any time. I love to dip fries, so we created a special dipping sauce of mayonnaise (any homemade or high-quality store-bought, or aioli), blended with a lacto-fermented homemade sriracha sauce.

IMG_20151023_111739

IMG_20151025_163611

IMG_20151025_163410

IMG_20151025_163329

IMG_20151025_163246

We also made a delicious Maple Cornbread, using coarse, colorful cornmeal from Indian corn. Colorful corn contains a little more nutrition than regular sweet corn – no surprises there!

IMG_20151024_143241

IMG_20151024_143317

And because she rolls that way, Lady Camille was in the carrier on my back while we set the room up for class. Once class began, our friend Mary snuggled baby during the whole thing.

IMG_20151023_111310

Silky Squash Soup with Bone Broth

I created this dish while I was in Washington and wanted to serve a warm, filling meal to my family during the Seahawks game (we lost. It sucked. We needed comfort food). It’s simple, straightforward and truly not all that unique. There are millions of variations you could create from this basic dish, and the measurements I provide here are basic guidelines – you can do whatever you want, really.

4 cups bone broth or an alternative broth
2 cups pumpkin, raw and cubed, or cooked and pureed
2 cups butternut squash, raw and cubed, or cooked and pureed
3 large carrots, coarsely chopped
3 shallots or 1 medium onion
1 15-ounce can coconut cream
3 – 6 cloves garlic
1/2 cup butter or an alternative fat
Pepitas, dried pumpkin seeds, for garnishing
Salt and pepper

In a skillet, heat the butter. Add cubed pumpkin, butternut squash, carrots and onion; or add what is cubed, and reserve pureed mixtures. The goal is to cook the squashes down until they are soft. While mixture is cooking, crush garlic and set aside.
Once mixture is soft, use broth to help blend it until smooth; add garlic while blending, and then pour into a pot. Alternatively, you can use an immersion blender for this step. If you are using pureed pumpkin or butternut squash, add it now, and any more broth, and begin to heat mixture. Whisk in coconut milk. Add salt and pepper to taste.
Ladle into bowls and serve hot; sprinkle with pepitas before eating.

If you use ghee, bacon fat, coconut oil, olive oil or avocado oil instead of butter, this dish qualifies as a Whole30 and Paleo soup.

Download the recipe PDF for silky squash soup, baked root vegetables, spicy sweet potato fries, fermented dipping sauce, maple cornbread and a printable menu

IMG_20150921_073317[1]

IMG_20150928_095615[1]

I know you’ll feel just as indulgent and spoiled as I do when you get to enjoy these delicious foods … and let me know what your favorite tweaks are so I can try your versions, too!

Andrea

Download the recipe PDF for silky squash soup, baked root vegetables, spicy sweet potato fries, fermented dipping sauce, maple cornbread and a printable menu

Beauty Care: Face Wash, Sleepy Rollers, and Tummy Tuck!

(Tummy tuck? What? Go on, please!)

Dear adorable,

The husband and I came home to Seattle for a brief visit, and I kicked off the #seattleoiltribe happenings with a huge beauty make & take! We made four different items, using the Base lotion in some of them, and we did a lot of Zyto scans. And mostly, we visited, we laughed hysterically until we snorted (true story!) and we loved being with friends we hadn’t seen for months and years!!!

image 7

I flew out to Seattle with the two babies, and Gary followed a few days later. I met many wonderful friends on the flight from Virginia to Washington state, and they made my trip a peaceful and painless experience.

image 2

IMG6

imaGE 6

When I was planning my trip, I ordered essential oils, containers and ingredients for the make & take items from Virginia, and had them shipped straight to my mom’s house in Seattle. This was perfect! The first event in Seattle was on a Saturday.

image 4

We opened the doors early for Zyto scans and assessments. Using galvanic skin response, the same technology as a polygraph test, the hand scan takes about three minutes and measures 74 biomarkers in your body, seeing what is out of range. This tool does not diagnose or treat disease. Neither do I!

image 8

Before class began, we made a huge batch of the Base lotion. I mean, it was a bathtub-size bowl that my mom uses to make chocolate chip cookies at Christmastime. I used over seven pounds of shea butter in one sitting – and we blew through virtually the entire monstrous bowl of lotion over the course of the class. It was INSANE! I loved every minute of it!!

imGG`

IMG2

IMG8

I live-streamed the event on Periscope (find me there, Andrea Huehnerhoff. You can watch my classes live, too!).

IMG4

We made individual Zyto rollers for everyone, based on their Zyto scans – this is one of my favorite things to do. Immediate solutions!!

IMG3

We made Sleepy Time Rollers for rolling on your feet just before bed; Silky Foaming Face Wash for refreshing your skin.

IMG_20150927_223647

And the insanely popular Tummy Tuck Lotion for those areas of skin that yearn to be tight again. We ran out of THIS before class even ended, and I’m making more already!

And there are so many other things we can make!

IMG5

So many oils! I went a little crazy hehehaha

Download all five recipes here
(Sleepy Roller, The Base, Tummy Tuck)

Tummy Tuck Lotion
I use this as a part of my post-partum tummy tightening protocol! 

2 ounces base lotion
5 drops Geranium
5 drops Lavender
5 drops Grapefruit
5 drops Elemi
Where to buy containers, ingredients, and effective essential oils

Place base lotion in a 2-ounce container.
Add essential oils and gently combine using a chopstick or another small implement.
Keep tightly sealed in a cool place out of direct sunlight.

Download all five recipes here

I look forward to seeing you at one of our events … online, or in person – in Seattle, or in Virginia – or anywhere else in the world!!!!!

Blessings,

Andrea

IMG7

Clean-Eating Paleo Baking Powder: no sodium aluminum sulfate required

Dear leavened,

I was happily stirring up a triple batch of banana bread a few days ago when I was dismayed to realize we were out of baking powder! Fortunately, I had the ingredients on hand to whisk together a batch of homemade baking powder. It’s an easy recipe to remember, and it took me just a few extra moments to stir up enough to fill my baking powder container.

Of course, the banana bread came out perfectly; and if you’ve already downloaded the recipe for yourself, you know how good it is!

I was baking cookies with a friend once when she revealed she had no baking powder. “Isn’t baking soda basically the same thing?” she asked, surprised that I wasn’t accepting the brightly colored box of Arm & Hammer.

In a sense, yes; baking soda and powder are both chemical leavening agents that build puffy, gassy bubbles in dough much faster than fast-acting yeast or sour starters do.  Hence, things like banana bread, Irish soda bread and baking powder biscuits usually fall under the category of ‘Quick Breads’.

20150430_134127

Terms and Conditions 

Baking Soda (sodium bicarbonate, or alkali), is used in recipes with acidic ingredients it can interact with, like vinegar, lemon juice, buttermilk, non-Dutch processed cocoa, molasses, honey, and so on.  Baking soda is instant-acting and batters made with this leavener should always be baked immediately after mixing, with minimum stirring involved.

Baking Powder is a mixture of baking soda, an acid salt, and usually a starch to absorb moisture so that the soda doesn’t react with the dry ingredients until the wet components are added.  The acid salt can be cream of tartar. This acid salt takes the place of adding lemon juice, buttermilk or another acidic liquid to your batter; magically, the acid can be wetted by whatever liquids you add to your batter, and activate the baking soda! The cookies my friend and I were making in the story above would not have been sufficiently leavened without baking powder, because there was no acid in the cookie ingredients to activate the bubbling of the baking soda. The third ingredient, a starch, which is technically optional, can be organic cornstarch – or arrowroot powder, if you are minimizing grain ingredients in your diet. If you leave the starch out entirely, you will have to use your baking powder right away, or within a few days or weeks! This is one way Paleo baking powder is different from regular baking powder!

Double-Acting Baking Powder is what you would buy in the grocery store, as packaged single-acting baking powder is generally only sold for commercial baking.  As the name indicates, double-acting baking powder leavens twice (hence the double-acting).  When the batter is initially mixed, there is an immediate acidic reaction from the cream of tartar, with the wet ingredients of the batter and the baking soda, and carbon dioxide gas is produced.  The second reaction comes from a second acid that doesn’t activate until the temperatures are elevated (that is to say, the batter goes into the oven), and the gas cells expand and cause the batter to rise. The second acid is usually calcium acid phosphate or sodium aluminum sulfate, two ingredients that many health-conscious consumers are now choosing to avoid due to possible neurological issues associated with aluminum.

11178274_10153391697815921_7062278023106730774_n

10978568_10153223781880921_375650625884420965_n
Homemade Baking Powder is not double-acting – if you use homemade baking powder in a recipe I would recommend baking the batter right away and not delaying (so make sure you preheat the oven when you start mixing your ingredients!). Homemade baking powder is used in the same ratio as store-bought. If your recipe is for a batter that sits in the fridge overnight or which specifically calls for double-acting baking powder, know that the homemade one will probably not produce the desired effect; that second, heat-activating acid would need to be present.

How long do these last in my cupboard?  
Baking Soda can sit in the cupboard, sealed, for an indefinite length of time.  If you are worried that it is too old and you want to test the effectiveness before mixing it into your ingredients, mix 1/4 teaspoon of soda with 2 teaspoons of vinegar.  It should bubble up immediately just like in science class.

Baking Powder should only sit in the cupboard for about six months; the components to homemade baking powder, however (soda, cream of tartar, arrowroot/cornstarch), can sit separately in the cupboard indefinitely so you can keep those handy and simply mix up small batches at a time. To test if baking powder is still active, mix 1 teaspoon powder with 1/2 cup hot water; it should bubble up with carbon dioxide immediately.

3cef5b62eb0d__1296760493000

How much baking powder do I use in a recipe? 
If you are creating your own recipe, a good rule of thumb is 1 to 2 teaspoons baking powder to 1 cup of flour.  Too much baking powder, and the gas bubbles will expand too quickly and cause the batter to collapse in baking.  Too little baking powder, and there won’t be enough gas bubbles and the batter will be dense and tough.

Download Baking Powder Recipe

[Paleo] Aluminum-Free Single-Acting Baking Powder for Storage

If you bought this at the grocery store, it would cost twice as much as regular baking powder. Crazy, huh? Use this baking powder teaspoon for teaspoon to replace store-bought baking powder. The ratio is one part baking soda, two parts cream of tartar and one part starch. 

Sodium bicarbonate: 1/4 cup baking soda
Acid Salt: 1/2 cup cream of tartar
Starch: 1/4 cup arrowroot powder or 1/4 cup organic cornstarch

Whisk ingredients together, pressing through a mesh sieve if baking soda has clumps. Store in an airtight container for less than six months.

Immediate-Use Starch-Free Baking Powder

The ratio for baking powder is two parts cream of tartar to one part baking soda. This baking powder is meant to be used immediately – do not store it! Since there is no starch, you only need 3/4 teaspoon total to replace 1 teaspoon in a recipe calling for standard baking powder. 

To replace 1 teaspoon of baking powder in a recipe, without any additional starches:
1/2 teaspoon cream of tartar
1/4 teaspoon baking soda

Remember, your baked goods must go in the oven immediately after you mix them, as the carbon dioxide bubbling will have begun the second liquids contacted the acid!

Download Baking Powder Recipe

11174914_10153409453325921_8631737741642784364_n

Happy Baking!

Mrs H

Mom’s Internationally-Acclaimed Banana Bread: more famous than any other

Dear hungries,

This morning I had a mountain of black bananas, which the husband has been eyeing hopefully while whispering banana bread under his breath, hoping it sinks into my subconscious. I pulled out my splattered and ragged banana bread recipe, passed down from my mom, given to her by a college friend’s mom and used until well-worn before any of us precious little angels were born.

20150430_134127

This banana bread is simple, and classic.

It has everything a purist loaf of banana bread needs – sweet, overripe bananas, no additional mix-ins. A moist and tender crumb, and a sweet, slightly sticky top that cracks and splits right down the middle, in tender perfection. Cut a slice and melt on some butter – the world stops turning as you drift into a heavenly banana dream. And naturally, when stirring up the batter you can add all the walnuts and chocolate chips you like – a little banana bread blasphemy is always wickedly fun.

This recipe has been emailed, copied, and written down so many times by so many people, my mom spends half her time on the computer sending it out. It’s about time it was posted online for all of you to enjoy!!

20150430_150921

20150430_150933

Download the Best Banana Bread recipe here

Best Banana Bread

You can add chocolate chips, walnuts, dried fruit or even coconut flakes to mix up the flavors and textures!  I tend to go the purist route and not mix in anything – I always plan to do it next time! 

Heat oven to 325 degrees.

Combine in bowl:
2-3 ripe bananas, mashed
1 cup sugar
1 egg

Blend in:
2 cups flour
½ tsp salt
½ tsp soda
1 ½ tsp baking powder

Add:
½ cup Canola oil

Mix well, pour into greased pan.  Bake 45-60 minutes. Serve hot, with butter!

Banana Muffins: spray paper liners in a muffin tin. Scoop in ¼ to 1/3 cup batter in each cup; makes 12.
Mini Loaf Pans: spray mini loaf pans before using; makes three.
Hawaiian French Toast: use slices of banana loaf instead of regular bread when preparing French toast.
Elvis Style Hawaiian French Toast: spread two slices of banana bread with peanut butter; spread one slice with jam, and make a sandwich. Dip into egg and milk for French toast, and cook as French toast.

Alternative Ingredients
Replace 1 cup sugar with ½ cup honey
Replace Canola oil with melted coconut oil

Download the Best Banana Bread recipe here

 Enjoy your banana bread, and please share with me your ideas for mix-ins!

Mrs H

UnGranola Porridge: grain-free, dairy-free, Whole30 kind of

Dear -free advocates and hungry breakfasters,

While I like to think we eat a clean, real-food diet, doing the Whole30 challenge has revealed to me where I am lacking in that area – highlighting bad habits I’ve developed, areas I’ve gotten lazy. And while I love everything on the Whole30, sometimes I just want to eat a breakfast that isn’t made out of eggs!

Well hello, UnGranola.

19719_10153354894830921_6341393825634410924_n

Whole30, in short, means no dairy, no grains, no pseudo-grains like quinoa seeds or buckwheat, no sugars including maple syrup or honey or stevia except for fruit sugars, no legumes (peanuts, beans, soy), and no psychologically-enhanced grain-free Paleo baked indulgences like coconut flour pancakes and muffins. What I do eat are a lot of eggs, mountains of green vegetables, free-range and grass-fed meat from local farmers, fruits, nuts … potatoes, root vegetables, seaweed, seafood, coffee, Choffy, tea and lots of other good stuff. It takes creativity and energy to put together meals without dropping back into habits that are long-established, and there is basically Nothing At All in the grocery store that is pre-made that fulfills the Whole30 requirements, so if one is tired and doesn’t feel like cooking but is also hungry, one is out of luck. (You’d be surprised how much stuff has pea protein in it, am I right?)

Benefits for this pregnant lady on Whole30 (under midwife supervision) include: on Day 23 today, this is the longest stretch I’ve gone without throwing up since I got pregnant. I love me some good food, but I hate seeing it twice! As of about Day 5, my life-interruptingly uncomfortable hiccups and overwhelming chest-pressure ceased entirely, enabling me to do things like breathe during the day, and sleep laying down, instead of propped up over four hundred pillows. And my legs – it’s like the excess baby weight is already trimming itself down despite the fact that I am consuming more calories now than I ever did before, because my clothes fit more easily (but the belly still grows!).

So back to eating a breakfast with no eggs. We eat a lot of fried, scrambled, poached, and boiled eggs in general, because we like them. Yet sometimes I just want something else in the morning, like a hot bowl of porridge with fruit on top. I don’t know if this strays in to “non-Whole30 approved psychological destruction” of the program, but at any rate it keeps me happy on the program and I still feel refreshed, nutritionally fulfilled, and experience none of the negative side effects that my previous (carbohydrate-enhanced) meals were apparently giving me.

I also wanted something Relatively Fast – I don’t always feel like/want to spend forty hours in the kitchen making a meal, so I wanted to make a mixture that could be chucked on the stove, oatmeal-style, and cooked up in just a few minutes. I wanted something the little kids would eat. I wanted something with nutrition, variety, flavor and spices. I wanted something that goes in a bowl and I eat, earthy peasant-style, with a too-large spoon. This satisfies all the requirements, and still meets the standard of no grain, dairy, legumes blah blah.

Enter UnGranola.

26

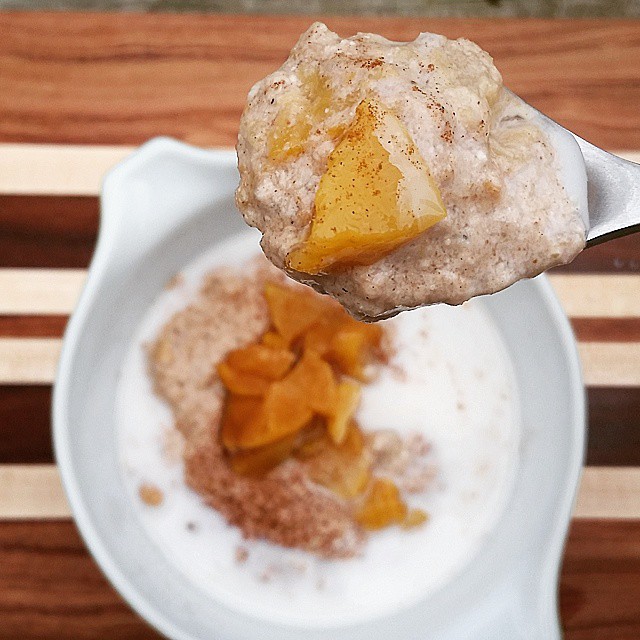
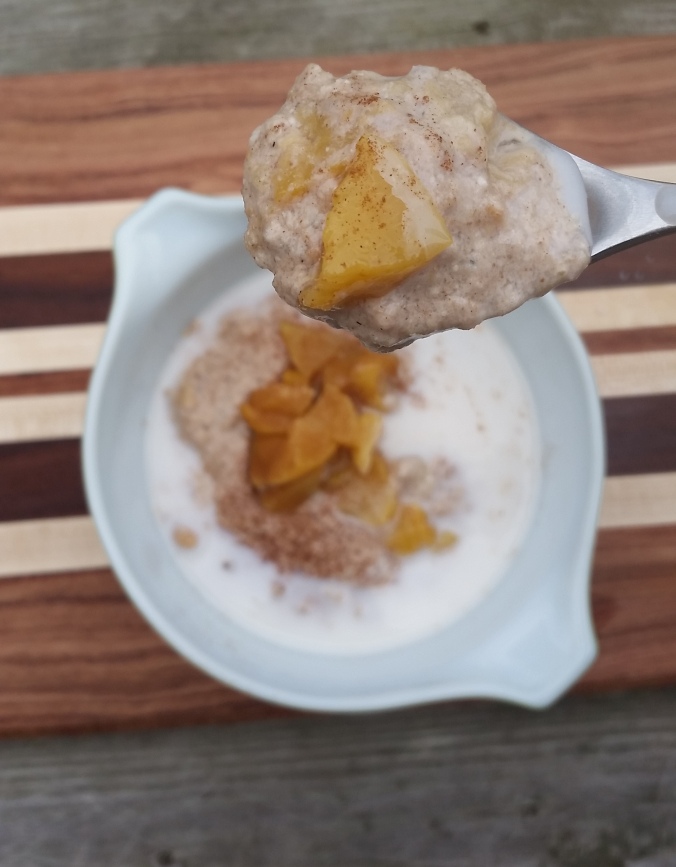
Peaches ‘n cream, anyone?

new

This porridge fulfills the desire for texture, warmth, a little sweetness if you desire (sometimes I do, sometimes I don’t). And while I like the popular Paleo nut-butter porridges and make those from time to time, they ultimately are something I can only have few and far between because the very nutty smoothness of them gets underwhelming after a while. Download the recipe PDF for UnGranola Porridge at the bottom of this post!

1

2

4

6

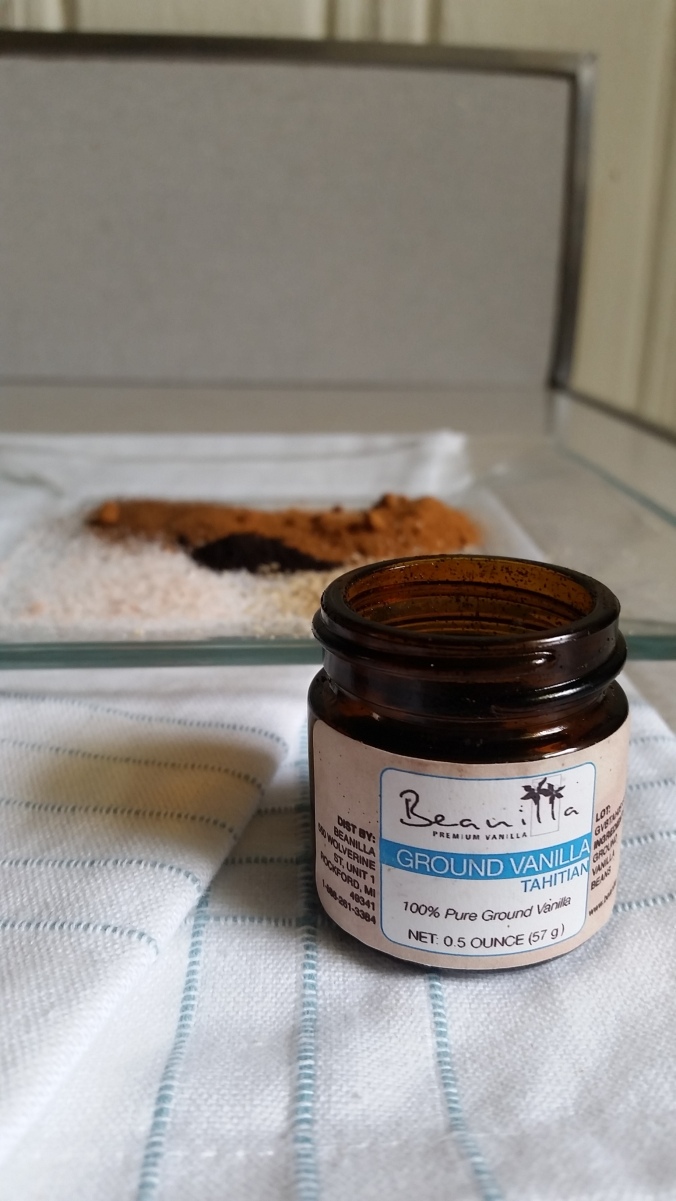
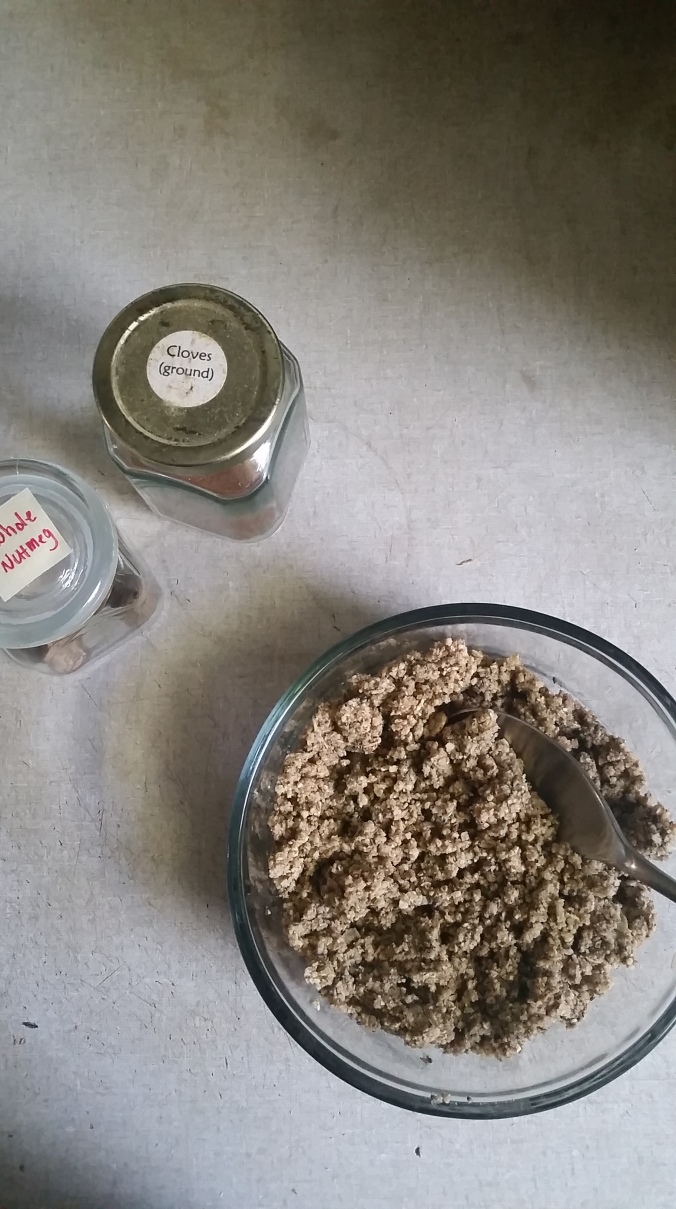
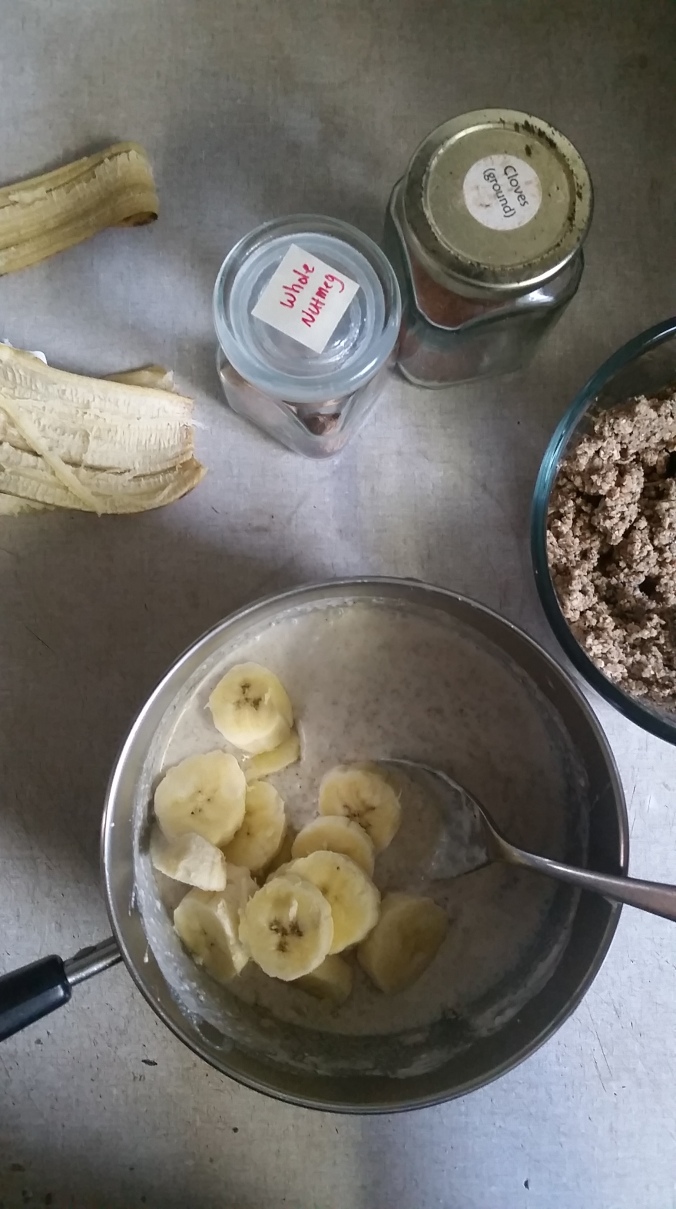
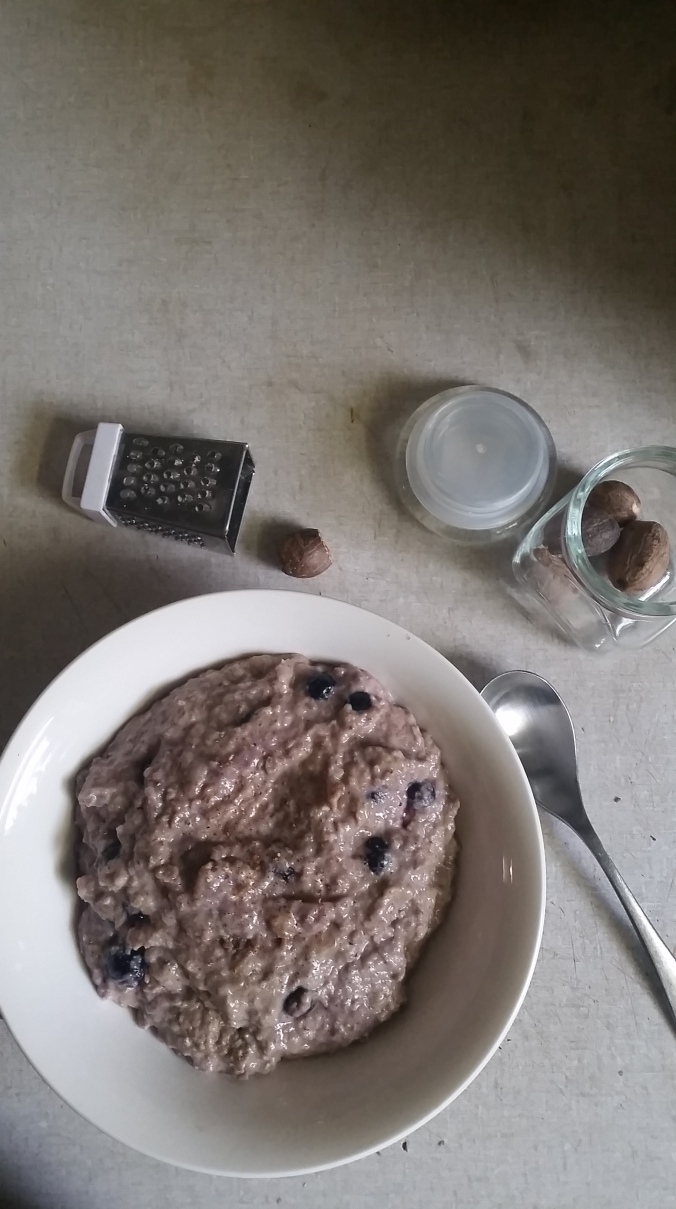
The ingredients can vary widely based on your taste, or what you have available in your pantry. Spices can be mixed up to suit your personal preference, too – I love using cinnamon, cloves, fresh nutmeg and a little vanilla powder – because on Whole30 you can’t use vanilla extract, there are too many illegal ingredients! Plus, using powder keeps my mixture nice and dry.  I order it from Beanilla and use it for all sorts of things in the kitchen!

7

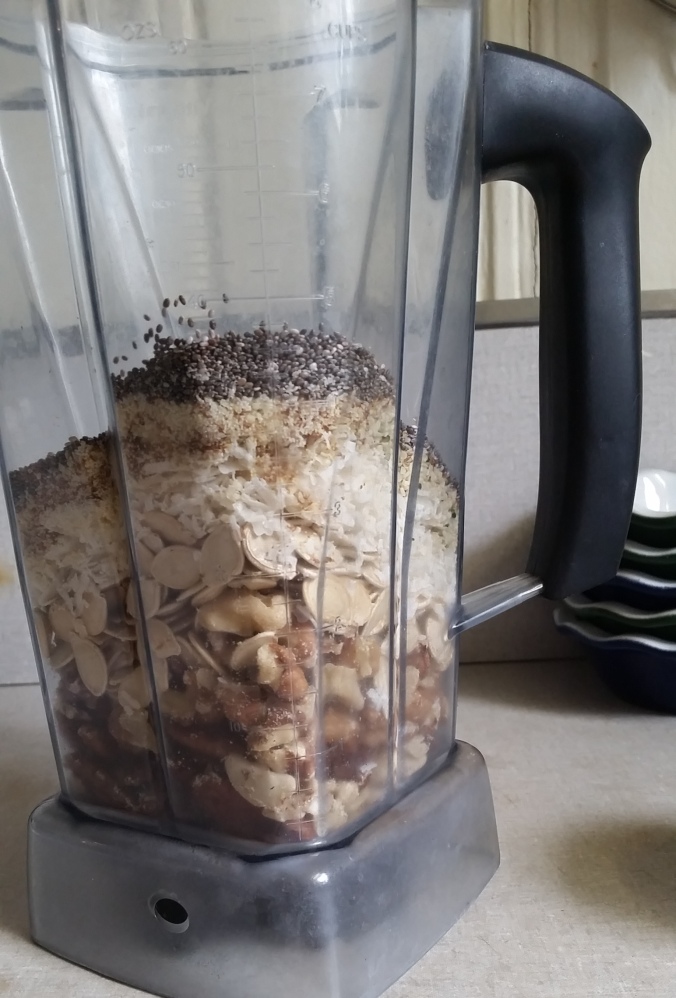
Everything goes in the blender or food processor to mix – you have to be careful that you don’t churn it into a paste-like nut butter, though! I think a food processor is the best option, but I don’t have one so the Vitamix is my go-to. The new, wide-based Vitamix would be perfect for this! Sometimes I use the dry cup, but it doesn’t make much difference really.

9

10

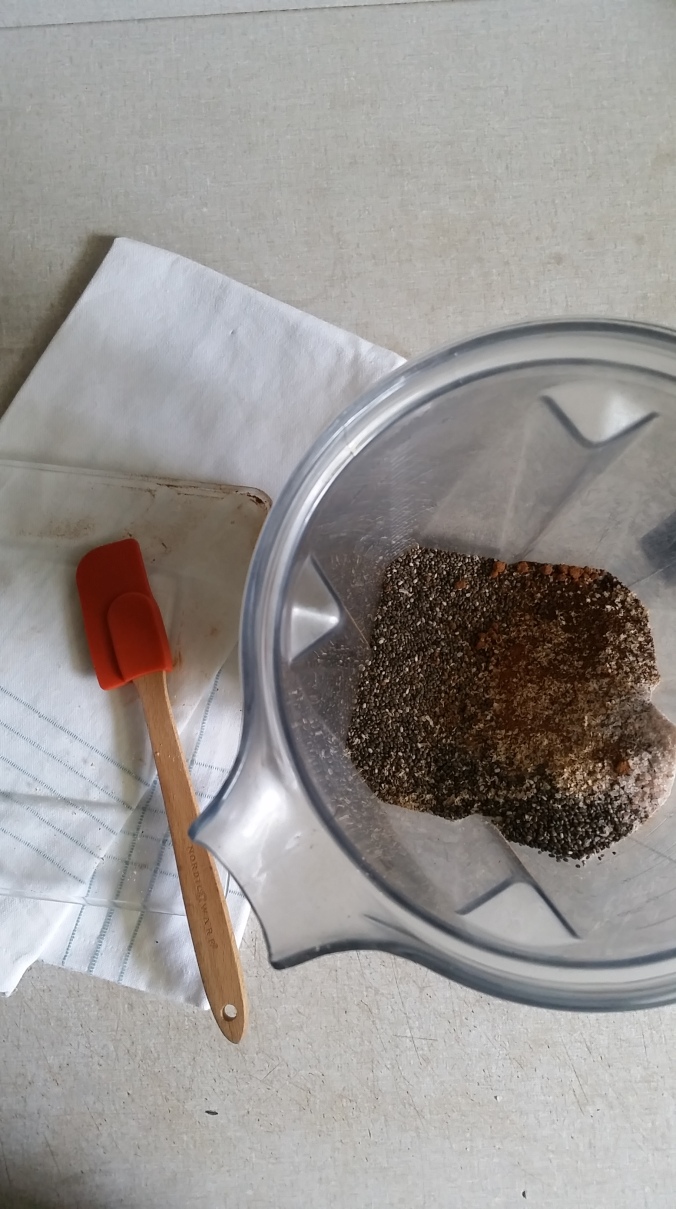
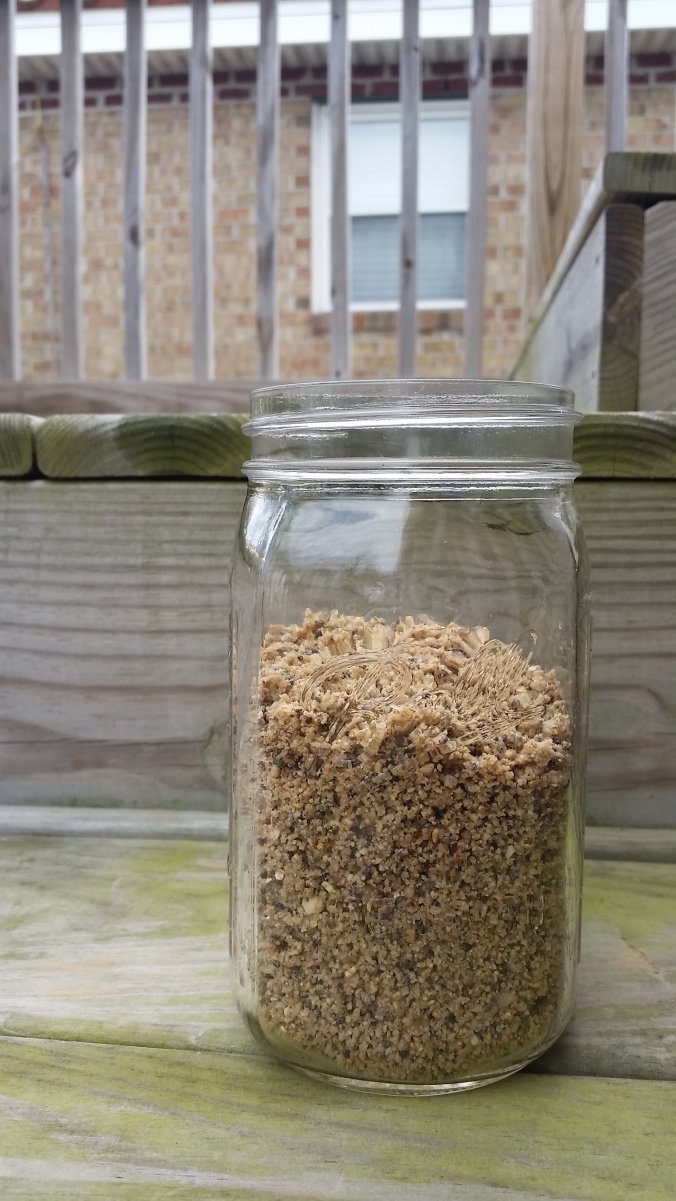
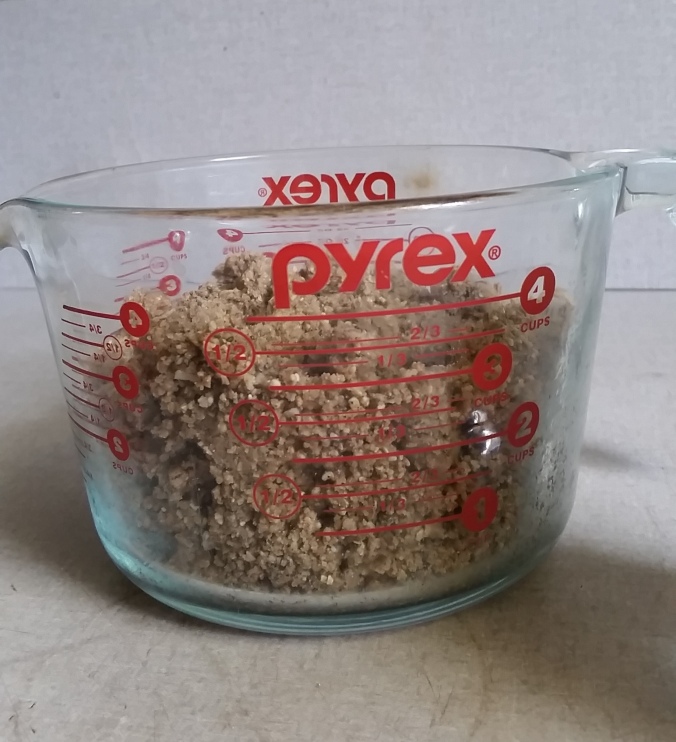
Once everything is ground together, as coarse or as fine as you prefer, you have a handy mix to keep in the fridge! I keep it refrigerated because I don’t want the nut oils to go rancid – our house gets pretty warm in the spring and summer. A dark, cool pantry might be just fine, but the fridge is a nice, safe bet.

11

12

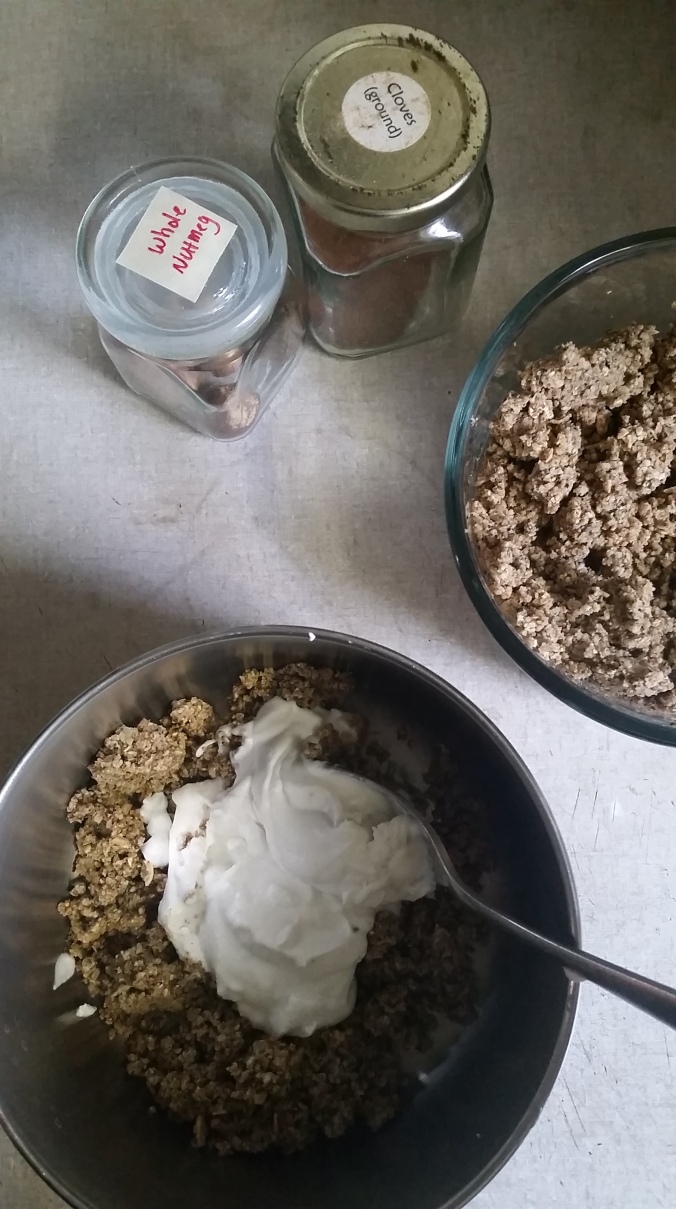
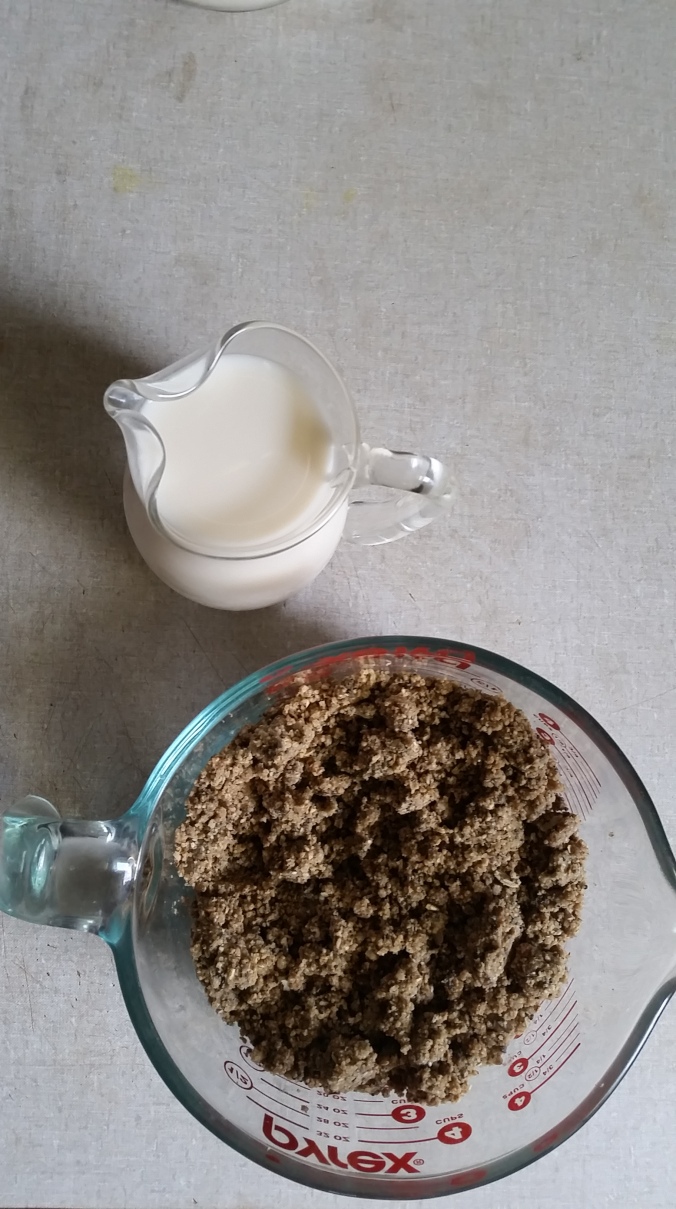
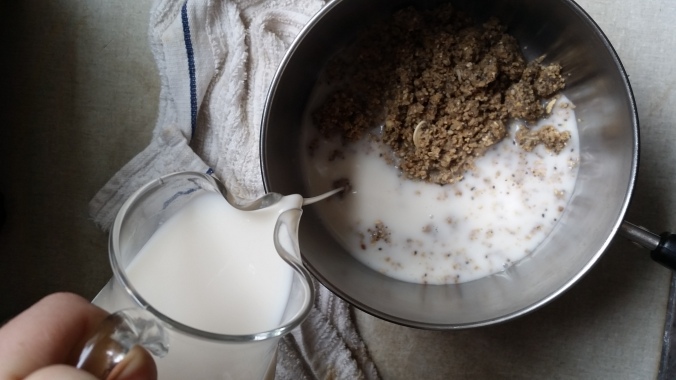
To prepare your delicious morning bowl of UnGranola, you take a scoop of the mixture and add a liquid to it. This can be whatever you like! Coconut cream and water, coconut milk, fresh almond milk, goat milk or cow’s milk if you drink dairy.

13

14

The almond milk, if you’re on Whole30, will probably be homemade, because there will be carageenan and other 30-illegal ingredients in most packaged almond milk.

15

16

17

18

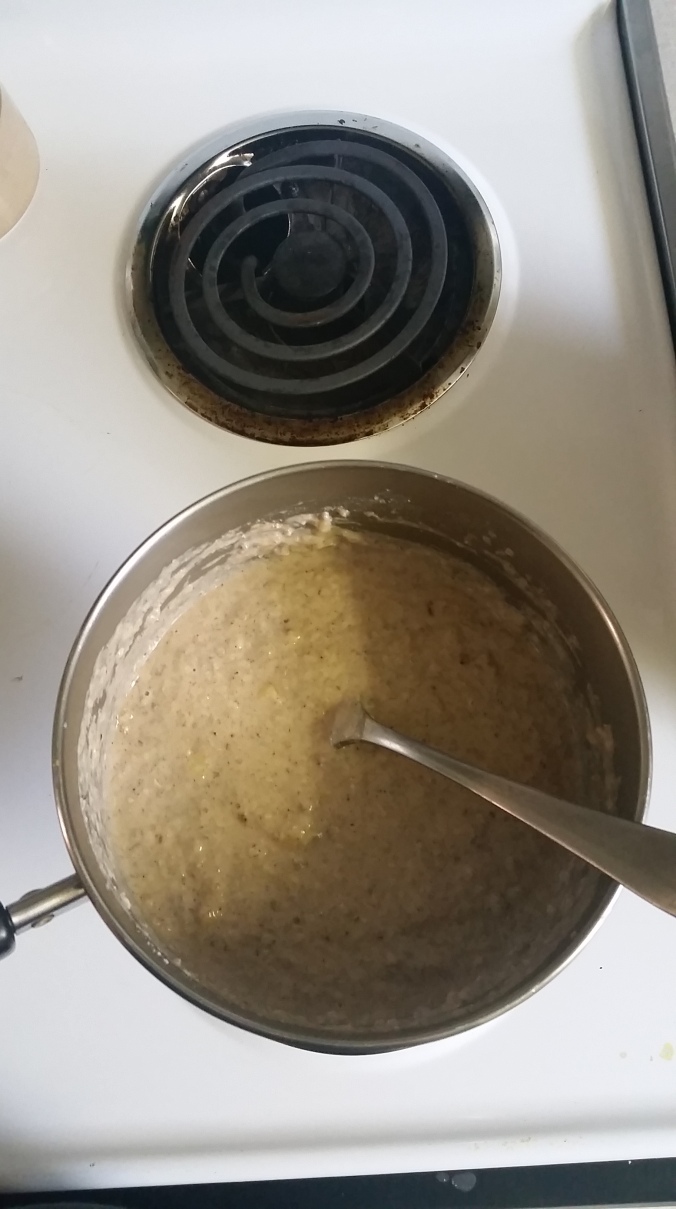
Then, you have the option of adding a sweetener if you choose! For a banana-blend UnGranola, mash in a sliced fresh banana, or slice in a frozen one and let it cook down while you stir and mash. The little kids seem to particularly like this version, and it makes a very pleasingly thick, gently-sweet porridge.

19

20

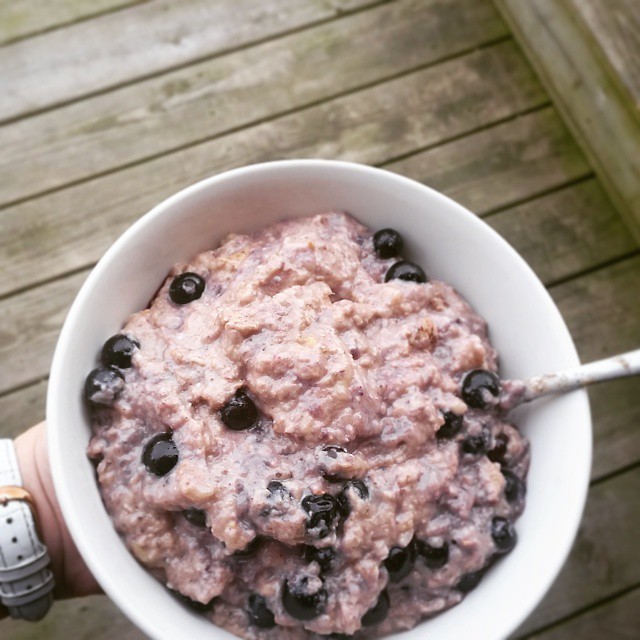
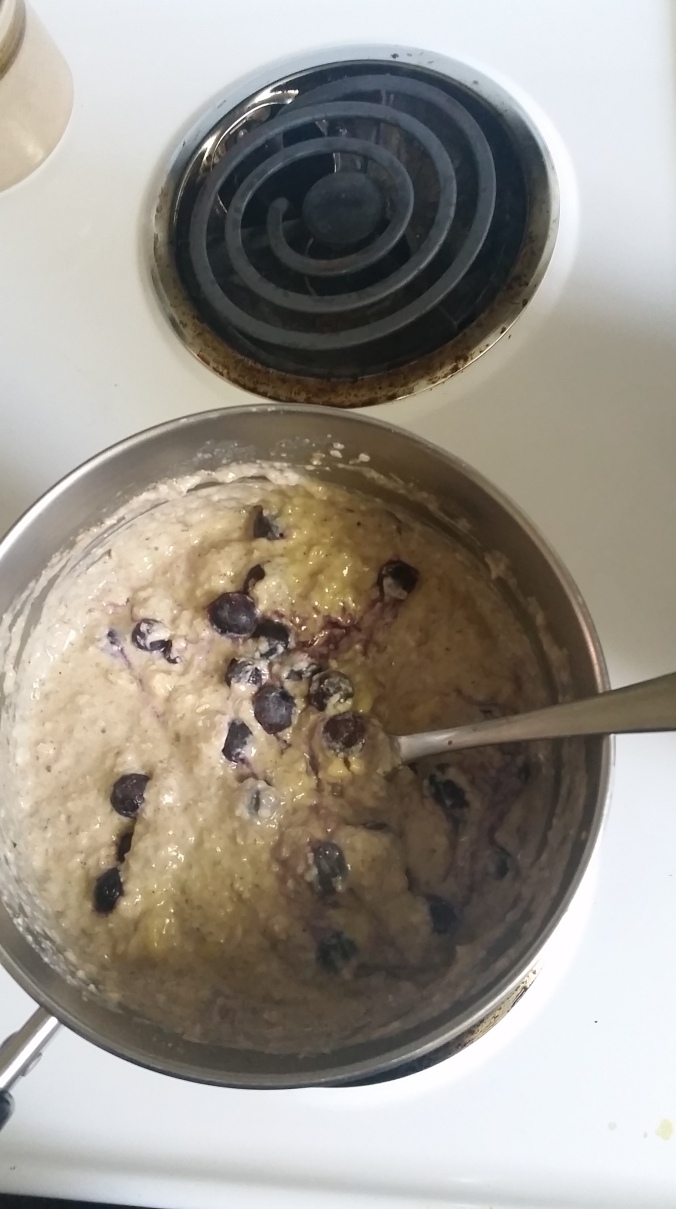
For Blueberries ‘n Cream, you can add blueberries or use them instead of bananas. Add them fresh or frozen close to the end of cooking, and gently stir in! It’s a good thing summer is coming because I’m almost out of frozen blueberries – we pick at least a hundred pounds a year and wash, freeze on pans and then store in gallon bags. After serving the bowls, I like to add a little extra spice to the top – some cinnamon and fresh nutmeg will enhance these berries!

21

22

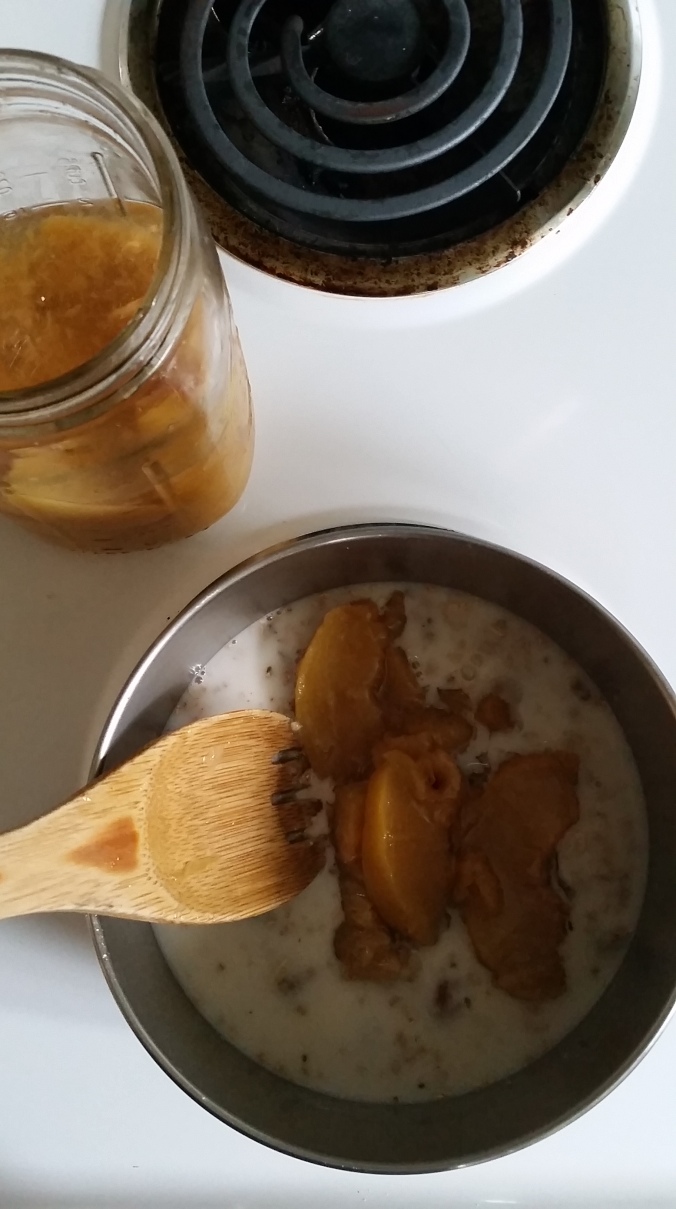
For Peaches ‘n Cream, I popped open a jar of peaches from our summer harvest. You could use fresh or frozen peaches, too! I mashed them in with a fork while the mixture was cooking.

23

24

Serve the granola with more fruit, spices and milk if you like. A swirl of jam or jelly, some dried fruit, or a rich dollop of butter, ghee or coconut cream. The sky is the limit!

Download the recipe PDF here! 

UnGranola Porridge

Measurements will vary; these are all approximate! You can increase one ingredient in favor of another, if you prefer. A nut-free version is distinctly smaller but still possible. 

UnGranola Mix
Makes approximately 3 – 4 cups of mix, or 6 – 8 servings (1/2 cup dry mix per serving)
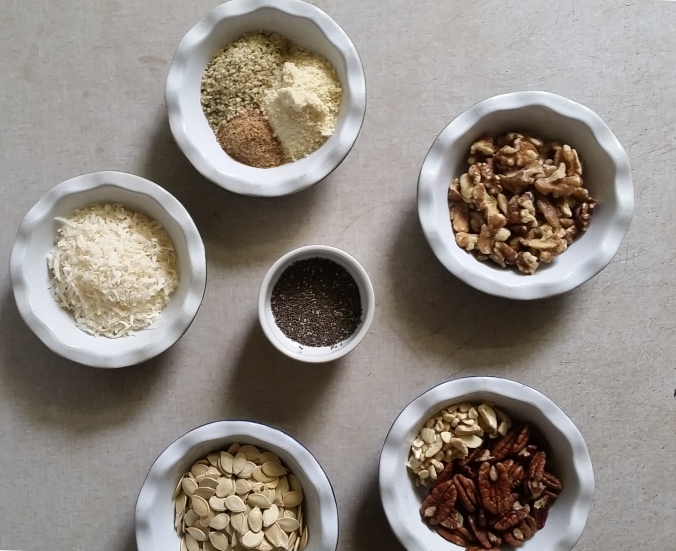
1 cup raw walnuts
1 cup raw, dried pumpkin seeds (or other gourd)
1 cup flaked or shredded unsweetened coconut
3/4 cup raw pecans
3/4 cup shelled, raw sunflower seeds
1/4 – 1/2 cup coconut flour
1/4 – 1/2 cup almond flour
1/4 – 1/2 cup hempseed
1/4 – 1/2 cup chia seed
1/4 cup raw cashews
1/4 cup ground flaxseed
Vanilla powder to taste (optional)
Ground cinnamon and cloves to taste
Freshly grated nutmeg
Ground pink Himlayan salt

Liquids:
Coconut cream and water, coconut milk, almond milk or another nut milk, a dairy milk if you prefer

Sweeteners (optional): 
1 banana or another fruit, or maple syrup, honey, stevia or another sweetener of your choice

Making the mix
Pour all of the UnGranola Mix ingredients into a blender or food processor. If using the Vitamix, turn to speed 8 and stop every 30 seconds to scrape container with spatula; press down gently with the tamper while mixing, being careful not to over-blend into a paste.

Scrape mix into a glass container for storage; cap and store in the refrigerator.

To serve UnGranola Porridge: 
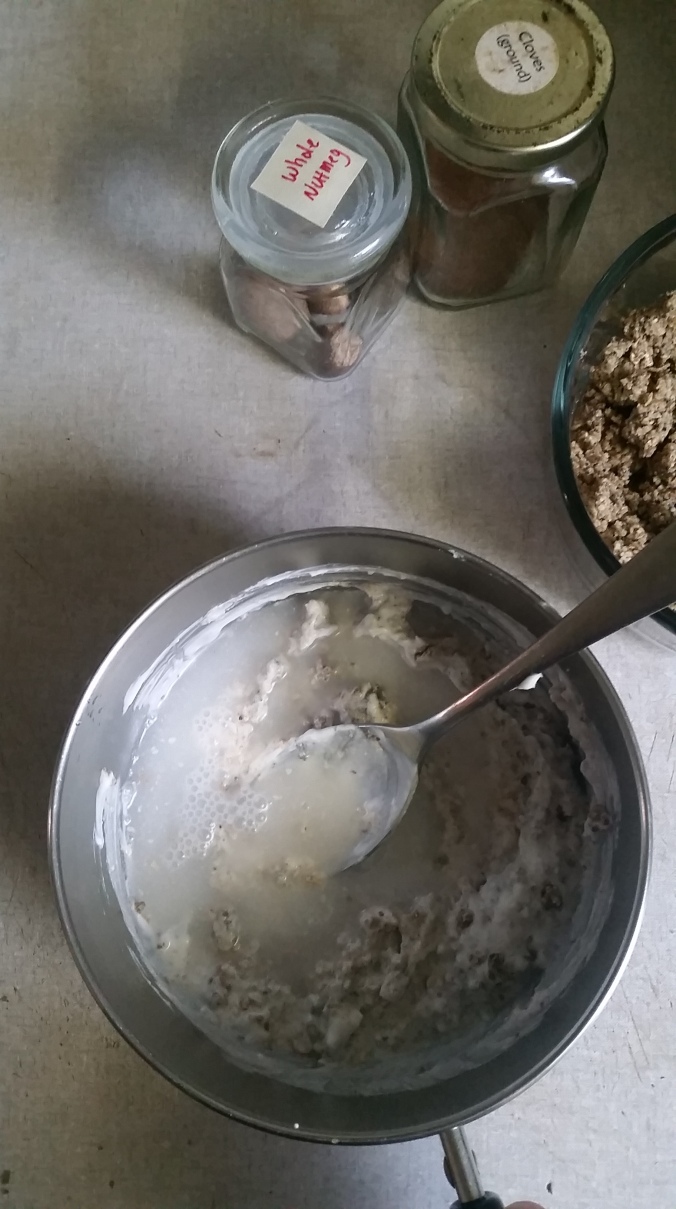
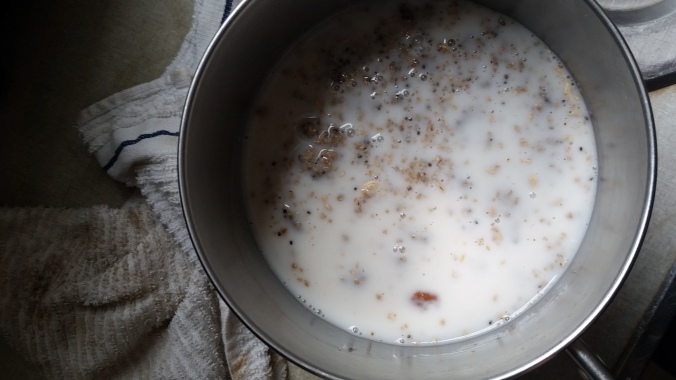
Scoop 1/2 cup of mix and place in a small saucepan. Add up to 3/4 cup of the liquid of your choice, more if you like your porridge thinner. Stir briskly with a fork over medium heat, whisking in a banana if you choose and mashing it fully or choosing another variation or sweetener. Heat for about ten minutes, stirring frequently, or until mixture is hot and thick to your liking. Serve with additional fruit, spices or milk if desired.

Tips: If there are any coarse pieces of pumpkin seed or coconut, longer cooking will soften them. If you made your porridge too thin, whisk in a little coconut flour to bulk it up.

Variations: 
Blueberries ‘n Cream: Stir in fresh or frozen blueberries towards the end of cooking. Grate fresh nutmeg on top before serving.

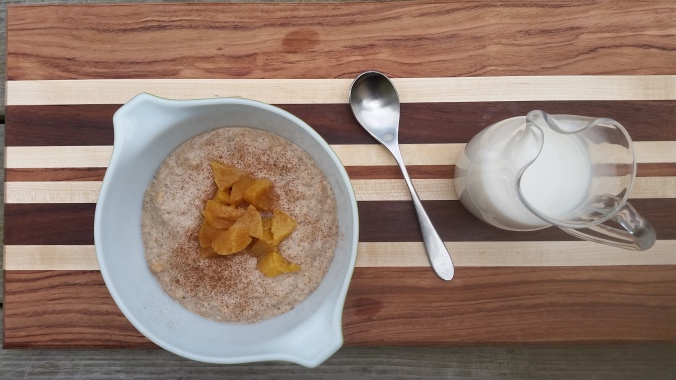
Peaches ‘n Cream: Stir in fresh, canned or frozen peaches, dicing or mashing in to your preference. Sprinkle with cinnamon and pour in cream to serve.

Pumpkin Spice: Add allspice to the spice mixture, and increase the amounts.

Gingerbread Wonderland: Add ground ginger and additional nutmeg to the pumpkin spice version; serve with hot applesauce.

PB&J: Swirl in a dollop of peanut butter, almond butter or another nut butter, and add a spoonful of jam or jelly just before serving.

Hot Butter: Top with a slab of butter or ghee, and a sprinkle of salt.

Download the recipe PDF here!

25

I hope you’ll keep me posted on any fun variations you and your family come up with – I am also always on the lookout for new and interesting ingredients to throw in the mix, so let me know what you find!!

Blessings,

Mrs H

See it first on Instagram
Face to face on the book