Rustic Bone Broth, Bouillon and Powdered Broth

Novemberites and lovers of fall and food,

Bone broth has to be one of the cheapest, most nutrient-dense sources of food out there. One of the oldest and most revered foods, it has long been the way matriarchs prepared nourishing food with meager expenditure. Cooked until the bone is crumbling and breaking, bone broth is rich in gelatin, collagen, protein, glycine and minerals. It creates foundational building blocks for our gut health, skin, hair, bones, teeth, and it can be a wonderfully soothing source of nutrition for the ill, or for anyone suffering from morning sickness.

12115645_10153851756245921_8079637497941597019_n

Not only can you make it cheaply, but you can easily store bone broth by cooking it down and making bouillon cubes, or dehydrating and powdering it.

10734139_10152950609615921_5860906272330866187_n

Bone broth can be expensive to buy, but preparing it from scratch costs almost nothing – even when you use the finest, grass-fed, organic bones and vegetables.

12049583_10153820387080921_2124711480553387518_n

I use leftover bones from our meals (even the drumstick you picked clean at dinner – that makes great bone broth. Squeamish about cooties? Remember, it’ll be cooking for over 24 hours – even if there WERE any cooties on that bone, they’ll be gone by the time you strain your broth!).  Wilful waste makes woeful want! Waste not, want not.  I use fish-heads and bones from local fishermen, and carcasses from cutting up whole chicken or turkey for dinner. The bones from ham, beef and any other meat we eat go straight into a pot, along with any vegetable scraps from preparing dinner.

I'm not above prominent product placement. Gary made this mahogany salt cellar; click the picture to see more.

I’m not above a little prominent product placement!  Gary made this mahogany salt cellar; click the picture to see more.

Print recipe for bone broth, bouillon and powdered broth

Rustic Bone Broth

2 pounds bones – leftover roasted poultry bones or piece bones, ham bone or pork chop bones, oxtail bones, fish heads or spines, or boiled and rinsed pig’s feet
Butt from 1 – 2 bunches of celery
Butts and/or skins from 4 – 10 carrots
Butts, skins and any pieces from 1 – 3 onions
Potato skins
Any other vegetable scraps, skins, tops, butts
2 – 4 tablespoons fat (coconut oil, olive oil, avocado oil, bacon drippings, duck fat), optional
2 – 4 tablespoons raw apple cider vinegar (optional), to help draw minerals from the bones
Sprigs thyme, sage and a few bay leaves, salt and pepper
Filtered water

Prep the bones  |  If bones are not already cooked, heat oil in a large skillet. Add bones and herbs and sear them for a few moments on the stove. Note: Cover and let sit for 45 minute if you are using beef bones; or let them roast, uncovered, at 375F for 45 minutes.  Beef bones should always be roasted for 45 minutes or more prior to use.  Fish bones can skip this step entirely – do not pre-roast or sear them (if they are pre-cooked, that is fine).

Stovetop |  Place all scraps, seared or roasted bones, herbs, any leftover oil and cider vinegar (if using) in a large stockpot.  Add water to cover, or up to 2 gallons.  Cover with a lid and bring up to a strong simmer. Turn down heat and let simmer for 24 – 48 hours.

Crockpot  |  Place all scraps, seared or roasted bones, herbs, any leftover oil and cider vinegar (if using) in a large crockpot. Add water to cover. Top with lid and bring to LOW temp; cook for 24 – 48 hours.

Continuous broth  |  Follow directions for crockpot. Every 24 hours for 5 -7 days, remove 1 – 2 quarts of bone broth and replace with fresh water. Use a large spoon to continuously break and distress the bones each time you remove broth.

Usage  |  Bone broth should be consumed daily; use it to cook rice, quinoa, millet or other grains. Drink a mug of it, well-seasoned, as a nourishing and comforting beverage. Bring a thermos to work or school. Use to cook pieces of meat and vegetables for delicious and nutritious soups!

Print recipe for bone broth, bouillon and powdered broth

12195911_10153844938110921_7301865412123420209_n

We should visit more soon; have you checked my events page to see if I’ll be in your area? Maybe we can chat over a glass of kombucha, or a mug of steaming bone broth!

Until then,

Andrea

The Ten-Pound Cleanse: Scrub out your insides and start fresh

I am not a doctor, nutritionist or dietitian. This post and these recipes have not been reviewed by any medical professionals at any point in time; never begin a cleanse without talking to your medical professional or nutritionist first. By reading this article, you take on all responsibility for your own well-being.
This cleanse is not for everyone. Proceed with caution. 

Dear skeptical reader,

I hope the title of this post was intriguing enough to pique your interest!

Since Why I Do Yoga, with dramatic before and after pictures, just about blew up my blog the day I posted it (instantly shooting to the top-viewed post of all time and quadrupling traffic!), I figured I’d better follow it up with a word on nutrition, too.

I call this the ten pound cleanse because everybody who follows it seems to lose around ten pounds, if not more. The reasons are many; but to start, sludging through the average Western digestive system are several pounds of what some nutritionists call “phantom” weight, pounds of crap and mucous that are settling and processing (or not processing) for way too long. There’s always lots of junk to offload, and then for anybody with extra pounds of fat that they aren’t using any more, some of that seems to go, too.

This is a cleanse I designed about two years ago after doing various versions of cleanses and finding what worked for me, and I use regularly for myself. So many of my friends have asked me for copies of it, and used it to their own success, that I guess I just got bored emailing it out over and over and answering the same questions again and again, and decided to post it here, online, for anybody to see and use. But, it’s just my own cleanse – not created or approved by any doctor. I hope I made myself fairly clear here, and now, let’s move on to the interesting stuff.

Keep reading, and then download the cleanse at the end of the post.

snoothie2

What is a cleanse? “Cleanse” is a fairly relative term. For somebody eating a Standard American Diet, a pretty revolutionary cleanse would be just to cut out anything processed or packaged. For somebody eating a fairly clean diet of real food (nothing packaged, processed, but fresh, organic and whole ingredients), a cleanse like this one is just a gentle recalibration of the digestive system; some easy-to-process foods, a rest from eating solids, grains and meats, a purified regimen.

Who can do a cleanse? Again, it’s all pretty relative. Only you and your doctor, nutritionist, therapist, dietitian, holistic care practitioner, cat or whoever you get your advice from, can decide if your body is ready for a cleanse. I personally feel like pretty much everybody can use a cleanse at some point in time; I like a weekend cleanse every month, and a week long cleanse every year. I used them during my weight-loss journey to jump-start my weight loss, and then to regularly get past plateaus and see some increased progress. It perhaps goes without saying that breastfeeding moms and pregnant moms need to exercise extreme caution; losing weight during breastfeeding, for instance, or detoxing heavily, can send all kinds of toxins through your breastmilk. I will say that I do modified versions of cleanses even during pregnancy and breastfeeding – but again, it’s all relative – I am still enjoying lots of full-fat milk, yogurt and fruits whenever I want them, even having meat if that’s what I’m craving, but overall, it’s not that far removed from my everyday diet which is pretty clean – just put in a blender (not the meat, though. Ick)!

Will I be hungry? The biggest complaint I get from people is that they can’t finish all the food assigned in one day. That’s fine, obviously! One of the best things that is happening here is the stomach shrinks – I can’t prove that scientifically, but let’s just say that you eat less and less to get full, and after you start eating normal food again, you are still eating less. (It also works the other way – you can stretch your stomach out to eat more and more if you eat out at restaurants a lot, or generally take large portions! Beware!) Normally I can get through about two smoothies a day on the cleanse, even though three and a snack are allowed. Don’t push yourself to eat more if you aren’t hungry.

OMG I just looked at the recipes and there is fat in them!!!!!! Yeah, you betcha there is. A picture is worth a thousand preachy blog posts, so here’s me eating a standard low-fat, low-sugar, lean meat, high veggie and high-carb American diet designed for weight loss. Size 10 generally, or size 8 on a good day.  Pre-pregnancy, too.

worst ever

Kinda sick of seeing that picture of me so let’s fast-forward to modern times. Here’s me eating full-fat raw milk, fatty pastured bacon, free-range scrambled farm eggs, grass-fed and farm-raised meats, lots of lush organic vegetables and fruits, nuts, seeds, and a low amount of carbohydrates from grains. Please note that I shoehorned myself into a tight pair of size 1 [stretchy] jeans. Post-pregnancy. I could have cried! Maybe I did – you’ll never know … 

jakob

bonfire

I feel like there’s a difference! I attribute all this change in large part to hot yoga – again, you can read Why I Do Yoga to find out how it impacted my life and the way I look at myself – and then eventually, the way I look.

So … get back to the cleanse, lady… What I’m saying is I definitely had to start supplementing that hot yoga with a powerful change in diet, even though (surprisingly) that didn’t actually fully happen until a year and 25 pounds of weight loss in to my story (I started the change earlier, but slowly). Now, I find that with my current, more nutritious diet I can even maintain my weight fairly steadily, where before it was madly fluctuating and skyrocketing every time I ate a cheeseburger.

So the cleanse helped you to … ? It helped me to jumpstart more intense weight loss when I plateaued, and it made me feel clearer, better and even inspired. Any time I got off track, a day or seven of cleansing would bring my intestines back into order, and I wouldn’t lose ground.

smoothie10

You want to try it, too??? Onward to the Cleanse!!!!!!!!!!! 

Detailz detailz. The cleanse can be done up to seven days (or longer, I guess, although I have never truly gone past about seven days). There is a Day 0 that involves eating no food at all (hungry does happen on this day, trust me). This day is really not for everyone (and it is definitely never for breastfeeding or pregnant moms, among other people!). I have a miraculous body that can store fat during the worst of morning sickness when I’m vomiting up all my food and barely eat a thing, and this body is made for survival in the harshest of times! I can go for a day (or up to five days, as I did during a spiritual fast once) with no food or hardly any food, and not be negatively affected. Hungry, yes, but not faint, nauseated, or suffering from headaches. This has not been the experience of all my friends. If you are heavily loaded with toxins, you will probably be feeling sick during Day 0 and beyond as your body goes through a more intense detoxifying process. If you are already at your ideal weight, a Day 0 may be too difficult as you might not have enough fat stores to fall back on! Personally, I feel like starting the cleanse with this Day 0 doubles the impact, and is a powerful attention-getter for me (yes, I still go to yoga on that day!).

I definitely don’t want to gain the weight back. You only need to do three days if this is your first time doing a cleanse, or if your diet is pretty heavily processed and you are graduating yourself into it. One of my friends lost ten pounds in the first three days, and then went back to eating processed foods and gained it all back by the weekend. You have to start cleaning up your entire diet – boxed, processed, packaged junk, and much of the white pasta and breads that are normal for us to eat, as well as sugary and sweet things need to find their way out the door while you’re in the learning and changing process. That’s all detail work that we aren’t getting in to here – there are books, doctors and websites to help with that – so let’s just focus on the cleanse.

What if I can’t buy all that stuff …? Swapping things out is more or less fine, as far as I am concerned. If you have certain allergies, you may have to swap some things for others. I chose every ingredient for a reason – based on it’s liver-cleansing, mucus-cleansing, probiotic or protein properties or a hundred other factors; some things may not be available to you where you live, and you’ll have to modify. Do so mindfully, and read up on your replacement first if you aren’t sure.

A note on ingredients: Using processed, packaged or pre-made food is probably going to ruin your cleanse effect. Honestly, if you use coconut or almond milk, you should either make your own (the cheapest version), or buy it fresh and raw. This isn’t always feasible, but it’s something we can work towards!

If you don’t have all the expensive ingredients, like maca powder, chia seeds or hempseed, you can still do a version of the cleanse using only the basic (large) ingredients in every recipe. Those are added as protein, enzyme and other boosters, and are highly beneficial and strongly recommended – but don’t let a cash shortage keep you from working on your better body, now. You can accumulate items as you go – one bag of maca powder can last for several years, and a ziplock of chia seeds from the store can last for months!  Buying them all at once would definitely be cost-prohibitive for me, but I wouldn’t let it stop me from starting the cleanse.

Best of luck to you in achieving all your goals! Please leave me a comment and tell me how you are doing!

Preview and Download the Seven Day “Ten Pound” Cleanse (yes, it’s free, duh)

smoothie

Happy cleansing!

Mrs H
Clean it up on Facebook
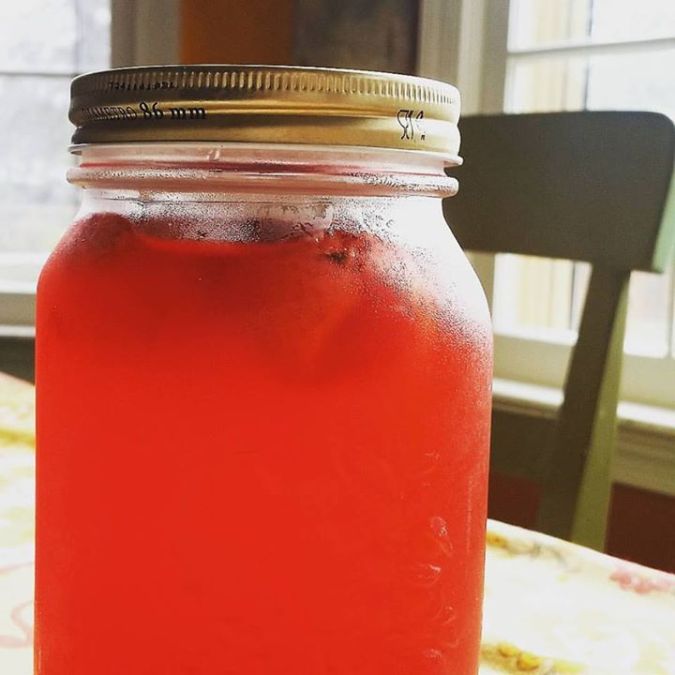
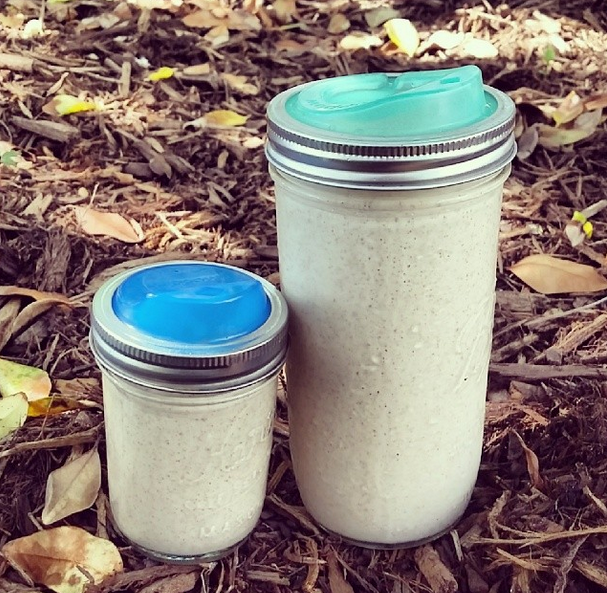
We post smoothies on Instagram

P.S. From time to time somebody points out a typo in a recipe or instructions –
I think I’ve caught most of them, but if you find any let me know and I’ll update the PDF!

Turkey Leftovers: Moo Shoo Wraps, Burritos and Delicious

Dear Thanksgivingers,

I actually buy extra turkey in advance, just so I can have more “leftovers” to make this. I was filling deviled eggs and whipping meringue for Thanksgiving dinner, and the wraps I would need for both of these recipes were already sitting on the pantry shelf, waiting for Their Day.

thanksgiving

Thanksgiving is as good a time as any to post heartwarming Norman Rockwell paintings.


Oh, these are good, very, very good. They drip juice, they crunch, they fill you up, and everybody wants more! For the Moo Shoo wraps, you can use cabbage or bok choy, whichever you have – both are available on our farm during this season, so I toss in a miscellaneous mixture of the two.

A big wok is best for making this, but you can also make it in a regular pan if you wish! If you are a vegetarian and you use something other than the usual turkey as your main, I’d be curious to know if you can throw a meatless twist on this! If you do, hook us up with a recipe link in the comments (I’m looking at you, Mysterious Mrs. S!).

Turkey Chase

This turkey is giving ’em a run for their money!


I originally shared this recipe back in 2011 on the old blogstead; I’d already been making it for several years by this time, and we still love it today. Love it so much, in fact, that it gets gobbled up (like that pun?) before I ever get any pictures – I’ll snap some this round, and add them to the post for you photophiles. And for your photo files.

Photo Credit: The Kitchn

Photo Credit: The Kitchn


Note: This is the oil we use and which I recommend to anyone looking for coconut oil – ethically sourced, traditionally prepared, and organic, the expeller-pressed oil has no coconut flavor or aroma and I use it for everything from frying chicken to scrambling eggs to pouring into my smoothies!


Moo Shoo Turkey Wraps

Download the Moo Shoo Turkey Wrap & Turkey Burrito Recipes

Obviously, there is lots of wiggle room in this recipe.  Add some toasted sesame seeds if you like; I love to serve these with homemade (or storebought) sweet plum sauce!  To really go with the Asian theme or to avoid extra gluten you could use rice wraps, like spring roll wrappers, instead of tortillas.  If you like, you could use a bagged shredded coleslaw mix instead of a cabbage.  

1 tablespoon olive oil, coconut oil or rice brain oil
1 additional teaspoon olive oil, or any of the above options
10 – 16 ounces sliced mushrooms
4 green onions, sliced
1 small knob peeled, grated ginger
1/4 teaspoon crushed red pepper flakes
3 cloves garlic, crushed
16 – 20 ounces shredded fresh cabbage or bok choy (one small cabbage, or less than half large cabbage)
1/3 cup water
2 cups shredded leftover cooked turkey (you could use chicken or pork, if you preferred)
3 tablespoons soy sauce
3 tablespoons (plus extra for serving) hoisin sauce (sometimes I use home-canned plum sauce instead)
8 tortillas, warmed

In a skillet or wok, heat one tablespoon oil on medium-high until hot.  Add mushrooms and saute 6 minutes, or until tender and lightly browned.  Remove to a plate.
In the skillet, heat one teaspoon olive oil on medium-high.  Stir in green onions (reserve a small portion if you want to sprinkle some fresh on the wraps), ginger, crushed red pepper, and garlic.  Add shredded cabbage and cook 2 minutes or until cabbage begins to soften, stirring constantly.  Add water and cook 1 to 2 minutes or until water evaporates.  Cabbage should be tender-crisp, not mushy; stir frequently.  Stir in turkey, soy sauce, 3 tablespoons hoisin sauce, and cooked mushrooms; cook an additional 3 minutes or until turkey is hot, stirring constantly.
Spread tortillas with hoisin sauce; top with turkey filling, extra green onions if you like, roll up and enjoy!  These are very juicy.  These are very delicious. These are amazing.

13214015

They aren’t always so agreeable to peeling potatoes, but sometimes you can trick ’em into it


Is it okay if I post two turkey recipes? Because this one is so insanely, crazy good that I can’t leave it out. I know you’ll go nuts for this one, too, because my entire family did! 

Turkey and Bean Burrito 

Download the Moo Shoo Turkey Wrap & Turkey Burrito Recipes

If you so desire, drizzle into your burritos a little Louisiana Hot Sauce, some homemade spicy ketchup, or some enchilada sauce! We crazy love this recipe, and you can sneak a little gravy in there if you like, too …   See the original post from 2011 here.

1 tablespoon olive oil or any of the above options
1 yellow onion, sliced thinly
2 cloves garlic, crushed
1 tablespoon ground cumin
1 teaspoon chile powder
1 pint diced tomatoes or you can purchase a can of tomatoes with diced chiles in it, such as Rotel tomatoes, and ignore the next ingredient
1 – 2 tablespoons chopped chiles or pickled jalapenos
2 tablespoons lime juice or the juice from one small lime
4 cups shredded cooked turkey (or chicken, or pork, or julienned tofu!)
1 pint pinto beans, fresh-cooked or canned, rinsed
6 tortillas, warmed
8 ounces shredded Monterey, pepper Jack, or cheddar cheese
2 cups shredded green cabbage or bok choy (one small cabbage, or less than half large cabbage)

Heat oil in a large skillet over medium heat.  Add onion and saute, stirring, until softened, about 2 minutes.  Stir in garlic, cumin and chile powder and cook for 30 seconds or until the spices release a fragrant scent.  Add tomatoes and lime juice; bring to a boil.  Reduce heat to a simmer and cook until onions are very tender, about 20 minutes.  Stir in turkey and cooked beans and continue cooking until the mixture is heated through, approximately five minutes.  Fill tortillas with the turkey and bean mixture; top with cheese and shredded cabbage, roll, and enjoy!

What do you do with your leftover turkey? Please tell me – I love turkey, I love it all manner of delicious ways!!


Norman-Rockwell-Thanksgiving-Turkey

She loves turkey, too.

Don’t forget to Download the Moo Shoo Turkey Wrap & Turkey Burrito Recipes for your recipe files!

Gobbling,

Mrs H
Our turkeys are on Facebook
Instagram is clearly for the birds!


Kombucha – From Basic Preparation to Hair Conditioning and Scoby Candies!

Need a scoby to make your homemade hair tonics and face pastes?
Click here! 

Dear soda-sippers and lovers of delicious beverages,

If I didn’t get this post written soon, I think ya’ll were gonna ride me out of town on a rail!

This is the long-awaited and dearly requested kombucha post. Yes, the recipe packet you have been asking for the most! We’ve had several kombucha Food Labs on the farm, a number of satellite classes at various off-campus locations, and we have more scheduled into January 2015.

Photos in this post were shot by Sami Roy Photography, one of the proficient and expert photographers on the farm!

NEF_Kombucha Class_003

NEF_Kombucha Class_017

You can do more with kombucha than just drink it as a fizzy, original or variously-flavored drink.  You can also use the scoby to make chewy, gummy candies that are flavored any way you like (or crispy candies, if you prefer!). You can make fruit gelatins, jelly candies, or even move out of the kitchen and make hair tonics and face masks!  And for those who want to know if there is alcohol in kombucha, yes – about the same level as in a loaf of bread or a bottle of Coke.  So, microscopic levels. 

NEF_Kombucha Class_005

NEF_Kombucha Class_009

NEF_Kombucha Class_013

NEF_Kombucha Class_018

NEF_Kombucha Class_027

Basic Kombucha Recipe

Download the Kombucha Class Packet here

This is a very basic kombucha recipe and similar to the hundreds you’ll see replicated across the internet.  Use filtered, purified water; use organic tea and sugar. This is non-negotiable – otherwise your revitalizing, detoxifying probiotic health drink will become a toxic, poisonous potion that was a waste of time to prepare! At least a quarter of your tea leaves should be black – this brew in particular feeds the kombucha scoby, although the bacteria seem to tolerate varying amounts of other tea leaves. Experiment with a variety of leaves and see what works best for you; personally, I’ve settled on the flavor profiles of organic Assam black – mellow, vegetal – and organic China green – fruity, light, notes of citrus.

Heat three quarts filtered water to boiling on the stove; remove and set aside for five minutes.

Add 4 teaspoons black tea and 4 teaspoons green tea or white tea or a mixture of both; stir to combine, let sit for five minutes. Alternately, use 4 black tea bags and 4 green tea bags. (See end of post for my recommended teas)

Measure three quarts cold or room temperature filtered water into a large heat-proof container. Place a mesh sieve over the pan if your tea leaves were loose and not in tea bags.

Pour the hot, steeped tea in to the cold water. Remove the sieve and set aside; to the warm tea, add 2 cups of white sugar and stir thoroughly and steadily with a wooden spoon until sugar is completely dissolved.

Let the tea cool to room temperature, or at least about body temperature (96°). Pour it into a large, clean, glass container. Use only clear glass for brewing kombucha.

Add 2 cups of kombucha and one scoby.  Cover the lid tightly with a clean, tight-weave towel and secure with a string or rubber band. Fruit flies love kombucha and will try very hard to get inside the container, so be aware!

Set in a cool, undisturbed area (about 70-85° is perfect for these bacteria to multiply) for about two weeks.  You can taste test your fermenting tea at intervals and find your favorite number of days for fermentation. Ambient temperature and other factors may impact the fermentation of your tea, and every various way you try it will be delicious and wonderful!

Download the Kombucha Class Packet
This includes: 
Basic Kombucha
Flavored Kombucha: Seven Food Lab Favorites
Kombucha Fruit Gummies
Probiotic Skin Healing Masque
Hair Conditioning Treatment (Hair Tonic)
Scoby Candy
Kombucha Gelatin

NEF_Kombucha Class_043

NEF_Kombucha Class_047

NEF_Kombucha Class_082

A moment to brag on the delicious Frontier Teas that I recommend for this kombucha…

I’ve done some extensive taste-testing, and I am very particular about my kombucha teas. The final teas I have settled on produce a kombucha so light, so airy and fruity, so delightfully flavored, that it has won best-taste from even the snobbiest of my clientele – and the most devoted kombucha haters!

Fair-Trade Certified, Organic Frontier China Green Tea (light, fruity, vegetal)

Fair-Trader Certified, Organic Assam Tea Tippy Golden (Black) (delicate, mellow, earthy)

For sugar, I use either

Itaja Organic Fine Granulated Sugar

or,

Wholesome Sweeteners Organic Cane Sugar

And as one of my favorite flavorings of all time:
Frontier Whole Elder European Berries

My top fermentation book recommendation, available at all my classes:

The Art of Fermentation: An In-Depth Exploration of Essential Concepts and Processes from around the World

And an explosive new book with recipes for kombucha that will blow your mind! (Book review pending here on the blog!)

Kombucha Revolution: 75 Recipes for Homemade Brews, Fixers, Elixirs, and Mixers

Brewing and sipping,
Mrs H
Face it, you like us
Gram it instantly – #eatorganic #farmandhearth

Authentic Asian Noodle Recipes – that you won’t find anywhere else!

Dear gourmands and explorers,

Have you ever had ramen?

maruchan

No, no, not those coyly named chicken “flavored” noodles that come in a plastic-wrapped briquette, notably the food of starving college students and high-metabolism bachelors.

I’m talking about authentic Asian street food, from the crowded, foggy streets of Shanghai and Tokyo, and the bustling alleyways and street markets of Canton and Yokohama. Served in a deep, round bowl with savory hot broth and piled with fresh vegetables, pulled pork, soft-poached eggs, chili threads and a hundred other choices, it’s slurped up with Chinese soup spoons and slick chopsticks.

marketstreet

An authentic bowl of ramen is hard to find, outside the countries where it originated and a few port cities where skilled immigrants bring their inherited craft to tiny restaurants and back-door kitchens.  What if you could make your own noodles, the real way, the handcrafted way, at home?  What if you could prepare dashi, katsuobushi salt, mayu and the other necessary condiments, sauces, sprinkles and fats requisite to a steaming bowl of ramen, all in your own home?

IMG_20140628_202129

IMG_20140626_205658

IMG_20140626_193145

In a recent Asian Noodles Food Lab here at New Earth Farm, we experienced the skill of the master first hand!  Chef Kevin Ordonez, owner of the pop-up-turning-restaurant Alkaline VA, treated a full class to a night of ramen making, rice noodles, and Asian noodle legend.  Truly dedicated to his art, he prepares everything for his restaurant from scratch – from the rich chicken bone broth to the infamous scorched mayu, unique in its preparation and notable for the earthy, smoky flavor it brings to a bowl of steaming noodles.

Visiting Chef Kevin’s pop-up – follow his Facebook page to see where he goes next! – is a treat that everybody passing through the Hampton Roads area should indulge in.  It’s a family-friendly setting, with a revolving, ever-changing menu that uses local, seasonal and fresh foods, inspired by Asian street food and a little Comic-con!

20140628_192406

20140628_192849

20140628_120238

Until that glorious day when you get to sit down to a bowl of Chef Kevin’s rich, fragrant ramen replete with umami explosions and sensational flavors, you can enjoy the wonders of Tokyo and Hong Kong in your own home!  [BANG! POW!]  Chef Kevin, in his typically generous fashion, put together a recipe packet for our readers including not only the noodle recipes, but broth, salts and condiments necessary to create a truly authentic ramen experience.  Download the entire recipe packet, or pick and choose – the recipes are simple, straightforward, and true to their Asian roots. Many of these recipes are difficult to find in English or outside of ramen houses, so I am fortunate to be able to share this rich catalog with you!

ordonez_family

Chef Ordonez with his beautiful family, Melissa and young Max, on a visit to New Earth Farm

Alkaline’s Shoyu Ramen

Download the entire recipe packet here – see below for individual files

By Chef Kevin Ordonez of Restaurant Alkaline VA
This plating creates one bowl of Ordonez’ delicious, signature ramen dish. The next time you’re in Virginia Beach, stop by the restaurant and sample a steaming bowl of the authentic, homemade noodles yourself!

Serves one
5 ounces alkaline noodles*
8 ounces chicken stock*
8 ounces dashi*
1 ounce tare*
1 tablespoon cut scallions
1 tablespoon chicken fat*
1 teaspoon katsuobushi salt*
1 teaspoon mayu*

In a small sauce pot, combine the chicken stock, dashi, and tare and bring to a boil. Bring a four quart pot of water to a boil. Meanwhile, drop a few drops of chicken fat and a pinch of katsuobushi salt into the bottom of your guest’s ramen bowl. When the pot of broth comes to a boil, carefully pour it into ramen bowl. Cook ramen noodles in pot of boiling water for 1 minute. Vigorously stir noodles in water with chopsticks or tongs to prevent clumping. Drain noodles well and add to bowl of broth. Add desired toppings. Enjoy!

*See recipes in Asian Noodle Food Lab recipe packet
A note on desired toppings: Regions and chefs create their own unique toppings, but favorites include slices jalapenos and cilantro, thinly sliced seared pork, kimchi, a soft-poached egg, hot house-made sauces and more. Let the natural environment around you create opportunities for invention! Use local and fresh ingredients, and let us know what your favorites are!

Download the entire recipe packet here (all the following recipes, in one document)
Download Alkaline Noodles recipe
Download Chicken Stock recipe
Download Dashi recipe
Download Tare and Chicken Fat recipe
Download Katsuobushi Salt recipe
Download Mayu recipe
Download Alkaline’s Shoyu Ramen recipe
Download Chicken Udon recipe
Download Ginger Soba Noodles recipe
Download Rice Noodles recipe
Download Rice Noodle Stir Fry recipe

20140628_195300

Shopping for noodle tools?  Here are the gadgets Chef Kevin recommends!

He uses a KitchenAid stand mixer and pasta attachment to make noodles by the thousands in his restaurant. It will work in your home kitchen, too!

KitchenAid Professional 5 Plus 5-Quart Stand Mixer

KitchenAid Stand-Mixer Pasta-Roller Attachment

Enjoy your noodles!

Mrs H
Oodles of Instagram, all the time
Our Facebook followers get it first!

Canning Dill Pickles – recipes, instructions and Food Lab, with hurricane-force winds

This post may contain Amazon affiliate links.
That’s how I earn my blogging income, so thanks for clicking through!

Dear jarred,

I love fermentation, kombucha, dehydrating, the whole bit. But out of all these food preservationy pursuits, my first love is, always has been, and doubtless always will be, canning.  Good, old-fashioned canning!

IMG_20140725_000351

When I was a food-nerdy, homeschooled kid with a lot of time to dream on my hands, I taught myself how to can out of my grandma’s old Farm Journal Cook-Book.  I fantasized about living on a farm, gathering eggs and piling muddy boots by the door, rolling out of bed before dawn and milking cows in a frosty-cold barn in the moonlight. I guess, in a way, these dreams have started to become a reality for me, since now I can gather eggs from 400 layers any time I please (that’s how it works, you know).

Back home in Washington, I spent many months in big groups of women, canning thousands of pounds of produce for our collective families and hauling it off to our respective homes at the end of the day – everybody eats together, the kids play together, and we trash one house – it’s pretty much a win-win.  Miz Carmen usually hosted – you’ll run into her again on this blog.

Our first canning Food Lab of 2014 (we had a few last year, too), was a raging success!  The first one had to be cancelled because of a tornado and a waterspout – I know, really?  Of all things.  The farm lost power, got flooded, and none of the students could drive out of their streets. So, we rescheduled, and many of the students were able to get in on the new date!

20140724_164021

20140724_164103

20140724_175648

Class was focusing on the water-bath canning technique, used for high-acid products like fruits, jams, jellies, pickles and the like.  I decided to make a classic dill pickle for our class; the original recipe came from my long-time mentor and dearly beloved friend Miz Carmen, who was gifted the recipe from another friend, who got it goodness knows where.  I have many favorite pickle recipes, but this one definitely tops the list of classic dills!

Everybody worked hard in class, and they each made a very individual pint of pickles based on the recipe – some added okra, others peppers, still others threw in zucchini; spices and heat varied, ranging from mild crushed red pepper to blazing guns ghost pepper!  Some cut their cucumbers into spears – others left them whole, still others diced them or sliced them.

20140724_163850

20140724_175701

20140724_180916

20140724_182302

20140724_182306

Fresh-Pack Dill Pickles or, Seattle Pickles at New Earth Farm

Download Dill Pickle recipe here

32 lb. pickling cukes, blossom ends trimmed

10 onions (1/3 per qt.)

4 garlic bulbs (2 cloves per qt.)

2-3 bunches dill (1-2 blossoms per qt.)

1⁄2 t. crushed red pepper per qt.

1⁄2 t. alum per qt. (optional)

1 t. pickling spice per qt.

Put all ingredients except cukes in jar. Cut onions, then pack cukes. Begin heating water bath, then prepare brine.

Brine:

3 qt. water

1 qt. apple cider vinegar

1 c. pickling salt

(Takes about four batches)

Cover to 1/2” with boiling brine. Wipe lids, screw on rings. Process 5-10 minutes.

Remove and store 6-8 weeks, to allow flavors to penetrate Pickling spice quantity is variable; brine is not.

Download Dill Pickle recipe here

More from the Food Lab: High Acid Canning Class

To read step-by-step instructions for water-bath canning and enjoy a few more pickling recipes such as my very favorite piccalilli or an award-winning pickled radish, download the entire canning class packet here

Recommended Reading

For those that want to can more, I have a few favorite books to suggest!

The Ball Blue Book is the industry standard on home preservation – canning, drying, and freezing.  Keep this book close at hand all year long – my copy is wrinkled, warped and scribbled on, but I have made good use of it!

Food in Jars, as seen on the popular blog www.foodinjars.com is a gorgeous, well-appointed book full of lush pictures and reasonable, human-sized, small-batch recipes that make a few manageable pints each.

Ball Complete Book of Home Preserving is everything we love about Ball, plus loads more. Lots of recipes to choose from, princples to learn from, and step-by-step instructions. 

But more importantly, some hungry baby robins delighted us by hatching, their nest located just outside the front door of the Learning Center.

IMG_20140725_001525

20140725_164303

It began to rain gently, and class broke up; a few students stayed to help Chef Lyndsay and I can the rest of the vegetables we had prepped (waste not!!).  The light rain turned into a torrential downpour with violent wind, thunder and lightening, and the remaining students eventually had to make a dash for it and escape through the storm! Lyndsay and I canned and cleaned until around 11:00 at night, when we called it a day, locked up, and went home.

I had such a contented, satisfied feeling from canning that day; and the beautiful building just added to my joy (despite the blurry, storm-sogged pictures you can still see how cozy it was!).

20140724_210144

20140724_223255

Canning merrily into the night,

Mrs H
Yes we can on Facebook
You can heart our jars on Instagram

Home-Cured Bacon, Merguez Sausage, Cured Egg Yolks: Charcuterie and more

This post may contain Amazon affiliate links.
That’s how I earn my blogging income, so thanks for clicking through!

Dear cured but never ailing,

In our Food Lab Charcuterie Level One class, we got to play with a lot of really delicious, really wonderful pastured pork from Autumn Olive Farms. Their heritage pork is pastured, well-nourished and consciously raised. Read all the way down to find recipes for bacon, sausage, cured egg yolks and a special pork-belly dish!

Photo by Autumn Olive Farms; Berkshires in a cornfield.

Photo by Autumn Olive Farms; Berkshires in a cornfield.

The talented chef de cuisine Kevin Dubel, from Terrapin Virginia Beach, led an engrossed class through the steps of curing bacon, egg yolks, and grinding sausage at home. (Locals recognized the name of Terrapin instantly, but for our distant readers – it is the most elite and organic, sustainable and delicious fine-dining restaurant in all of Virginia Beach!) Students each prepared their own unique slab of bacon to take home and salt-cure in their fridge, and the self-selected flavors I saw flying across the table ranged from such traditional seasonings as black peppercorns and sage to more exotic choices like dried ghost pepper powder or kombucha. Everybody enjoyed a fresh charcuterie board, finished out with fresh cheese from Sullivan’s Pond Farm, and decanters of our famous farmhouse kombucha flowed!

20140717_183031

20140717_182955

Students loved the chance to dig in and grind meat, add seasonings and experiement. We were blessed to have the expertise of Chef in our Food Lab; the pork for Terrapin is custom-raised, delivered from Waynesboro, VA, and chef breaks it down in his kitchen.  The salumi and charcuterie in the restaurant is house-cured and delectable – flavors are intense, fresh and undeniably delicious!  We loved the chance to meet with our readers and farm supporters, culinary enthusiasts and professionals as well as city-dwellers interested in eating better and living closer to their food.

20140717_185302

20140717_185309

20140717_185322

Home-Cured Bacon

Download home-cured bacon recipe here

10 pounds pork belly

450g salt, kosher (no iodine or anti-caking agents)

225 g sugar

50 g pink salt #1*

Optional: herbs, seasonings, peppers or other flavorings

1. In a shallow, wide bowl or pan, combine salt, sugar and pink salt, and add any additional flavors desired.

2. Use salt box method: roll pork belly in the salt and seasonings to thoroughly coat, and shake off excess.

3. Place in non-reactive bag or pan and set in a refrigerator. If in a bag, massage daily for seven days. If in a pan, flip every other day for seven days.

4. After seven days, remove and pat the pork belly dry. Smoke to an internal temperature of 150°F.  Alternately to smoking, place in 200°F oven until internal temperature reads 150°F.

5. Slice and enjoy!

*Manufacturers started adding pink color to their curing salts so chefs would not mistake it for regular salt. It is also called TCM (Tinted Cure Mix).  Pink Salt #1 or TCM is made up of salt and sodium nitrite; it is used for curing bacon, sausage, hams and other cured products that will be cooked. It is different from Pink Salt #2 which is salt, sodium nitrite and sodium nitrate, which is used for long dry cures such as salami or prosciutto. If you are concerned about sodium nitrites and nitrates used for preserving, remember there are more nitrites in a bowl of spinach than are used to cure an entire salame, and any cured meat that claims to be “nitrate and nitrite free” simply used a celery juice or other vegetable base, loaded with nitrites, to avoid using the sodium nitrite label. There is no nitrite-free cured meat.

Download home-cure bacon recipe here

More downloadable recipes from Food Lab Charcuterie: Level One

Charcuterie Level One Syllabus

Home-Cured Bacon

Merguez Unstuffed Sausage

Cured Egg Yolks

Download all of Level One in a single document!

For those interested in going further, the books recommended by chef are from Michael Ruhlman, the US authority on charcuterie and salumi and Chef Dubel’s mentor and teacher in the trade.

Charcuterie: The Craft of Salting, Smoking, and Curing (Revised and Updated) | Considered by chef to be the “bible” of the home curing world, this book has everything you need to carry off a successful venture in curing, smoking and salting your own foods at home. It’s a less intimidating world than you might think, once you delve in!

Salumi: The Craft of Italian Dry Curing | The techniques discussed in this book will be covered in our more advanced Food Lab charcuterie classes, but you can start researching now!

20140718_105116

Don’t strap your spurs on yet, there’s more!! The leftover slab of pork belly made a delicious staff lunch the next day, braised and slow-cooked in kombucha. Ready to try it out?

Staff Lunch Pork Belly

Download Pork Belly recipe here

One slab pork belly

Handful banana, carmen and green peppers, sliced into rounds

A few whole shishito peppers for good measure

A few whole beets, well-scrubbed

Kombucha

Salt, whole tellicherry peppers

Honey or maple syrup

Fresh herbs on the stem: oregano, thyme, sage and rosemary

1. Set a heavy Dutch-oven style pot over high heat. Gently sear the fatty side of pork belly.

2. While fatty side is searing, sprinkle meaty side with a two-finger pinch of salt, a scattering of tellicherry peppers, and a drizzle of honey or maple syrup.

3. Flip pork over, with fatty side on top. Turn heat down to medium. Again sprinkle with salt, tellicherry peppers, and a drizzle of honey or maple syrup. Pile with herbs, then heap in vegetables – peppers, beets, and potatoes if you wish.

4. Pour over pork one to two cups of kombucha, original or the flavoring of your choice. Cover pot and let cook slowly for one to two hours depending on size, or until tender and internal temperature reads 145F. Check occasionally and add more water or kombucha as necessary.

5. Let rest three to five minutes before slicing or shredding, and serve immediately to happy farm hands.

Download Pork Belly recipe here

Thanks for journeying through our Food Lab class with us!  What flavors do you think you’ll use for your bacon?  Any suggestions for our future classes?

Mrs H
Everything on our Facebook is fresh as a new-laid egg, but less poopy
Our Instagram pictures show that farming isn’t just a job, it’s a lifestyle


This post was shared on The Homestead Barn Hop

Cooking from the Farm: My Top 10 Cookbooks

This post may contain Amazon affiliate links.
That’s how I earn my blogging income, so thanks for clicking through!  

Dear gentle readers and those not so gentle as well,

We like to eat well, and we also like to save money. We like to eat local food, and we love fresh and seasonal food. Logically, then, much of what we eat every day comes from the farm. We also don’t like eating the same recipe twenty-hundred times in a season, so I am constantly scouting new cookbooks. I’ve whittled down a list of books that work very well for farmer’s market shoppers, CSA members, seasonal eaters, farmers and gardeners. I’ve stuck with this short list because every time I go to these books, I can find everything I need for a given recipe in one trip out to the farm, and the odds and ends (olive oil, balsamic vinegar), I tend to have in my pantry. These books stay in my kitchen for frequent, daily use while other interesting, but possibly less useful books, go elsewhere to be referenced occasionally.

20140722_071952

This list is not comprehensive, and in fact I am hoping you’ll send me your favorite titles as well; I am always looking to bolster my creative closet of books!  The following  books are in no particular order (other than smallest to biggest!).

My Favorite Cookbooks for Cooking from the Farm

20140722_072021

1. The French Market Cookbook: Vegetarian Recipes from My Parisian Kitchen

Clotilde Dusoulier is the totally adorable and well-loved blogger at chocolateandzucchini, and she is not a vegetarian. She is not gluten or dairy free, either, but as it happens, most of the recipes in this vegetarian book are also gluten and dairy free. I’m not vegetarian either, but I don’t eat loads and loads of meat because it’s expensive and it just isn’t sustainable (which you learn when you are growing your own food), to eat turkey and steak every week (more often than not we’re eating bones, feet and organs!).  Truth to be told, I was prepared to not like this book because so many “market” books don’t live up to their name, but truly every ingredient in her recipe will be found growing together, or harvested the same weekend. In fact, the book is divided into seasons, not categories, to make it even easier to plan your next trip to the farmer’s market. And the book is really cute, and precious, and pretty, and has lots of juicy pictures. I gave it a five star review when I reviewed it for the San Francisco Book Review.

2. Recipes from the Root Cellar: 270 Fresh Ways to Enjoy Winter Vegetables

And oh, how I love this book. It was recommended to me by copy editor and reviewer and vegetarian foodie Holly Scudero, who had an early galley copy that I loved to drool over. Mr H bought it for me when Borders Books went out of business – we pretty much cleared out the cookbook shelves, and this gem was one of the best things that happened that day. Andrea Chesman grows her own food, so her recipes have such a natural way of being seasonal that it feels a little ridiculous to even point it out. The first time I made sauerkraut was from this book; the long, lonely winter in California was filled with comforting, steaming bowls of Italian meatball soup, and pans of maple-roasted vegetables that I wrapped myself around like a mother cat with her kittens. This is one of the best books in my kitchen.

20140513_155326

3. Wild Fermentation: The Flavor, Nutrition, and Craft of Live-Culture Foods

And speaking of sauerkraut, behold the fermentation king!  For those of us who truly eat seasonally from our gardens, fermentation is one of the many food preservation techniques we rely on to get nutrient-dense, home-grown produce all year long.  This book will take you from novice to advanced fermentation artist (especially if you follow it with The Art of Fermentation, a veritable treatise on the subject!).  Since he grows much of his own food, and since fermentation is an art developed solely for the purpose of preserving food in it’s season, it’s very easy to find everything you need for a given recipe growing at one time. Can’t find Chinese cabbage?  Maybe it doesn’t grow in your area (so you’ll have to ferment pineapple and coconuts instead!), or maybe it’s the wrong season for it (and you should try turnips and carrots while you wait!). I fell in love with this book when I borrowed it from a friend, and then I had to buy my own copy and now it’s splattered and marked in and the pages are wobbly at the bottom from when a gallon of kimchi leaked out onto it.

4. The Real Food Cookbook: Traditional Dishes for Modern Cooks

Nina Planck, who writes at ninaplanck.com, grew up with farmer parents, eating farmer food. She is accustomed to and familiar with the rhythms of the garden and the bounty and not-so-bounty of some foods.  Her book has a certain respect towards the way a farm grows – look, we can’t put ground beef in every recipe or we’ll run out of cows and have a freezer full of feet – and she strongly encourages readers to vary the recipes, saying she will never make it the same way twice herself and we should adapt to our areas. I love that philosophy since I never follow recipes but, as she suggests, use them as inspiration (even though I often start out with good intentions of following the recipe very strictly, it never happens!).  Her book makes me so happy, and so hungry, and so eager to run out and harvest a basketful of dinner!

5. Better Homes and Gardens Fresh: Recipes for Enjoying Ingredients at Their Peak (Better Homes & Gardens)

I guess I was a little surprised how much I liked this book, since it seemed so commercial when I first picked it up.  But it actually delivers some delicious surprise!  The meat section focuses on very American cuts of meat like flank steak and meat-centric dishes, but that is only a very small portion of the overall book (and that is not to say we don’t need the occasional recipe for a flank steak! It’s just pretty darn rare… bad pun?). The fritters, salads, pizzas and desserts – oh, the desserts – overcompensate the cook with plenty to work with. In fact, as I am flipping through it I am wondering if the roasted vegetables and chickpeas might make an appropriate dinner … or shoestring sweet potatoes and beets?

20140722_072101

6. Local Flavors: Cooking and Eating from America’s Farmers’ Markets

Let me just start by saying anything from Deborah Madison has my automatic seal of approval. She’s on this list twice, if that tells you anything! She has a dessert book, too, that would be on this list I am sure if I were so lucky as to own it and have some experience with the recipes (I browsed through it at at the library once, but I was visiting another city at the time so I couldn’t check it out!). Her book has an astonishing ability to have recipes that use literally every single item I dug up or trimmed off the plant that day. When I first joined a CSA, I felt like every box was custom-built for one of her recipes. I fell in love with her work and have been a groupie ever since. When you need vegetable-centric dishes from somebody who knows vegetables, and knows plants and really, really knows food – Madison delivers the goods.

20140722_072126

7. Vegetable Literacy: Cooking and Gardening with Twelve Families from the Edible Plant Kingdom,

with over 300 Deliciously Simple Recipes

This is one of the newest books in my collection. I saw it at TJ Maxx and it was in my cart before you could shake a pasture-raised organically-fed lamb’s tail. Rich, nourishing, hearty, and most fascinating of all, divided by plant families. I could read this book all day long, but the shimmering pictures on the page would send me to the kitchen before long!  Prepare to get an education on the plant kingdom, flavor profiles and recipe history when you crack open this tome of wonder. Like all her books, the recipes are full of seasonal items that grow at the same time, and, as far as I can tell, in the same place.

8. The Silver Spoon

You’d be surprised how much international cookbooks stick to seasonal cooking – not because it’s a ‘thing’ or a ‘movement’ but because they don’t all shop and eat out of the supermarket!  This Italian cookbook has an easy fluidity to the recipes – they just feel so natural, so easily fresh and seasonal. It’s a pleasure to cook out of it, and easy. When I have a bumper crop of cucumbers, I go to the cucumber section and pick a few unique recipes. It’s definitely better than eating cucumber salad three times a day!

9. Food in Jars: Preserving in Small Batches Year-Round

(Not pictured above) Of course, I have to add a canning book. Marisa McClellan, with her gorgeous and tasty blog, has been a favorite of mine for years now, and she never fails to deliver!  She shops her local farmer’s markets or is gifted produce from friends, so her recipes also come seasonally quite naturally. With small batches for canning – you can do this while you make lunch, instead of setting aside the whole weekend for it – her recipes are attainable and enjoyable. I’ve loved every single recipe of hers I’ve ever made – they’ve all turned into family favorites, requested gifts, popular dishes at the house. When the gas repairman sampled the pickled beets, he said, “I’ve never eaten a beet in my life! I can’t stop eating these!” He took the whole jar home.

10. I need you to fill in this blank!

I need another market-worthy book!  Are there any good raw books out there, or international cookbooks? I love Mediterranean and Indian and Persian food – I’ve been curious to try The New Persian Kitchen, and of course anything by Ottolenghi but especially his new Jerusalem: A Cookbook. I love all-American, old fashioned or contemporary. What are your suggested titles? Thanks for reading along!!

Anxiously awaiting your reply,

Mrs H
Stay connected with Facebook, the great Lego of internet life

Let’s drool over these pictures together!

Welcome to the Farm! (Or, Signs of Life Persist)

Dear Reader,

Come on in!  How did you find us?  If you are a faithful follower that tracked me down from the old blog site, I am so thrilled to see you, you early-bird you!

We’re having a lot of fun (and a few headaches!) moving to our new blog home here, and we haven’t finished unpacking yet!  Watch out for all those boxes and papers, spilling code and drafts and edits everywhere …. That sawing sound?  That’s my SEO guy, trying to hack into the mainframe.

I’ve always been known for my stellar content and astral copy, but my CSS skills (or was it HTML? Or SOL?), are in the Sorely Lacking category.  That’s why it takes me longer.  Trust me, I’ll stick to what I’m good at and find People for the rest.

If you’re peeved at me for not writing on the old blog for the past year, and curious as to why I moved to a new platform and am suddenly barraging you with posts and letters (does one really, really fabulous post count as a barrage?), read on, Fascinated One.

samiroyphotography.com

During my husband’s deployment through 13-’14, I spent less time on the computer and more time filling my hours with our baby, volunteering on New Earth Farm in Eastern Virginia. An organic, biodiverse, sustainable, water-conserving farm led by Farmer John and his business partner Kevin and their team, this is a farm that is shaking things up. We troweled in the dirt, washed eggs, worked the farmer’s market stand, dug potatoes, chased sheep and watched lambing, picked kale with red-numb fingers in December and harvested tomatoes in sweat-sticky August. I started working at the farm as a fermentation and food preservation expert, and following the vision of our farm manager Kevin, we developed an entirely new facet of the farm called the Food Lab.  Here, in an airy, high-ceilinged building designed by interned architects and built entirely by donations, we experiment with food, create, invent, fail and laugh, and I teach classes in our new Food Lab – kombucha, advanced kombucha, sauerkraut, charcuterie, pasta, canning, lacto-fermentation … and I take the classes mobile, too, teaching at Williams-Sonoma, Whole Foods, Norfolk Botanical Gardens, local garden clubs, private classes, area shops and markets.

samiroyphotography.com

samiroyphotography.com

samiroyphotography.com

samiroyphotography.com

samiroyphotography.com

I finished my 200-hour yoga teacher training, took a prenatal yoga teacher training to add to my Simkin Center doula training and then immersed myself in a few other teacher trainings both in Virginia and in Seattle, meeting Manju Jois, Troy Lucero, Suzanne Hite and other yoga legends (I am heading off to the Baron Baptiste Level One training in August 2014! Very excited). I’m still writing for the San Francisco Book Review and their Alphabet Soup and Critical Eye blogs, and I began writing for a magazine after they came to the farm for a photo shoot and a four-page spread on the Food Lab.  Journalists and magazine writers from around the world started calling for media visits every week; schools drove buses of children out for tours. All – and I mean all – the top chefs in our area, keen on the best tasting, freshest produce and the unusual weeds, bugs and herbs we could provide, started descending on the farm and hammering us with questions, the most passionate of them digging in the dirt themselves and foraging with us for wild plants. They started inviting me in to their kitchens for private, pre-hours sessions with them, working to create the most delicious, unusual, ancient foods together. Farm Table events, where brilliant chefs designed a menu based on whatever we had to harvest that day and fourteen paying participants attend to cook and eat with the chef, started selling out back to back.

samiroyphotography.com

samiroyphotography.com

samiroyphotography.com

samiroyphotography.com

Whole Foods, Williams-Sonoma, local goat farms, butchers and pork farms, Bonfire Magazine, and other wonderful area providers and organic farms joined the charge as class sponsors, providing ingredients, tools, publicity, whole-hearted support. A photographer volunteered her time to come shoot events, edit the photos and get them back to us – she shot all the pictures in this post!  An appliance store donated a dishwasher. Area chefs donated used tools. Farm visitors donated cash, kitchen gear, time to paint and sweep and mop, just plain shook our hands and encouraged us to keep doing what we were doing.  Contractors gave tools and materials for our building, time, skill. With a massive group effort, the building was put together, the classes fell into place, and the people started coming.

samiroyphotography.com

samiroyphotography.com

samiroyphotography.com

samiroyphotography.com

samiroyphotography.com

With the scope of the blog ever evolving and my audience constantly growing, the name of the blog itself evolved and I found I had to move to a different platform – quite a daunting prospect in the blog world, but I was ready to take it on with your faithful reading support! All the good information on the old blog will stay there, safely housed and accessible for us to search, read and bookmark, and the best posts will also be imported over to the new blog platform to find a fresh, new look.  Things like how to eliminate some of the trash that flows from the home starting in the kitchen, or one of our hottest posts of all time – my booklist top picks and recommendations!  Even how to make yourself a back-alley cheese press with these cheap items you already have in your kitchen, and if you’re in the mood for food, whip up a deviled meat spread (we have a vegetarian option, too!).

If you need something fresh to read and you’re bored, check out fantastically well-written articles by yours truly on topics such as my favorite home-made deodorant, a sneaky trick for frothing milk without a frother, a cold overnight salad that will make your family fall in love, and a list of 66 awesome things to do with your Vitamix.  Did I make those sound pretty good or do I need to tempt you with a recipe for laundry detergent, too?  I know, who could resist that!

samiroyphotography.com

samiroyphotography.com

samiroyphotography.com

Watch in shock and awe as farm-tested recipes straight from the field roll out, photos and news clips and tutorial videos, hilarious and piquing interviews, even horror stories roll out on the new blog! You’ll even start seeing things for sale. Is a cookbook in the works?  I can’t say anything officially. But If I said two new cookbooks, would you believe me …?  Yes, I knew you would. If I said one was a raw food cookbook, and the other was a seasonal farm cookbook … I know, you’re already pulling out your wallet to buy copies for you and all your friends.  Don’t make me blush!! Events will be posted on the blog so you can find when a class is coming to a city near you, and class tours will start to open up nationwide as I do a West Coast series in August in Seattle, Washington and travel to Williamsburg in September to teach in my favorite town! And you can always visit us on the farm for a tour, a class, or just lunch with the farmhands – every day but Sunday, at about noon. We’d love to have you.

Mrs H
I’ll keep you up to date on Facebook (we’re already friends though, totes obv)
instagram.com/foodlab_newearthfarm super rad pictures from my cellphone 

samiroyphotography.com